Index of /wp-content/uploads/sites/86/2021/10
Name
Last modified
Size
Description
Parent Directory
-
A-Demonstration-of-the-Effect-of-Arches-and-Pre-Tensioning-in-Bridges-pdf-106x150.jpg
2021-10-20 15:29
7.2K
A-Demonstration-of-the-Effect-of-Arches-and-Pre-Tensioning-in-Bridges-pdf-212x300.jpg
2021-10-20 15:29
17K
A-Demonstration-of-the-Effect-of-Arches-and-Pre-Tensioning-in-Bridges-pdf-724x1024.jpg
2021-10-20 15:29
109K
A-Demonstration-of-the-Effect-of-Arches-and-Pre-Tensioning-in-Bridges-pdf.jpg
2021-10-20 15:29
222K
A-Demonstration-of-the-Effect-of-Arches-and-Pre-Tensioning-in-Bridges.pdf
2021-10-20 15:29
955K
A-Symmetric-Frame-A-150x150.jpg
2021-10-20 09:10
3.9K
A-Symmetric-Frame-A-225x300.jpg
2021-10-20 09:10
7.1K
A-Symmetric-Frame-A.jpg
2021-10-20 09:10
7.5K
A-Symmetric-Frame-B-1-150x150.jpg
2021-10-20 09:12
4.3K
A-Symmetric-Frame-B-1-225x300.jpg
2021-10-20 09:12
7.6K
A-Symmetric-Frame-B-1.jpg
2021-10-20 09:12
7.8K
A-Symmetric-Frame-B-150x150.jpg
2021-10-20 09:10
4.3K
A-Symmetric-Frame-B-225x300.jpg
2021-10-20 09:10
7.6K
A-Symmetric-Frame-B.jpg
2021-10-20 09:10
7.8K
ARNDALE-BRIDGE-pdf-106x150.jpg
2021-10-20 15:44
7.5K
ARNDALE-BRIDGE-pdf-212x300.jpg
2021-10-20 15:44
19K
ARNDALE-BRIDGE-pdf-724x1024.jpg
2021-10-20 15:44
143K
ARNDALE-BRIDGE-pdf.jpg
2021-10-20 15:44
281K
ARNDALE-BRIDGE.pdf
2021-10-20 15:44
208K
Application-of-Different-Materials-in-Construction-of-Bridges-pdf-106x150.jpg
2021-10-20 15:44
7.6K
Application-of-Different-Materials-in-Construction-of-Bridges-pdf-212x300.jpg
2021-10-20 15:44
19K
Application-of-Different-Materials-in-Construction-of-Bridges-pdf-724x1024.jpg
2021-10-20 15:44
140K
Application-of-Different-Materials-in-Construction-of-Bridges-pdf.jpg
2021-10-20 15:44
287K
Application-of-Different-Materials-in-Construction-of-Bridges.pdf
2021-10-20 15:44
263K
Axes-model-pdf-106x150.jpg
2021-10-20 15:44
6.3K
Axes-model-pdf-212x300.jpg
2021-10-20 15:44
14K
Axes-model-pdf-724x1024.jpg
2021-10-20 15:44
96K
Axes-model-pdf.jpg
2021-10-20 15:44
187K
Axes-model.pdf
2021-10-20 15:44
95K
Bucking-of-Slender-Paper-Columns-pdf-106x150.jpg
2021-10-20 15:35
6.6K
Bucking-of-Slender-Paper-Columns-pdf-212x300.jpg
2021-10-20 15:35
16K
Bucking-of-Slender-Paper-Columns-pdf-724x1024.jpg
2021-10-20 15:35
117K
Bucking-of-Slender-Paper-Columns-pdf.jpg
2021-10-20 15:35
234K
Bucking-of-Slender-Paper-Columns.pdf
2021-10-20 15:35
139K
C15-M5-V1-toilet-lid.mp4
2021-10-22 11:21
2.1M
C15-M5-V2-piano-cover-1.mp4
2021-10-22 11:30
2.9M
C15-M5-V2-piano-cover.mp4
2021-10-22 11:29
2.9M
C18-A2a-Comparison-of-lateral-vibration-of-two-rulers-with-and-without-a-pendulum-150x150.jpg
2021-10-25 16:01
7.6K
C18-A2a-Comparison-of-lateral-vibration-of-two-rulers-with-and-without-a-pendulum-225x300.jpg
2021-10-25 16:01
11K
C18-A2a-Comparison-of-lateral-vibration-of-two-rulers-with-and-without-a-pendulum-360x372.jpg
2021-10-25 16:01
18K
C18-A2a-Comparison-of-lateral-vibration-of-two-rulers-with-and-without-a-pendulum.jpg
2021-10-25 16:01
47K
C18-A2b-Comparison-of-lateral-vibration-of-two-rulers-with-and-without-a-pendulum-150x150.jpg
2021-10-25 16:01
7.6K
C18-A2b-Comparison-of-lateral-vibration-of-two-rulers-with-and-without-a-pendulum-225x300.jpg
2021-10-25 16:01
11K
C18-A2b-Comparison-of-lateral-vibration-of-two-rulers-with-and-without-a-pendulum-360x372.jpg
2021-10-25 16:01
18K
C18-A2b-Comparison-of-lateral-vibration-of-two-rulers-with-and-without-a-pendulum.jpg
2021-10-25 16:01
46K
CONCEPT-OF-EQUILIBRIUM-AND-ROTATIONAL-INERTIA-2-pdf-106x150.jpg
2021-10-20 15:39
7.4K
CONCEPT-OF-EQUILIBRIUM-AND-ROTATIONAL-INERTIA-2-pdf-212x300.jpg
2021-10-20 15:39
18K
CONCEPT-OF-EQUILIBRIUM-AND-ROTATIONAL-INERTIA-2-pdf-724x1024.jpg
2021-10-20 15:39
135K
CONCEPT-OF-EQUILIBRIUM-AND-ROTATIONAL-INERTIA-2-pdf.jpg
2021-10-20 15:39
270K
CONCEPT-OF-EQUILIBRIUM-AND-ROTATIONAL-INERTIA-2.pdf
2021-10-20 15:39
261K
CONCEPT-OF-EQUILIBRIUM-AND-ROTATIONAL-INERTIA-pdf-106x150.jpg
2021-10-20 14:36
7.0K
CONCEPT-OF-EQUILIBRIUM-AND-ROTATIONAL-INERTIA-pdf-212x300.jpg
2021-10-20 14:36
17K
CONCEPT-OF-EQUILIBRIUM-AND-ROTATIONAL-INERTIA-pdf-724x1024.jpg
2021-10-20 14:36
124K
CONCEPT-OF-EQUILIBRIUM-AND-ROTATIONAL-INERTIA-pdf.jpg
2021-10-20 14:36
252K
CONCEPT-OF-EQUILIBRIUM-AND-ROTATIONAL-INERTIA.pdf
2021-10-20 14:36
156K
Centre-of-Mass-Bronze-Running-Horse-pdf-106x150.jpg
2021-10-20 14:45
6.5K
Centre-of-Mass-Bronze-Running-Horse-pdf-212x300.jpg
2021-10-20 14:45
15K
Centre-of-Mass-Bronze-Running-Horse-pdf-724x1024.jpg
2021-10-20 14:45
97K
Centre-of-Mass-Bronze-Running-Horse-pdf.jpg
2021-10-20 14:45
196K
Centre-of-Mass-Bronze-Running-Horse.pdf
2021-10-20 14:45
110K
Centre-of-Mass-Kitchen-Wooden-Unit-pdf-106x150.jpg
2021-10-20 14:45
6.0K
Centre-of-Mass-Kitchen-Wooden-Unit-pdf-212x300.jpg
2021-10-20 14:45
13K
Centre-of-Mass-Kitchen-Wooden-Unit-pdf-724x1024.jpg
2021-10-20 14:45
84K
Centre-of-Mass-Kitchen-Wooden-Unit-pdf.jpg
2021-10-20 14:45
160K
Centre-of-Mass-Kitchen-Wooden-Unit.pdf
2021-10-20 14:45
184K
Centre-of-Mass-pdf-106x150.jpg
2021-10-20 14:45
7.0K
Centre-of-Mass-pdf-212x300.jpg
2021-10-20 14:45
16K
Centre-of-Mass-pdf-724x1024.jpg
2021-10-20 14:45
110K
Centre-of-Mass-pdf.jpg
2021-10-20 14:45
221K
Centre-of-Mass.pdf
2021-10-20 14:45
215K
Chocolate-a-sweet-application-of-structural-concepts-pdf-106x150.jpg
2021-10-20 15:03
6.6K
Chocolate-a-sweet-application-of-structural-concepts-pdf-212x300.jpg
2021-10-20 15:03
16K
Chocolate-a-sweet-application-of-structural-concepts-pdf-724x1024.jpg
2021-10-20 15:03
123K
Chocolate-a-sweet-application-of-structural-concepts-pdf.jpg
2021-10-20 15:03
256K
Chocolate-a-sweet-application-of-structural-concepts.pdf
2021-10-20 15:03
128K
Collapsible-Structures-Pop-Up-Books-pdf-106x150.jpg
2021-10-20 15:44
7.1K
Collapsible-Structures-Pop-Up-Books-pdf-212x300.jpg
2021-10-20 15:44
16K
Collapsible-Structures-Pop-Up-Books-pdf-724x1024.jpg
2021-10-20 15:44
95K
Collapsible-Structures-Pop-Up-Books-pdf.jpg
2021-10-20 15:44
184K
Collapsible-Structures-Pop-Up-Books.pdf
2021-10-20 15:44
308K
Contact-Us-Adrian-Bell-Photo-120x150.jpg
2021-10-19 15:01
8.0K
Contact-Us-Adrian-Bell-Photo.jpg
2021-10-19 15:01
12K
Contact-Us-Tianjian-Ji-Photo-120x150.jpg
2021-10-19 15:01
10K
Contact-Us-Tianjian-Ji-Photo.jpg
2021-10-19 15:01
10K
Creative-Use-of-Structural-Concepts-Quantum-Leap-pdf-106x150.jpg
2021-10-20 14:36
6.9K
Creative-Use-of-Structural-Concepts-Quantum-Leap-pdf-212x300.jpg
2021-10-20 14:36
17K
Creative-Use-of-Structural-Concepts-Quantum-Leap-pdf-724x1024.jpg
2021-10-20 14:36
128K
Creative-Use-of-Structural-Concepts-Quantum-Leap-pdf.jpg
2021-10-20 14:36
265K
Creative-Use-of-Structural-Concepts-Quantum-Leap.pdf
2021-10-20 14:36
1.1M
Design-Calculations-Real-Behaviour-Hamblys-Paradox-Buckling-pdf-106x150.jpg
2021-10-20 15:35
6.7K
Design-Calculations-Real-Behaviour-Hamblys-Paradox-Buckling-pdf-212x300.jpg
2021-10-20 15:35
17K
Design-Calculations-Real-Behaviour-Hamblys-Paradox-Buckling-pdf-724x1024.jpg
2021-10-20 15:35
127K
Design-Calculations-Real-Behaviour-Hamblys-Paradox-Buckling-pdf.jpg
2021-10-20 15:35
258K
Design-Calculations-Real-Behaviour-Hamblys-Paradox-Buckling.pdf
2021-10-20 15:35
1.0M
Design-Calculations-Real-Behaviour-Hamblys-Paradox-pdf-106x150.jpg
2021-10-20 14:45
6.7K
Design-Calculations-Real-Behaviour-Hamblys-Paradox-pdf-212x300.jpg
2021-10-20 14:45
17K
Design-Calculations-Real-Behaviour-Hamblys-Paradox-pdf-724x1024.jpg
2021-10-20 14:45
127K
Design-Calculations-Real-Behaviour-Hamblys-Paradox-pdf.jpg
2021-10-20 14:45
258K
Design-Calculations-Real-Behaviour-Hamblys-Paradox.pdf
2021-10-20 14:45
1.0M
Different-cross-sections-of-a-paper-bridge-pdf-106x150.jpg
2021-10-20 15:01
7.4K
Different-cross-sections-of-a-paper-bridge-pdf-212x300.jpg
2021-10-20 15:01
17K
Different-cross-sections-of-a-paper-bridge-pdf-724x1024.jpg
2021-10-20 15:01
108K
Different-cross-sections-of-a-paper-bridge-pdf.jpg
2021-10-20 15:01
216K
Different-cross-sections-of-a-paper-bridge.pdf
2021-10-20 15:01
143K
Direct-Force-Paths-in-Buildings-pdf-106x150.jpg
2021-10-20 15:29
6.8K
Direct-Force-Paths-in-Buildings-pdf-212x300.jpg
2021-10-20 15:29
17K
Direct-Force-Paths-in-Buildings-pdf-724x1024.jpg
2021-10-20 15:29
124K
Direct-Force-Paths-in-Buildings-pdf.jpg
2021-10-20 15:29
247K
Direct-Force-Paths-in-Buildings.pdf
2021-10-20 15:29
468K
Energy-Exchange-Model-1-A-Moving-Wheel-150x150.jpg
2021-10-21 14:57
8.1K
Energy-Exchange-Model-1-A-Moving-Wheel-300x225.jpg
2021-10-21 14:57
11K
Energy-Exchange-Model-1-A-Moving-Wheel.jpg
2021-10-21 14:57
12K
Energy-Exchange-Model-2-Collision-Balls-1-150x150.jpg
2021-10-21 14:57
8.9K
Energy-Exchange-Model-2-Collision-Balls-1-300x225.jpg
2021-10-21 14:57
13K
Energy-Exchange-Model-2-Collision-Balls-1-615x372.jpg
2021-10-21 14:57
30K
Energy-Exchange-Model-2-Collision-Balls-1.jpg
2021-10-21 14:57
30K
Energy-Exchange-Model-2-Collision-Balls-2-150x150.jpg
2021-10-21 14:57
9.7K
Energy-Exchange-Model-2-Collision-Balls-2-300x225.jpg
2021-10-21 14:57
14K
Energy-Exchange-Model-2-Collision-Balls-2-615x372.jpg
2021-10-21 14:57
29K
Energy-Exchange-Model-2-Collision-Balls-2.jpg
2021-10-21 14:57
31K
Energy-Exchange-Model-3-Dropping-a-Series-of-Balls-150x150.jpg
2021-10-21 14:57
11K
Energy-Exchange-Model-3-Dropping-a-Series-of-Balls-225x300.jpg
2021-10-21 14:57
18K
Energy-Exchange-Model-3-Dropping-a-Series-of-Balls.jpg
2021-10-21 14:57
18K
Energy-Exchange-Practical-Example-A-Torch-Without-a-Battery-150x150.jpg
2021-10-21 14:57
8.9K
Energy-Exchange-Practical-Example-A-Torch-Without-a-Battery-300x225.jpg
2021-10-21 14:57
13K
Energy-Exchange-Practical-Example-A-Torch-Without-a-Battery.jpg
2021-10-21 14:57
13K
Energy-Exchange-Practical-Example-Roller-Coasters-The-First-Tower-150x150.jpg
2021-10-21 14:57
8.4K
Energy-Exchange-Practical-Example-Roller-Coasters-The-First-Tower-225x300.jpg
2021-10-21 14:57
22K
Energy-Exchange-Practical-Example-Roller-Coasters-The-First-Tower.jpg
2021-10-21 14:57
30K
Energy-Exchange-Practical-Example-Roller-Coasters-Twists-and-Turns-150x150.jpg
2021-10-21 14:57
19K
Energy-Exchange-Practical-Example-Roller-Coasters-Twists-and-Turns-300x225.jpg
2021-10-21 14:57
34K
Energy-Exchange-Practical-Example-Roller-Coasters-Twists-and-Turns-519x372.jpg
2021-10-21 14:57
71K
Energy-Exchange-Practical-Example-Roller-Coasters-Twists-and-Turns.jpg
2021-10-21 14:57
68K
Equilibrium-Analysis-of-the-Structures-in-Angry-Birds-pdf-106x150.jpg
2021-10-20 14:35
7.2K
Equilibrium-Analysis-of-the-Structures-in-Angry-Birds-pdf-212x300.jpg
2021-10-20 14:35
18K
Equilibrium-Analysis-of-the-Structures-in-Angry-Birds-pdf-724x1024.jpg
2021-10-20 14:35
135K
Equilibrium-Analysis-of-the-Structures-in-Angry-Birds-pdf.jpg
2021-10-20 14:35
275K
Equilibrium-Analysis-of-the-Structures-in-Angry-Birds.pdf
2021-10-20 14:35
198K
Equilibrium-achieved-by-book-support-pdf-106x150.jpg
2021-10-20 14:36
7.0K
Equilibrium-achieved-by-book-support-pdf-212x300.jpg
2021-10-20 14:36
16K
Equilibrium-achieved-by-book-support-pdf-724x1024.jpg
2021-10-20 14:36
104K
Equilibrium-achieved-by-book-support-pdf.jpg
2021-10-20 14:36
213K
Equilibrium-achieved-by-book-support.pdf
2021-10-20 14:36
281K
FORCE-INCREASING-SYSTEM-pdf-106x150.jpg
2021-10-20 14:36
6.4K
FORCE-INCREASING-SYSTEM-pdf-212x300.jpg
2021-10-20 14:36
15K
FORCE-INCREASING-SYSTEM-pdf-724x1024.jpg
2021-10-20 14:36
92K
FORCE-INCREASING-SYSTEM-pdf.jpg
2021-10-20 14:36
188K
FORCE-INCREASING-SYSTEM.pdf
2021-10-20 14:36
273K
Fig-14-5-A-model-of-a-translational-suspended-system-and-a-rotational-suspend-system-150x150.jpg
2021-10-21 15:40
8.9K
Fig-14-5-A-model-of-a-translational-suspended-system-and-a-rotational-suspend-system-225x300.jpg
2021-10-21 15:40
15K
Fig-14-5-A-model-of-a-translational-suspended-system-and-a-rotational-suspend-system.jpg
2021-10-21 15:40
15K
Fig-15-9b-Single-ruler-vibrates-for-a-longer-time-150x150.jpg
2021-10-22 09:11
5.0K
Fig-15-9b-Single-ruler-vibrates-for-a-longer-time-300x250.jpg
2021-10-22 09:11
12K
Fig-15-9b-Single-ruler-vibrates-for-a-longer-time-460x372.jpg
2021-10-22 09:11
24K
Fig-15-9b-Single-ruler-vibrates-for-a-longer-time.jpg
2021-10-22 09:11
21K
Fig.-14-6-Effects-of-mass-and-the-centre-of-mass-150x150.jpg
2021-10-21 15:40
13K
Fig.-14-6-Effects-of-mass-and-the-centre-of-mass-225x300.jpg
2021-10-21 15:40
19K
Fig.-14-6-Effects-of-mass-and-the-centre-of-mass-360x372.jpg
2021-10-21 15:40
29K
Fig.-14-6-Effects-of-mass-and-the-centre-of-mass.jpg
2021-10-21 15:40
29K
Fig.-14-7a-Effect-of-the-centre-of-mass-150x150.jpg
2021-10-21 15:40
11K
Fig.-14-7a-Effect-of-the-centre-of-mass-225x300.jpg
2021-10-21 15:40
16K
Fig.-14-7a-Effect-of-the-centre-of-mass-360x372.jpg
2021-10-21 15:40
24K
Fig.-14-7a-Effect-of-the-centre-of-mass.jpg
2021-10-21 15:40
24K
Fig.-14-7b-Effect-of-the-centre-of-mass-150x150.jpg
2021-10-21 15:40
11K
Fig.-14-7b-Effect-of-the-centre-of-mass-225x300.jpg
2021-10-21 15:40
16K
Fig.-14-7b-Effect-of-the-centre-of-mass-360x372.jpg
2021-10-21 15:40
24K
Fig.-14-7b-Effect-of-the-centre-of-mass.jpg
2021-10-21 15:40
24K
Fig.-14-8a-Static-behaviour-of-of-an-outward-inclined-suspended-system-150x150.jpg
2021-10-21 15:48
7.4K
Fig.-14-8a-Static-behaviour-of-of-an-outward-inclined-suspended-system-300x225.jpg
2021-10-21 15:48
12K
Fig.-14-8a-Static-behaviour-of-of-an-outward-inclined-suspended-system.jpg
2021-10-21 15:48
13K
Fig.-14-8b-Static-behaviour-of-of-an-outward-inclined-suspended-system-150x150.jpg
2021-10-21 15:48
8.3K
Fig.-14-8b-Static-behaviour-of-of-an-outward-inclined-suspended-system-300x225.jpg
2021-10-21 15:48
13K
Fig.-14-8b-Static-behaviour-of-of-an-outward-inclined-suspended-system.jpg
2021-10-21 15:48
14K
Fig1-3a-Action-and-reaction-150x150.jpg
2021-10-26 11:05
6.0K
Fig1-3a-Action-and-reaction.jpg
2021-10-26 11:05
7.3K
Fig1-3b-Action-and-reaction-150x150.jpg
2021-10-26 11:05
6.1K
Fig1-3b-Action-and-reaction-300x225.jpg
2021-10-26 11:05
9.9K
Fig1-3b-Action-and-reaction.jpg
2021-10-26 11:05
14K
Fig1-3c-Action-and-reaction-150x150.jpg
2021-10-26 11:05
3.2K
Fig1-3c-Action-and-reaction-225x300.jpg
2021-10-26 11:05
6.8K
Fig1-3c-Action-and-reaction-459x372.jpg
2021-10-26 11:05
14K
Fig1-3c-Action-and-reaction-459x576.jpg
2021-10-26 11:05
20K
Fig1-3c-Action-and-reaction.jpg
2021-10-26 11:05
15K
Fig1-4a-Stable-and-unstable-equilibrium-150x150.jpg
2021-10-26 11:46
7.0K
Fig1-4a-Stable-and-unstable-equilibrium-300x225.jpg
2021-10-26 11:46
11K
Fig1-4a-Stable-and-unstable-equilibrium.jpg
2021-10-26 11:46
16K
Fig1-4b-Stable-and-unstable-equilibrium-150x150.jpg
2021-10-26 11:47
6.0K
Fig1-4b-Stable-and-unstable-equilibrium-300x225.jpg
2021-10-26 11:47
9.6K
Fig1-4b-Stable-and-unstable-equilibrium.jpg
2021-10-26 11:47
15K
Fig1-5a-Equilibrium-of-a-bottle-and-wood-system-150x150.jpg
2021-10-26 12:05
8.7K
Fig1-5a-Equilibrium-of-a-bottle-and-wood-system-300x225.jpg
2021-10-26 12:05
13K
Fig1-5a-Equilibrium-of-a-bottle-and-wood-system.jpg
2021-10-26 12:05
17K
Fig1-5b-Equilibrium-of-a-bottle-and-wood-system-150x150.jpg
2021-10-26 12:05
9.0K
Fig1-5b-Equilibrium-of-a-bottle-and-wood-system-300x225.jpg
2021-10-26 12:05
14K
Fig1-5b-Equilibrium-of-a-bottle-and-wood-system.jpg
2021-10-26 12:05
19K
Fig1-6a-A-magnetic-float-model-150x150.jpg
2021-10-26 12:07
7.3K
Fig1-6a-A-magnetic-float-model-300x225.jpg
2021-10-26 12:07
11K
Fig1-6a-A-magnetic-float-model.jpg
2021-10-26 12:07
13K
Fig1-6b-A-magnetic-float-model-150x150.jpg
2021-10-26 12:07
6.6K
Fig1-6b-A-magnetic-float-model-300x225.jpg
2021-10-26 12:07
9.4K
Fig1-6b-A-magnetic-float-model.jpg
2021-10-26 12:07
12K
Fig1-6c-A-magnetic-float-model-150x150.jpg
2021-10-26 12:07
5.3K
Fig1-6c-A-magnetic-float-model-300x138.jpg
2021-10-26 12:07
7.8K
Fig1-6c-A-magnetic-float-model.jpg
2021-10-26 12:07
14K
Fig1-6d-A-magnetic-float-model-150x150.jpg
2021-10-26 12:07
5.2K
Fig1-6d-A-magnetic-float-model-300x146.jpg
2021-10-26 12:07
7.7K
Fig1-6d-A-magnetic-float-model.jpg
2021-10-26 12:07
12K
Fig1-7-A-barrier-150x150.jpg
2021-10-26 12:10
5.8K
Fig1-7-A-barrier-300x160.jpg
2021-10-26 12:10
12K
Fig1-7-A-barrier.jpg
2021-10-26 12:10
20K
Fig1-8-A-foot-bridge-can-be-lifted-by-a-single-person-150x150.jpg
2021-10-26 12:11
14K
Fig1-8-A-foot-bridge-can-be-lifted-by-a-single-person-300x225.jpg
2021-10-26 12:11
22K
Fig1-8-A-foot-bridge-can-be-lifted-by-a-single-person.jpg
2021-10-26 12:11
36K
Fig1-9-An-equilibrium-kitchen-scale-150x150.jpg
2021-10-26 12:21
13K
Fig1-9-An-equilibrium-kitchen-scale-300x225.jpg
2021-10-26 12:21
21K
Fig1-9-An-equilibrium-kitchen-scale-615x372.jpg
2021-10-26 12:21
51K
Fig1-9-An-equilibrium-kitchen-scale.jpg
2021-10-26 12:21
47K
Fig1-11-A-magnetic-float-train-150x150.jpg
2021-10-26 12:23
5.2K
Fig1-11-A-magnetic-float-train-300x225.jpg
2021-10-26 12:23
12K
Fig1-11-A-magnetic-float-train.jpg
2021-10-26 12:23
12K
Fig1-12a-An-application-of-inequilibrium-150x150.jpg
2021-10-26 12:24
6.3K
Fig1-12a-An-application-of-inequilibrium-164x300.jpg
2021-10-26 12:24
13K
Fig1-12a-An-application-of-inequilibrium.jpg
2021-10-26 12:24
15K
Fig1-12b-An-application-of-inequilibrium-150x150.jpg
2021-10-26 12:24
6.6K
Fig1-12b-An-application-of-inequilibrium-168x300.jpg
2021-10-26 12:24
13K
Fig1-12b-An-application-of-inequilibrium.jpg
2021-10-26 12:24
15K
Fig2-5a-Locating-the-centre-of-mass-of-a-piece-of-cardboard-of-arbitrary-shape-150x150.jpg
2021-10-27 09:03
4.5K
Fig2-5a-Locating-the-centre-of-mass-of-a-piece-of-cardboard-of-arbitrary-shape-225x300.jpg
2021-10-27 09:03
6.1K
Fig2-5a-Locating-the-centre-of-mass-of-a-piece-of-cardboard-of-arbitrary-shape-308x372.jpg
2021-10-27 09:03
7.3K
Fig2-5a-Locating-the-centre-of-mass-of-a-piece-of-cardboard-of-arbitrary-shape.jpg
2021-10-27 09:03
7.6K
Fig2-5b-Locating-the-centre-of-mass-of-a-piece-of-cardboard-of-arbitrary-shape-150x150.jpg
2021-10-27 09:03
4.8K
Fig2-5b-Locating-the-centre-of-mass-of-a-piece-of-cardboard-of-arbitrary-shape-225x300.jpg
2021-10-27 09:03
7.0K
Fig2-5b-Locating-the-centre-of-mass-of-a-piece-of-cardboard-of-arbitrary-shape-308x372.jpg
2021-10-27 09:03
10K
Fig2-5b-Locating-the-centre-of-mass-of-a-piece-of-cardboard-of-arbitrary-shape.jpg
2021-10-27 09:03
9.6K
Fig2-5c-Locating-the-centre-of-mass-of-a-piece-of-cardboard-of-arbitrary-shape-150x150.jpg
2021-10-27 09:03
5.2K
Fig2-5c-Locating-the-centre-of-mass-of-a-piece-of-cardboard-of-arbitrary-shape-225x300.jpg
2021-10-27 09:03
7.8K
Fig2-5c-Locating-the-centre-of-mass-of-a-piece-of-cardboard-of-arbitrary-shape-308x372.jpg
2021-10-27 09:03
11K
Fig2-5c-Locating-the-centre-of-mass-of-a-piece-of-cardboard-of-arbitrary-shape.jpg
2021-10-27 09:03
11K
Fig2-6-Centre-of-mass-and-centroid-150x150.jpg
2021-10-27 09:07
2.7K
Fig2-6-Centre-of-mass-and-centroid-225x300.jpg
2021-10-27 09:07
6.5K
Fig2-6-Centre-of-mass-and-centroid-308x372.jpg
2021-10-27 09:07
11K
Fig2-6-Centre-of-mass-and-centroid.jpg
2021-10-27 09:07
10K
Fig2-7a-Centre-of-mass-of-an-L-shape-body-in-a-horizontal-plan-150x150.jpg
2021-10-27 09:28
10K
Fig2-7a-Centre-of-mass-of-an-L-shape-body-in-a-horizontal-plan-300x225.jpg
2021-10-27 09:28
14K
Fig2-7a-Centre-of-mass-of-an-L-shape-body-in-a-horizontal-plan.jpg
2021-10-27 09:28
21K
Fig2-7b-Centre-of-mass-of-an-L-shape-body-in-a-horizontal-plan-150x150.jpg
2021-10-27 09:28
10K
Fig2-7b-Centre-of-mass-of-an-L-shape-body-in-a-horizontal-plan-300x225.jpg
2021-10-27 09:28
15K
Fig2-7b-Centre-of-mass-of-an-L-shape-body-in-a-horizontal-plan.jpg
2021-10-27 09:28
22K
Fig2-7c-Centre-of-mass-of-an-L-shape-body-in-a-horizontal-plan-150x150.jpg
2021-10-27 09:28
9.8K
Fig2-7c-Centre-of-mass-of-an-L-shape-body-in-a-horizontal-plan-300x225.jpg
2021-10-27 09:28
14K
Fig2-7c-Centre-of-mass-of-an-L-shape-body-in-a-horizontal-plan.jpg
2021-10-27 09:28
22K
Fig2-7d-Centre-of-mass-of-an-L-shape-body-in-a-horizontal-plan-150x150.jpg
2021-10-27 09:28
9.5K
Fig2-7d-Centre-of-mass-of-an-L-shape-body-in-a-horizontal-plan-300x225.jpg
2021-10-27 09:28
13K
Fig2-7d-Centre-of-mass-of-an-L-shape-body-in-a-horizontal-plan.jpg
2021-10-27 09:28
19K
Fig2-7e-Centre-of-mass-of-an-L-shape-body-in-a-horizontal-plan-150x150.jpg
2021-10-27 09:28
9.4K
Fig2-7e-Centre-of-mass-of-an-L-shape-body-in-a-horizontal-plan-300x225.jpg
2021-10-27 09:28
13K
Fig2-7e-Centre-of-mass-of-an-L-shape-body-in-a-horizontal-plan.jpg
2021-10-27 09:28
19K
Fig2-7f-Centre-of-mass-of-an-L-shape-body-in-a-horizontal-plan-150x150.jpg
2021-10-27 09:28
9.5K
Fig2-7f-Centre-of-mass-of-an-L-shape-body-in-a-horizontal-plan-300x225.jpg
2021-10-27 09:28
13K
Fig2-7f-Centre-of-mass-of-an-L-shape-body-in-a-horizontal-plan.jpg
2021-10-27 09:28
19K
Fig2-8a-Centre-of-mass-of-a-body-in-a-vertical-plane-150x150.jpg
2021-10-27 11:03
10K
Fig2-8a-Centre-of-mass-of-a-body-in-a-vertical-plane-225x300.jpg
2021-10-27 11:03
15K
Fig2-8a-Centre-of-mass-of-a-body-in-a-vertical-plane.jpg
2021-10-27 11:03
15K
Fig2-8b-Centre-of-mass-of-a-body-in-a-vertical-plane-150x150.jpg
2021-10-27 11:03
6.9K
Fig2-8b-Centre-of-mass-of-a-body-in-a-vertical-plane-225x300.jpg
2021-10-27 11:03
9.7K
Fig2-8b-Centre-of-mass-of-a-body-in-a-vertical-plane.jpg
2021-10-27 11:03
9.8K
Fig2-8c-Centre-of-mass-of-a-body-in-a-vertical-plane-150x150.jpg
2021-10-27 11:03
9.8K
Fig2-8c-Centre-of-mass-of-a-body-in-a-vertical-plane-225x300.jpg
2021-10-27 11:03
14K
Fig2-8c-Centre-of-mass-of-a-body-in-a-vertical-plane.jpg
2021-10-27 11:03
14K
Fig2-9a-Centre-of-mass-and-stability-of-three-aluminum-blocks-150x150.jpg
2021-10-27 11:05
8.7K
Fig2-9a-Centre-of-mass-and-stability-of-three-aluminum-blocks-300x225.jpg
2021-10-27 11:05
12K
Fig2-9a-Centre-of-mass-and-stability-of-three-aluminum-blocks.jpg
2021-10-27 11:05
19K
Fig2-9b-Centre-of-mass-and-stability-of-three-aluminum-blocks-150x150.jpg
2021-10-27 11:05
9.7K
Fig2-9b-Centre-of-mass-and-stability-of-three-aluminum-blocks-300x225.jpg
2021-10-27 11:05
14K
Fig2-9b-Centre-of-mass-and-stability-of-three-aluminum-blocks.jpg
2021-10-27 11:05
21K
Fig2-9c-Centre-of-mass-and-stability-of-three-aluminum-blocks-150x150.jpg
2021-10-27 11:05
10K
Fig2-9c-Centre-of-mass-and-stability-of-three-aluminum-blocks-300x225.jpg
2021-10-27 11:05
15K
Fig2-9c-Centre-of-mass-and-stability-of-three-aluminum-blocks.jpg
2021-10-27 11:05
24K
Fig2-9d-Centre-of-mass-and-stability-of-three-aluminum-blocks-150x150.jpg
2021-10-27 11:05
10K
Fig2-9d-Centre-of-mass-and-stability-of-three-aluminum-blocks-300x225.jpg
2021-10-27 11:05
14K
Fig2-9d-Centre-of-mass-and-stability-of-three-aluminum-blocks.jpg
2021-10-27 11:05
22K
Fig2-10a-Centre-of-mass-and-motion-150x150.jpg
2021-10-27 11:17
7.9K
Fig2-10a-Centre-of-mass-and-motion-300x225.jpg
2021-10-27 11:17
13K
Fig2-10a-Centre-of-mass-and-motion.jpg
2021-10-27 11:17
18K
Fig2-10b-Centre-of-mass-and-motion-150x150.jpg
2021-10-27 11:17
9.0K
Fig2-10b-Centre-of-mass-and-motion-225x300.jpg
2021-10-27 11:17
14K
Fig2-10b-Centre-of-mass-and-motion.jpg
2021-10-27 11:17
14K
Fig2-11a-Cranes-on-construction-sites-150x150.jpg
2021-10-27 12:25
11K
Fig2-11a-Cranes-on-construction-sites-300x225.jpg
2021-10-27 12:25
19K
Fig2-11a-Cranes-on-construction-sites-512x372.jpg
2021-10-27 12:25
43K
Fig2-11a-Cranes-on-construction-sites.jpg
2021-10-27 12:25
37K
Fig2-11b-Cranes-on-construction-sites-150x150.jpg
2021-10-27 12:25
12K
Fig2-11b-Cranes-on-construction-sites-300x225.jpg
2021-10-27 12:25
21K
Fig2-11b-Cranes-on-construction-sites-512x372.jpg
2021-10-27 12:25
44K
Fig2-11b-Cranes-on-construction-sites.jpg
2021-10-27 12:25
39K
Fig2-12-The-Eiffel-Tower-150x150.jpg
2021-10-27 12:27
10K
Fig2-12-The-Eiffel-Tower-225x300.jpg
2021-10-27 12:27
17K
Fig2-12-The-Eiffel-Tower.jpg
2021-10-27 12:27
18K
Fig2-13a-Inclined-display-unit-150x150.jpg
2021-10-27 12:28
7.3K
Fig2-13a-Inclined-display-unit-225x300.jpg
2021-10-27 12:28
16K
Fig2-13a-Inclined-display-unit-369x372.jpg
2021-10-27 12:28
38K
Fig2-13a-Inclined-display-unit.jpg
2021-10-27 12:28
38K
Fig2-13b-Inclined-display-unit-150x150.jpg
2021-10-27 12:28
12K
Fig2-13b-Inclined-display-unit-225x300.jpg
2021-10-27 12:28
23K
Fig2-13b-Inclined-display-unit-308x372.jpg
2021-10-27 12:28
38K
Fig2-13b-Inclined-display-unit.jpg
2021-10-27 12:28
36K
Fig2-14-One-of-the-two-Kio-Towers-150x150.jpg
2021-10-27 12:29
11K
Fig2-14-One-of-the-two-Kio-Towers-225x300.jpg
2021-10-27 12:29
19K
Fig2-14-One-of-the-two-Kio-Towers-389x372.jpg
2021-10-27 12:29
32K
Fig2-14-One-of-the-two-Kio-Towers.jpg
2021-10-27 12:29
38K
Fig2-A1a-The-models-150x150.jpg
2021-10-27 11:27
3.5K
Fig2-A1a-The-models-300x192.jpg
2021-10-27 11:27
7.2K
Fig2-A1a-The-models.jpg
2021-10-27 11:27
46K
Fig2-A1b-The-models-150x150.jpg
2021-10-27 11:27
10K
Fig2-A1b-The-models-300x225.jpg
2021-10-27 11:27
14K
Fig2-A1b-The-models.jpg
2021-10-27 11:27
48K
Fig2-A2a-Initial-position-of-the-ball-150x150.jpg
2021-10-27 12:16
9.5K
Fig2-A2a-Initial-position-of-the-ball-300x225.jpg
2021-10-27 12:16
13K
Fig2-A2a-Initial-position-of-the-ball.jpg
2021-10-27 12:16
45K
Fig2-A2b-New-position-of-the-ball-150x150.jpg
2021-10-27 12:16
8.8K
Fig2-A2b-New-position-of-the-ball-300x225.jpg
2021-10-27 12:16
12K
Fig2-A2b-New-position-of-the-ball.jpg
2021-10-27 12:16
42K
Fig2-A3a-Object-b-with-applied-lateral-force-150x150.jpg
2021-10-27 12:16
9.6K
Fig2-A3a-Object-b-with-applied-lateral-force-300x225.jpg
2021-10-27 12:16
13K
Fig2-A3a-Object-b-with-applied-lateral-force.jpg
2021-10-27 12:16
44K
Fig2-A3b-Object-b-returns-to-its-original-position-150x150.jpg
2021-10-27 12:16
8.9K
Fig2-A3b-Object-b-returns-to-its-original-position-300x225.jpg
2021-10-27 12:16
12K
Fig2-A3b-Object-b-returns-to-its-original-position.jpg
2021-10-27 12:16
41K
Fig2-A4a-Object-c-with-applied-lateral-force-150x150.jpg
2021-10-27 12:16
9.5K
Fig2-A4a-Object-c-with-applied-lateral-force-300x225.jpg
2021-10-27 12:16
13K
Fig2-A4a-Object-c-with-applied-lateral-force.jpg
2021-10-27 12:16
43K
Fig2-A4b-Object-b-Object-c-topples-over-150x150.jpg
2021-10-27 12:16
8.7K
Fig2-A4b-Object-b-Object-c-topples-over-300x225.jpg
2021-10-27 12:16
11K
Fig2-A4b-Object-b-Object-c-topples-over.jpg
2021-10-27 12:16
40K
Fig2-A5a-Object-d-with-applied-lateral-force-150x150.jpg
2021-10-27 12:16
9.8K
Fig2-A5a-Object-d-with-applied-lateral-force-300x225.jpg
2021-10-27 12:16
13K
Fig2-A5a-Object-d-with-applied-lateral-force.jpg
2021-10-27 12:16
45K
Fig2-A5b-Object-d-returns-to-its-original-position-150x150.jpg
2021-10-27 12:15
8.9K
Fig2-A5b-Object-d-returns-to-its-original-position-300x225.jpg
2021-10-27 12:15
12K
Fig2-A5b-Object-d-returns-to-its-original-position.jpg
2021-10-27 12:15
41K
Fig3-4-Three-beams-with-different-cross-sections-150x150.gif
2021-10-27 15:08
6.4K
Fig3-4-Three-beams-with-different-cross-sections-300x94.gif
2021-10-27 15:08
17K
Fig3-4-Three-beams-with-different-cross-sections.gif
2021-10-27 15:08
20K
Fig3-5a-A-rectangular-section-beam-with-the-larger-dimension-horizontal-150x150.gif
2021-10-27 15:10
7.8K
Fig3-5a-A-rectangular-section-beam-with-the-larger-dimension-horizontal-300x100.gif
2021-10-27 15:10
19K
Fig3-5a-A-rectangular-section-beam-with-the-larger-dimension-horizontal.gif
2021-10-27 15:10
22K
Fig3-5b-A-rectangular-section-with-the-larger-dimension-vertical-150x150.gif
2021-10-27 15:10
5.2K
Fig3-5b-A-rectangular-section-with-the-larger-dimension-vertical-300x100.gif
2021-10-27 15:10
16K
Fig3-5b-A-rectangular-section-with-the-larger-dimension-vertical.gif
2021-10-27 15:10
16K
Fig3-5c-I-section-150x150.gif
2021-10-27 15:10
6.4K
Fig3-5c-I-section-300x100.gif
2021-10-27 15:10
17K
Fig3-5c-I-section.gif
2021-10-27 15:10
18K
Fig3-6a-Two-bookmarks-in-different-shapes-150x150.jpg
2021-10-27 15:39
9.2K
Fig3-6a-Two-bookmarks-in-different-shapes-225x300.jpg
2021-10-27 15:39
13K
Fig3-6a-Two-bookmarks-in-different-shapes-360x372.jpg
2021-10-27 15:39
19K
Fig3-6a-Two-bookmarks-in-different-shapes-rotated.jpg
2021-10-27 15:39
21K
Fig3-6a-Two-bookmarks-in-different-shapes.jpg
2021-10-27 15:39
20K
Fig3-6b-Lifting-a-book-using-a-folded-bookmark-150x150.jpg
2021-10-27 15:39
8.5K
Fig3-6b-Lifting-a-book-using-a-folded-bookmark-300x225.jpg
2021-10-27 15:39
12K
Fig3-6b-Lifting-a-book-using-a-folded-bookmark.jpg
2021-10-27 15:39
16K
Fig3-7-A-steel-framed-building-150x150.jpg
2021-10-27 15:41
17K
Fig3-7-A-steel-framed-building-300x225.jpg
2021-10-27 15:41
31K
Fig3-7-A-steel-framed-building.jpg
2021-10-27 15:41
32K
Fig3-8-A-railway-bridge-150x150.jpg
2021-10-27 15:43
16K
Fig3-8-A-railway-bridge-300x225.jpg
2021-10-27 15:43
25K
Fig3-8-A-railway-bridge.jpg
2021-10-27 15:43
41K
Fig3-9-Cellular-columns-150x150.jpg
2021-10-27 15:45
21K
Fig3-9-Cellular-columns-225x300.jpg
2021-10-27 15:45
35K
Fig3-9-Cellular-columns.jpg
2021-10-27 15:45
55K
Fig3-10-Cellular-beams-150x150.jpg
2021-10-27 15:45
14K
Fig3-10-Cellular-beams-300x225.jpg
2021-10-27 15:45
23K
Fig3-10-Cellular-beams-615x372.jpg
2021-10-27 15:45
50K
Fig3-10-Cellular-beams.jpg
2021-10-27 15:45
49K
Fig4-4a-Examination-of-beam-bending-assumptions-150x150.jpg
2021-10-28 08:45
3.6K
Fig4-4a-Examination-of-beam-bending-assumptions-300x207.jpg
2021-10-28 08:45
9.0K
Fig4-4a-Examination-of-beam-bending-assumptions.jpg
2021-10-28 08:45
21K
Fig4-4b-Examination-of-beam-bending-assumptions-150x150.jpg
2021-10-28 08:45
4.5K
Fig4-4b-Examination-of-beam-bending-assumptions-300x213.jpg
2021-10-28 08:45
11K
Fig4-4b-Examination-of-beam-bending-assumptions.jpg
2021-10-28 08:45
22K
Fig4-5a-A-series-of-girders-supporting-windows-at-airport-terminals-150x150.jpg
2021-10-28 08:55
18K
Fig4-5a-A-series-of-girders-supporting-windows-at-airport-terminals-225x300.jpg
2021-10-28 08:55
31K
Fig4-5a-A-series-of-girders-supporting-windows-at-airport-terminals.jpg
2021-10-28 08:55
32K
Fig4-5b-A-series-of-girders-supporting-windows-at-airport-terminals-150x150.jpg
2021-10-28 08:56
18K
Fig4-5b-A-series-of-girders-supporting-windows-at-airport-terminals.jpg
2021-10-28 08:56
36K
Fig4-5c-A-series-of-girders-supporting-windows-at-airport-terminals-150x150.jpg
2021-10-28 08:56
16K
Fig4-5c-A-series-of-girders-supporting-windows-at-airport-terminals.jpg
2021-10-28 08:55
31K
Fig4-6-Overhangs-used-to-reduce-bending-moments-and-deflections-150x150.jpg
2021-10-28 08:59
7.2K
Fig4-6-Overhangs-used-to-reduce-bending-moments-and-deflections-300x196.jpg
2021-10-28 08:59
18K
Fig4-6-Overhangs-used-to-reduce-bending-moments-and-deflections.jpg
2021-10-28 08:59
49K
Fig4-7a-A-bench-150x150.jpg
2021-10-28 09:01
6.5K
Fig4-7a-A-bench-225x300.jpg
2021-10-28 09:01
18K
Fig4-7a-A-bench-308x372.jpg
2021-10-28 09:01
35K
Fig4-7a-A-bench.jpg
2021-10-28 09:01
32K
Fig4-7b-Cracks-at-the-end-of-the-cantilever-150x150.jpg
2021-10-28 09:01
7.0K
Fig4-7b-Cracks-at-the-end-of-the-cantilever-225x300.jpg
2021-10-28 09:01
19K
Fig4-7b-Cracks-at-the-end-of-the-cantilever-308x372.jpg
2021-10-28 09:01
37K
Fig4-7b-Cracks-at-the-end-of-the-cantilever.jpg
2021-10-28 09:01
34K
Fig4-8a-A-typical-stapler-150x150.jpg
2021-10-28 09:04
10K
Fig4-8a-A-typical-stapler-300x225.jpg
2021-10-28 09:04
15K
Fig4-8a-A-typical-stapler.jpg
2021-10-28 09:04
22K
Fig4-8b-A-typical-stapler-150x150.jpg
2021-10-28 09:04
11K
Fig4-8b-A-typical-stapler-300x225.jpg
2021-10-28 09:04
16K
Fig4-8b-A-typical-stapler.jpg
2021-10-28 09:04
25K
Fig4-9a-The-process-of-the-deformation-of-a-staple-150x150.jpg
2021-10-28 09:04
2.8K
Fig4-9a-The-process-of-the-deformation-of-a-staple.jpg
2021-10-28 09:04
5.3K
Fig4-9b-The-process-of-the-deformation-of-a-staple-150x150.jpg
2021-10-28 09:04
3.4K
Fig4-9b-The-process-of-the-deformation-of-a-staple.jpg
2021-10-28 09:04
7.6K
Fig4-9c-The-process-of-the-deformation-of-a-staple-150x150.jpg
2021-10-28 09:04
3.5K
Fig4-9c-The-process-of-the-deformation-of-a-staple.jpg
2021-10-28 09:04
5.1K
Fig4-9d-The-process-of-the-deformation-of-a-staple-150x71.jpg
2021-10-28 09:04
1.2K
Fig4-9d-The-process-of-the-deformation-of-a-staple.jpg
2021-10-28 09:04
2.0K
Fig4-A1-Thin-and-Thick-sponge-beams-150x150.jpg
2021-10-28 08:51
3.6K
Fig4-A1-Thin-and-Thick-sponge-beams-234x300.jpg
2021-10-28 08:51
9.3K
Fig4-A1-Thin-and-Thick-sponge-beams-386x372.jpg
2021-10-28 08:51
22K
Fig4-A1-Thin-and-Thick-sponge-beams.jpg
2021-10-28 08:51
57K
Fig4-A2a-Deformation-of-the-Thin-beam-150x150.jpg
2021-10-28 08:51
7.3K
Fig4-A2a-Deformation-of-the-Thin-beam-225x300.jpg
2021-10-28 08:51
12K
Fig4-A2a-Deformation-of-the-Thin-beam-360x372.jpg
2021-10-28 08:51
21K
Fig4-A2a-Deformation-of-the-Thin-beam.jpg
2021-10-28 08:51
48K
Fig4-A2b-Deformation-of-the-Thin-beam-150x150.jpg
2021-10-28 08:51
7.5K
Fig4-A2b-Deformation-of-the-Thin-beam-225x300.jpg
2021-10-28 08:51
12K
Fig4-A2b-Deformation-of-the-Thin-beam-360x372.jpg
2021-10-28 08:51
23K
Fig4-A2b-Deformation-of-the-Thin-beam.jpg
2021-10-28 08:51
52K
Fig5-5-Effect-of-torsion-150x150.jpg
2021-10-28 10:27
7.6K
Fig5-5-Effect-of-torsion-300x225.jpg
2021-10-28 10:27
12K
Fig5-5-Effect-of-torsion-615x372.jpg
2021-10-28 10:27
28K
Fig5-5-Effect-of-torsion.jpg
2021-10-28 10:27
27K
Fig5-6a-Effect-of-shear-stress-in-catalogues-150x150.jpg
2021-10-28 10:29
9.9K
Fig5-6a-Effect-of-shear-stress-in-catalogues-300x225.jpg
2021-10-28 10:29
16K
Fig5-6a-Effect-of-shear-stress-in-catalogues-615x372.jpg
2021-10-28 10:29
44K
Fig5-6a-Effect-of-shear-stress-in-catalogues.jpg
2021-10-28 10:29
41K
Fig5-6b-Effect-of-shear-stress-in-catalogues-150x150.jpg
2021-10-28 10:29
11K
Fig5-6b-Effect-of-shear-stress-in-catalogues-300x225.jpg
2021-10-28 10:29
17K
Fig5-6b-Effect-of-shear-stress-in-catalogues-615x372.jpg
2021-10-28 10:29
45K
Fig5-6b-Effect-of-shear-stress-in-catalogues.jpg
2021-10-28 10:29
41K
Fig5-6c-Effect-of-shear-stress-in-catalogues-150x150.jpg
2021-10-28 10:29
8.9K
Fig5-6c-Effect-of-shear-stress-in-catalogues-300x225.jpg
2021-10-28 10:29
14K
Fig5-6c-Effect-of-shear-stress-in-catalogues-615x372.jpg
2021-10-28 10:29
35K
Fig5-6c-Effect-of-shear-stress-in-catalogues.jpg
2021-10-28 10:29
32K
Fig5-6d-Effect-of-shear-stress-in-catalogues-150x150.jpg
2021-10-28 10:29
8.8K
Fig5-6d-Effect-of-shear-stress-in-catalogues-300x225.jpg
2021-10-28 10:29
14K
Fig5-6d-Effect-of-shear-stress-in-catalogues-615x372.jpg
2021-10-28 10:29
33K
Fig5-6d-Effect-of-shear-stress-in-catalogues.jpg
2021-10-28 10:29
31K
Fig5-7a-Effect-of-shear-resistance-in-beams-150x150.jpg
2021-10-28 10:31
4.9K
Fig5-7a-Effect-of-shear-resistance-in-beams-300x225.jpg
2021-10-28 10:31
7.2K
Fig5-7a-Effect-of-shear-resistance-in-beams.jpg
2021-10-28 10:31
13K
Fig5-7b-Effect-of-shear-resistance-in-beams-150x150.jpg
2021-10-28 10:31
6.0K
Fig5-7b-Effect-of-shear-resistance-in-beams-300x225.jpg
2021-10-28 10:31
9.3K
Fig5-7b-Effect-of-shear-resistance-in-beams.jpg
2021-10-28 10:31
15K
Fig5-7c-Effect-of-shear-resistance-in-beams-150x150.jpg
2021-10-28 10:31
5.9K
Fig5-7c-Effect-of-shear-resistance-in-beams-300x225.jpg
2021-10-28 10:31
9.4K
Fig5-7c-Effect-of-shear-resistance-in-beams.jpg
2021-10-28 10:31
15K
Fig5-8a-Effect-of-shear-walls-150x150.jpg
2021-10-28 10:33
13K
Fig5-8a-Effect-of-shear-walls-300x225.jpg
2021-10-28 10:33
23K
Fig5-8a-Effect-of-shear-walls.jpg
2021-10-28 10:33
23K
Fig5-8b-Effect-of-shear-walls-150x150.jpg
2021-10-28 10:33
12K
Fig5-8b-Effect-of-shear-walls-300x225.jpg
2021-10-28 10:33
20K
Fig5-8b-Effect-of-shear-walls.jpg
2021-10-28 10:33
20K
Fig5-8c-Effect-of-shear-walls-150x150.jpg
2021-10-28 10:33
14K
Fig5-8c-Effect-of-shear-walls-300x225.jpg
2021-10-28 10:33
24K
Fig5-8c-Effect-of-shear-walls.jpg
2021-10-28 10:33
24K
Fig5-8d-Effect-of-shear-walls-150x150.jpg
2021-10-28 10:33
13K
Fig5-8d-Effect-of-shear-walls-300x225.jpg
2021-10-28 10:33
23K
Fig5-8d-Effect-of-shear-walls.jpg
2021-10-28 10:33
23K
Fig5-9a-Open-and-closed-sections-subject-to-torsion-with-warping-150x150.jpg
2021-10-28 10:35
5.3K
Fig5-9a-Open-and-closed-sections-subject-to-torsion-with-warping-300x225.jpg
2021-10-28 10:35
8.8K
Fig5-9a-Open-and-closed-sections-subject-to-torsion-with-warping.jpg
2021-10-28 10:35
14K
Fig5-9b-Open-and-closed-sections-subject-to-torsion-with-warping-150x150.jpg
2021-10-28 10:35
5.9K
Fig5-9b-Open-and-closed-sections-subject-to-torsion-with-warping-300x225.jpg
2021-10-28 10:35
9.5K
Fig5-9b-Open-and-closed-sections-subject-to-torsion-with-warping.jpg
2021-10-28 10:35
15K
Fig5-10a-Open-and-Closed-sections-subjected-to-torsion-without-warping-150x150.jpg
2021-10-28 12:24
4.9K
Fig5-10a-Open-and-Closed-sections-subjected-to-torsion-without-warping-300x225.jpg
2021-10-28 12:24
7.5K
Fig5-10a-Open-and-Closed-sections-subjected-to-torsion-without-warping.jpg
2021-10-28 12:24
13K
Fig5-10b-Open-and-Closed-sections-subjected-to-torsion-without-warping-150x150.jpg
2021-10-28 12:24
7.8K
Fig5-10b-Open-and-Closed-sections-subjected-to-torsion-without-warping-300x225.jpg
2021-10-28 12:24
13K
Fig5-10b-Open-and-Closed-sections-subjected-to-torsion-without-warping.jpg
2021-10-28 12:24
20K
Fig5-10c-Open-and-Closed-sections-subjected-to-torsion-without-warping-150x150.jpg
2021-10-28 12:24
7.4K
Fig5-10c-Open-and-Closed-sections-subjected-to-torsion-without-warping-300x225.jpg
2021-10-28 12:24
12K
Fig5-10c-Open-and-Closed-sections-subjected-to-torsion-without-warping.jpg
2021-10-28 12:24
18K
Fig5-11a-composite-sections-150x150.jpg
2021-10-28 14:58
11K
Fig5-11a-composite-sections-300x225.jpg
2021-10-28 14:58
18K
Fig5-11a-composite-sections-615x372.jpg
2021-10-28 14:58
44K
Fig5-11a-composite-sections.jpg
2021-10-28 14:58
41K
Fig5-11b-composite-sections-150x150.jpg
2021-10-28 14:58
7.6K
Fig5-11b-composite-sections-300x225.jpg
2021-10-28 14:58
13K
Fig5-11b-composite-sections-512x372.jpg
2021-10-28 14:58
28K
Fig5-11b-composite-sections.jpg
2021-10-28 14:58
25K
Fig5-12-Shear-walls-in-a-steel-framed-building-150x150.jpg
2021-10-28 15:01
6.1K
Fig5-12-Shear-walls-in-a-steel-framed-building-228x300.jpg
2021-10-28 15:01
15K
Fig5-12-Shear-walls-in-a-steel-framed-building.jpg
2021-10-28 15:01
16K
Fig5-13a-Connectors-in-the-cap-of-a-drinks-bottle-150x150.jpg
2021-10-28 15:02
8.9K
Fig5-13a-Connectors-in-the-cap-of-a-drinks-bottle-225x300.jpg
2021-10-28 15:02
13K
Fig5-13a-Connectors-in-the-cap-of-a-drinks-bottle-360x372.jpg
2021-10-28 15:02
19K
Fig5-13a-Connectors-in-the-cap-of-a-drinks-bottle.jpg
2021-10-28 15:02
19K
Fig5-13b-Shear-failure-of-the-connectors-150x150.jpg
2021-10-28 15:02
10K
Fig5-13b-Shear-failure-of-the-connectors-225x300.jpg
2021-10-28 15:02
15K
Fig5-13b-Shear-failure-of-the-connectors-360x372.jpg
2021-10-28 15:02
21K
Fig5-13b-Shear-failure-of-the-connectors.jpg
2021-10-28 15:02
22K
Fig5-14a-Cross-section-of-a-box-girder-150x150.jpg
2021-10-28 15:05
4.0K
Fig5-14a-Cross-section-of-a-box-girder-300x223.jpg
2021-10-28 15:05
9.3K
Fig5-14a-Cross-section-of-a-box-girder-581x372.jpg
2021-10-28 15:05
27K
Fig5-14a-Cross-section-of-a-box-girder.jpg
2021-10-28 15:05
25K
Fig5-14b-Construction-of-a-box-girder-bridge-150x150.jpg
2021-10-28 15:05
4.7K
Fig5-14b-Construction-of-a-box-girder-bridge-231x300.jpg
2021-10-28 15:05
12K
Fig5-14b-Construction-of-a-box-girder-bridge-442x372.jpg
2021-10-28 15:05
22K
Fig5-14b-Construction-of-a-box-girder-bridge.jpg
2021-10-28 15:05
29K
Fig5-A1-Different-loading-positions-of-three-identical-cantilever-beams-with-open-sections-150x150.jpg
2021-10-28 12:27
2.8K
Fig5-A1-Different-loading-positions-of-three-identical-cantilever-beams-with-open-sections-300x189.jpg
2021-10-28 12:27
5.3K
Fig5-A1-Different-loading-positions-of-three-identical-cantilever-beams-with-open-sections-672x372.jpg
2021-10-28 12:27
20K
Fig5-A1-Different-loading-positions-of-three-identical-cantilever-beams-with-open-sections-768x483.jpg
2021-10-28 12:27
27K
Fig5-A1-Different-loading-positions-of-three-identical-cantilever-beams-with-open-sections.jpg
2021-10-28 12:27
50K
Fig5-A2a-Deformation-of-the-beams-due-to-vertical-loads-150x150.jpg
2021-10-28 12:37
3.3K
Fig5-A2a-Deformation-of-the-beams-due-to-vertical-loads-300x258.jpg
2021-10-28 12:37
7.7K
Fig5-A2a-Deformation-of-the-beams-due-to-vertical-loads-469x372.jpg
2021-10-28 12:37
15K
Fig5-A2a-Deformation-of-the-beams-due-to-vertical-loads.jpg
2021-10-28 12:37
13K
Fig5-A2b-Deformation-of-the-beams-due-to-vertical-loads-150x150.jpg
2021-10-28 12:37
3.3K
Fig5-A2b-Deformation-of-the-beams-due-to-vertical-loads-300x262.jpg
2021-10-28 12:37
7.8K
Fig5-A2b-Deformation-of-the-beams-due-to-vertical-loads-455x372.jpg
2021-10-28 12:37
16K
Fig5-A2b-Deformation-of-the-beams-due-to-vertical-loads.jpg
2021-10-28 12:37
13K
Fig5-A2c-Deformation-of-the-beams-due-to-vertical-loads-150x150.jpg
2021-10-28 12:37
3.5K
Fig5-A2c-Deformation-of-the-beams-due-to-vertical-loads-300x270.jpg
2021-10-28 12:37
8.7K
Fig5-A2c-Deformation-of-the-beams-due-to-vertical-loads-473x372.jpg
2021-10-28 12:37
18K
Fig5-A2c-Deformation-of-the-beams-due-to-vertical-loads.jpg
2021-10-28 12:37
15K
Fig6-1a-Balloon-on-nails-150x150.jpg
2021-10-28 15:21
5.5K
Fig6-1a-Balloon-on-nails-224x300.jpg
2021-10-28 15:21
13K
Fig6-1a-Balloon-on-nails.jpg
2021-10-28 15:21
14K
Fig6-1b-Balloon-on-nails-150x150.jpg
2021-10-28 15:21
5.4K
Fig6-1b-Balloon-on-nails-224x300.jpg
2021-10-28 15:21
13K
Fig6-1b-Balloon-on-nails.jpg
2021-10-28 15:21
15K
Fig6-2-A-person-lying-on-a-nail-bed-150x150.jpg
2021-10-28 15:23
6.7K
Fig6-2-A-person-lying-on-a-nail-bed-300x225.jpg
2021-10-28 15:23
16K
Fig6-2-A-person-lying-on-a-nail-bed-615x372.jpg
2021-10-28 15:23
57K
Fig6-2-A-person-lying-on-a-nail-bed.jpg
2021-10-28 15:23
57K
Fig6-3a-49-plastic-cups-placed-upside-down-150x150.jpg
2021-10-28 15:24
11K
Fig6-3a-49-plastic-cups-placed-upside-down-300x225.jpg
2021-10-28 15:24
18K
Fig6-3a-49-plastic-cups-placed-upside-down.jpg
2021-10-28 15:24
31K
Fig6-3b-A-person-standing-on-the-cups-150x150.jpg
2021-10-28 15:24
12K
Fig6-3b-A-person-standing-on-the-cups-300x225.jpg
2021-10-28 15:24
18K
Fig6-3b-A-person-standing-on-the-cups.jpg
2021-10-28 15:24
28K
Fig6-4a-Uniform-stress-distribution-150x150.jpg
2021-10-28 15:59
10K
Fig6-4a-Uniform-stress-distribution-300x225.jpg
2021-10-28 15:59
17K
Fig6-4a-Uniform-stress-distribution.jpg
2021-10-28 15:59
17K
Fig6-4b-Non-uniform-stress-distribution-150x150.jpg
2021-10-28 15:59
11K
Fig6-4b-Non-uniform-stress-distribution-300x225.jpg
2021-10-28 15:59
18K
Fig6-4b-Non-uniform-stress-distribution.jpg
2021-10-28 15:59
18K
Fig6-5a-A-flat-shoe-150x150.jpg
2021-10-29 08:53
6.8K
Fig6-5a-A-flat-shoe-300x225.jpg
2021-10-29 08:53
11K
Fig6-5a-A-flat-shoe.jpg
2021-10-29 08:53
11K
Fig6-5b-A-high-heel-shoe-150x150.jpg
2021-10-29 08:53
7.2K
Fig6-5b-A-high-heel-shoe-300x225.jpg
2021-10-29 08:53
11K
Fig6-5b-A-high-heel-shoe.jpg
2021-10-29 08:53
11K
Fig6-6a-Lead-blocks-used-to-reduce-the-uneven-stress-distribution-on-foundation-108x300.jpg
2021-10-29 08:57
9.0K
Fig6-6a-Lead-blocks-used-to-reduce-the-uneven-stress-distribution-on-foundation-150x150.jpg
2021-10-29 08:57
6.0K
Fig6-6a-Lead-blocks-used-to-reduce-the-uneven-stress-distribution-on-foundation-200x372.jpg
2021-10-29 08:57
21K
Fig6-6a-Lead-blocks-used-to-reduce-the-uneven-stress-distribution-on-foundation.jpg
2021-10-29 08:57
24K
Fig6-6b-Lead-blocks-used-to-reduce-the-uneven-stress-distribution-on-foundation-150x150.jpg
2021-10-29 08:57
7.6K
Fig6-6b-Lead-blocks-used-to-reduce-the-uneven-stress-distribution-on-foundation-205x300.jpg
2021-10-29 08:57
18K
Fig6-6b-Lead-blocks-used-to-reduce-the-uneven-stress-distribution-on-foundation-290x372.jpg
2021-10-29 08:57
32K
Fig6-6b-Lead-blocks-used-to-reduce-the-uneven-stress-distribution-on-foundation.jpg
2021-10-29 08:57
31K
Fig6-A1-The-model-150x150.jpg
2021-10-28 16:02
7.2K
Fig6-A1-The-model-225x300.jpg
2021-10-28 16:02
12K
Fig6-A1-The-model-336x372.jpg
2021-10-28 16:02
23K
Fig6-A1-The-model.jpg
2021-10-28 16:02
48K
Fig6-A2a-Uniformly-distributed-load-150x150.jpg
2021-10-28 16:02
4.4K
Fig6-A2a-Uniformly-distributed-load-249x300.jpg
2021-10-28 16:02
12K
Fig6-A2a-Uniformly-distributed-load.jpg
2021-10-28 16:02
14K
Fig6-A2b-Concentrated-load-150x150.jpg
2021-10-28 16:02
4.8K
Fig6-A2b-Concentrated-load-255x300.jpg
2021-10-28 16:02
13K
Fig6-A2b-Concentrated-load.jpg
2021-10-28 16:02
15K
Fig6-A3-Rectangular-and-circular-sections-with-their-core-areas-150x150.jpg
2021-10-29 08:47
10K
Fig6-A3-Rectangular-and-circular-sections-with-their-core-areas-225x300.jpg
2021-10-29 08:47
14K
Fig6-A3-Rectangular-and-circular-sections-with-their-core-areas-360x372.jpg
2021-10-29 08:47
24K
Fig6-A3-Rectangular-and-circular-sections-with-their-core-areas-rotated.jpg
2021-10-29 08:47
28K
Fig6-A3-Rectangular-and-circular-sections-with-their-core-areas.jpg
2021-10-29 08:47
52K
Fig6-A4a-Load-applied-within-the-core-area-150x150.jpg
2021-10-29 08:48
3.3K
Fig6-A4a-Load-applied-within-the-core-area-274x300.jpg
2021-10-29 08:48
9.4K
Fig6-A4a-Load-applied-within-the-core-area-486x372.jpg
2021-10-29 08:48
16K
Fig6-A4a-Load-applied-within-the-core-area.jpg
2021-10-29 08:48
20K
Fig6-A4b-Load-applied-outside-of-the-core-area-150x150.jpg
2021-10-29 08:48
3.8K
Fig6-A4b-Load-applied-outside-of-the-core-area-292x300.jpg
2021-10-29 08:48
11K
Fig6-A4b-Load-applied-outside-of-the-core-area-488x372.jpg
2021-10-29 08:48
22K
Fig6-A4b-Load-applied-outside-of-the-core-area.jpg
2021-10-29 08:48
24K
Fig6-A5a-Load-applied-within-the-core-area-150x150.jpg
2021-10-29 08:51
3.3K
Fig6-A5a-Load-applied-within-the-core-area-263x300.jpg
2021-10-29 08:51
9.1K
Fig6-A5a-Load-applied-within-the-core-area-467x372.jpg
2021-10-29 08:51
15K
Fig6-A5a-Load-applied-within-the-core-area.jpg
2021-10-29 08:51
20K
Fig6-A5b-Load-applied-outside-of-the-core-area-150x150.jpg
2021-10-29 08:51
3.6K
Fig6-A5b-Load-applied-outside-of-the-core-area-274x300.jpg
2021-10-29 08:51
11K
Fig6-A5b-Load-applied-outside-of-the-core-area-459x372.jpg
2021-10-29 08:51
21K
Fig6-A5b-Load-applied-outside-of-the-core-area.jpg
2021-10-29 08:51
23K
Fig7-3a-Deflections-of-a-cantilever-beam-subjected-to-a-concentrated-load-150x150.jpg
2021-10-29 09:26
3.1K
Fig7-3a-Deflections-of-a-cantilever-beam-subjected-to-a-concentrated-load-300x129.jpg
2021-10-29 09:26
5.9K
Fig7-3a-Deflections-of-a-cantilever-beam-subjected-to-a-concentrated-load.jpg
2021-10-29 09:26
9.8K
Fig7-3b-Deflections-of-a-cantilever-beam-subjected-to-a-concentrated-load-150x150.jpg
2021-10-29 09:26
2.6K
Fig7-3b-Deflections-of-a-cantilever-beam-subjected-to-a-concentrated-load-300x129.jpg
2021-10-29 09:26
5.8K
Fig7-3b-Deflections-of-a-cantilever-beam-subjected-to-a-concentrated-load.jpg
2021-10-29 09:26
9.7K
Fig7-3c-Deflections-of-a-cantilever-beam-subjected-to-a-concentrated-load-150x150.jpg
2021-10-29 09:26
2.8K
Fig7-3c-Deflections-of-a-cantilever-beam-subjected-to-a-concentrated-load-300x129.jpg
2021-10-29 09:26
5.9K
Fig7-3c-Deflections-of-a-cantilever-beam-subjected-to-a-concentrated-load.jpg
2021-10-29 09:26
11K
Fig7-4a-Deflections-of-a-simply-supported-beam-150x150.jpg
2021-10-29 09:32
7.8K
Fig7-4a-Deflections-of-a-simply-supported-beam-300x225.jpg
2021-10-29 09:32
12K
Fig7-4a-Deflections-of-a-simply-supported-beam-615x372.jpg
2021-10-29 09:32
31K
Fig7-4a-Deflections-of-a-simply-supported-beam.jpg
2021-10-29 09:32
29K
Fig7-4b-Deflections-of-a-fixed-beam-150x150.jpg
2021-10-29 09:32
7.7K
Fig7-4b-Deflections-of-a-fixed-beam-300x225.jpg
2021-10-29 09:32
12K
Fig7-4b-Deflections-of-a-fixed-beam-615x372.jpg
2021-10-29 09:32
31K
Fig7-4b-Deflections-of-a-fixed-beam.jpg
2021-10-29 09:32
29K
Fig7-5a-Before-loading-150x150.jpg
2021-10-29 09:35
13K
Fig7-5a-Before-loading-300x225.jpg
2021-10-29 09:35
21K
Fig7-5a-Before-loading-615x372.jpg
2021-10-29 09:35
48K
Fig7-5a-Before-loading.jpg
2021-10-29 09:35
48K
Fig7-5b-Adding-a-weight-at-the-centre-of-the-beam-150x150.jpg
2021-10-29 09:35
13K
Fig7-5b-Adding-a-weight-at-the-centre-of-the-beam-300x225.jpg
2021-10-29 09:35
21K
Fig7-5b-Adding-a-weight-at-the-centre-of-the-beam-615x372.jpg
2021-10-29 09:35
49K
Fig7-5b-Adding-a-weight-at-the-centre-of-the-beam.jpg
2021-10-29 09:35
49K
Fig7-5c-Rotation-at-the-end-and-the-reading-150x150.jpg
2021-10-29 09:35
12K
Fig7-5c-Rotation-at-the-end-and-the-reading-225x300.jpg
2021-10-29 09:35
20K
Fig7-5c-Rotation-at-the-end-and-the-reading-308x372.jpg
2021-10-29 09:35
30K
Fig7-5c-Rotation-at-the-end-and-the-reading.jpg
2021-10-29 09:35
28K
Fig7-5d-Adding-loads-to-remove-the-rotation-150x150.jpg
2021-10-29 09:35
12K
Fig7-5d-Adding-loads-to-remove-the-rotation-225x300.jpg
2021-10-29 09:35
20K
Fig7-5d-Adding-loads-to-remove-the-rotation-308x372.jpg
2021-10-29 09:35
30K
Fig7-5d-Adding-loads-to-remove-the-rotation.jpg
2021-10-29 09:35
28K
Fig7-6-Column-supports-150x150.jpg
2021-10-29 11:00
12K
Fig7-6-Column-supports-300x225.jpg
2021-10-29 11:00
22K
Fig7-6-Column-supports-512x372.jpg
2021-10-29 11:00
49K
Fig7-6-Column-supports.jpg
2021-10-29 11:00
43K
Fig7-7-Prop-roots-150x150.jpg
2021-10-29 11:01
9.2K
Fig7-7-Prop-roots-225x300.jpg
2021-10-29 11:01
26K
Fig7-7-Prop-roots.jpg
2021-10-29 11:01
28K
Fig7-8a-Props-used-to-support-a-footbridge-150x150.jpg
2021-10-29 11:02
13K
Fig7-8a-Props-used-to-support-a-footbridge-225x300.jpg
2021-10-29 11:02
20K
Fig7-8a-Props-used-to-support-a-footbridge-360x372.jpg
2021-10-29 11:02
34K
Fig7-8a-Props-used-to-support-a-footbridge.jpg
2021-10-29 11:02
35K
Fig7-8b-Props-used-to-support-a-footbridge-150x150.jpg
2021-10-29 11:02
5.2K
Fig7-8b-Props-used-to-support-a-footbridge-212x300.jpg
2021-10-29 11:02
12K
Fig7-8b-Props-used-to-support-a-footbridge-288x372.jpg
2021-10-29 11:02
20K
Fig7-8b-Props-used-to-support-a-footbridge.jpg
2021-10-29 11:02
19K
Fig7-A1a-The-physical-model-150x150.jpg
2021-10-29 10:49
6.5K
Fig7-A1a-The-physical-model-225x300.jpg
2021-10-29 10:49
9.4K
Fig7-A1a-The-physical-model-360x372.jpg
2021-10-29 10:49
17K
Fig7-A1a-The-physical-model.jpg
2021-10-29 10:49
39K
Fig7-A1b-The-idealized-model-150x150.jpg
2021-10-29 10:49
1.9K
Fig7-A1b-The-idealized-model-300x292.jpg
2021-10-29 10:49
4.9K
Fig7-A1b-The-idealized-model-391x372.jpg
2021-10-29 10:49
7.3K
Fig7-A1b-The-idealized-model.jpg
2021-10-29 10:49
8.9K
Fig7-A2a-Loading-on-the-cantilever-150x150.jpg
2021-10-29 10:49
11K
Fig7-A2a-Loading-on-the-cantilever-300x225.jpg
2021-10-29 10:49
15K
Fig7-A2a-Loading-on-the-cantilever.jpg
2021-10-29 10:49
47K
Fig7-A2b-Loading-on-the-beam-with-two-fixed-ends-150x150.jpg
2021-10-29 10:49
11K
Fig7-A2b-Loading-on-the-beam-with-two-fixed-ends-300x225.jpg
2021-10-29 10:49
15K
Fig7-A2b-Loading-on-the-beam-with-two-fixed-ends.jpg
2021-10-29 10:49
45K
Fig7-A3a-Deformation-of-the-cantilever-150x150.jpg
2021-10-29 10:49
6.9K
Fig7-A3a-Deformation-of-the-cantilever-225x300.jpg
2021-10-29 10:49
10K
Fig7-A3a-Deformation-of-the-cantilever-360x372.jpg
2021-10-29 10:49
18K
Fig7-A3a-Deformation-of-the-cantilever.jpg
2021-10-29 10:49
41K
Fig7-A3b-Deformation-of-the-beam-with-two-ends-fixed-150x150.jpg
2021-10-29 10:49
6.7K
Fig7-A3b-Deformation-of-the-beam-with-two-ends-fixed-225x300.jpg
2021-10-29 10:49
10K
Fig7-A3b-Deformation-of-the-beam-with-two-ends-fixed-360x372.jpg
2021-10-29 10:49
17K
Fig7-A3b-Deformation-of-the-beam-with-two-ends-fixed.jpg
2021-10-29 10:49
40K
Fig8-5-Aluminium-test-frames-150x150.jpg
2021-10-29 11:05
6.2K
Fig8-5-Aluminium-test-frames-300x206.jpg
2021-10-29 11:05
14K
Fig8-5-Aluminium-test-frames.jpg
2021-10-29 11:05
33K
Fig8-6-Load-deflection-curves-for-Frames-A-B-and-C-150x150.jpg
2021-10-29 11:06
4.5K
Fig8-6-Load-deflection-curves-for-Frames-A-B-and-C-300x177.jpg
2021-10-29 11:06
9.5K
Fig8-6-Load-deflection-curves-for-Frames-A-B-and-C.jpg
2021-10-29 11:06
18K
Fig8-7-Braced-frame-models-showing-direct-and-zigzag-force-paths-150x150.jpg
2021-10-29 11:07
5.4K
Fig8-7-Braced-frame-models-showing-direct-and-zigzag-force-paths-300x160.jpg
2021-10-29 11:07
10K
Fig8-7-Braced-frame-models-showing-direct-and-zigzag-force-paths-672x365.jpg
2021-10-29 11:07
46K
Fig8-7-Braced-frame-models-showing-direct-and-zigzag-force-paths.jpg
2021-10-29 11:07
40K
Fig8-8a-John-Hancock-Centre-150x150.jpg
2021-10-29 11:08
6.9K
Fig8-8a-John-Hancock-Centre-225x300.jpg
2021-10-29 11:08
20K
Fig8-8a-John-Hancock-Centre-308x372.jpg
2021-10-29 11:08
39K
Fig8-8a-John-Hancock-Centre.jpg
2021-10-29 11:08
37K
Fig8-8b-Bank-of-China-in-Hong-Kong-150x150.jpg
2021-10-29 11:08
7.7K
Fig8-8b-Bank-of-China-in-Hong-Kong-225x300.jpg
2021-10-29 11:08
13K
Fig8-8b-Bank-of-China-in-Hong-Kong-308x372.jpg
2021-10-29 11:08
20K
Fig8-8b-Bank-of-China-in-Hong-Kong.jpg
2021-10-29 11:08
19K
Fig8-9-Collapse-of-a-scaffolding-structure-150x150.jpg
2021-10-29 11:10
6.9K
Fig8-9-Collapse-of-a-scaffolding-structure-300x194.jpg
2021-10-29 11:10
16K
Fig8-9-Collapse-of-a-scaffolding-structure.jpg
2021-10-29 11:10
39K
Fig8-10a-Inefficient-bracing-systems-for-scaffolding-structures-150x150.jpg
2021-10-29 11:10
7.4K
Fig8-10a-Inefficient-bracing-systems-for-scaffolding-structures-211x300.jpg
2021-10-29 11:10
17K
Fig8-10a-Inefficient-bracing-systems-for-scaffolding-structures-395x372.jpg
2021-10-29 11:10
40K
Fig8-10a-Inefficient-bracing-systems-for-scaffolding-structures.jpg
2021-10-29 11:10
50K
Fig8-10b-Inefficient-bracing-systems-for-scaffolding-structures-150x150.jpg
2021-10-29 11:10
7.7K
Fig8-10b-Inefficient-bracing-systems-for-scaffolding-structures-300x204.jpg
2021-10-29 11:10
18K
Fig8-10b-Inefficient-bracing-systems-for-scaffolding-structures.jpg
2021-10-29 11:10
23K
Fig9-8-Comparison-of-the-deformations-of-two-rubber-rings-150x150.jpg
2021-10-29 12:00
5.3K
Fig9-8-Comparison-of-the-deformations-of-two-rubber-rings-300x193.jpg
2021-10-29 12:00
12K
Fig9-8-Comparison-of-the-deformations-of-two-rubber-rings.jpg
2021-10-29 12:00
17K
Fig9-9a-Locations-of-wires-from-left-to-righ-Models-A-B-and-C-150x150.jpg
2021-10-29 12:03
10K
Fig9-9a-Locations-of-wires-from-left-to-righ-Models-A-B-and-C-300x225.jpg
2021-10-29 12:03
15K
Fig9-9a-Locations-of-wires-from-left-to-righ-Models-A-B-and-C.jpg
2021-10-29 12:03
21K
Fig9-9b-A-plastic-beam-stiffened-by-externally-profiled-wires-150x150.jpg
2021-10-29 12:03
6.1K
Fig9-9b-A-plastic-beam-stiffened-by-externally-profiled-wires-300x225.jpg
2021-10-29 12:03
10K
Fig9-9b-A-plastic-beam-stiffened-by-externally-profiled-wires-615x372.jpg
2021-10-29 12:03
25K
Fig9-9b-A-plastic-beam-stiffened-by-externally-profiled-wires.jpg
2021-10-29 12:02
25K
Fig9-10-The-force-paths-of-the-Rayleigh-Arena-150x150.jpg
2021-10-29 12:05
6.3K
Fig9-10-The-force-paths-of-the-Rayleigh-Arena-300x185.jpg
2021-10-29 12:05
11K
Fig9-10-The-force-paths-of-the-Rayleigh-Arena.jpg
2021-10-29 12:05
29K
Fig9-11-A-stadium-in-Nanjing-China-150x150.jpg
2021-10-29 12:06
9.7K
Fig9-11-A-stadium-in-Nanjing-China-300x225.jpg
2021-10-29 12:06
17K
Fig9-11-A-stadium-in-Nanjing-China.jpg
2021-10-29 12:06
25K
Fig9-12-Zhejiang-Dragon-Sports-Centre-150x150.jpg
2021-10-29 12:09
6.3K
Fig9-12-Zhejiang-Dragon-Sports-Centre-300x205.jpg
2021-10-29 12:09
16K
Fig9-12-Zhejiang-Dragon-Sports-Centre.jpg
2021-10-29 12:09
35K
Fig9-13a-Bending-moment-due-to-cable-forces-150x150.jpg
2021-10-29 12:09
3.3K
Fig9-13a-Bending-moment-due-to-cable-forces-300x269.jpg
2021-10-29 12:09
8.0K
Fig9-13a-Bending-moment-due-to-cable-forces.jpg
2021-10-29 12:09
12K
Fig9-13b-Bending-moment-due-to-compression-forces-150x150.jpg
2021-10-29 12:09
3.2K
Fig9-13b-Bending-moment-due-to-compression-forces-300x266.jpg
2021-10-29 12:09
7.4K
Fig9-13b-Bending-moment-due-to-compression-forces.jpg
2021-10-29 12:09
13K
Fig9-13c-Bending-moment-due-to-cable-forces-and-compression-forces-150x150.jpg
2021-10-29 12:09
3.8K
Fig9-13c-Bending-moment-due-to-cable-forces-and-compression-forces-300x266.jpg
2021-10-29 12:09
8.8K
Fig9-13c-Bending-moment-due-to-cable-forces-and-compression-forces.jpg
2021-10-29 12:09
15K
Fig9-14-A-cable-stayed-bridge-in-Lisbon-150x150.jpg
2021-10-29 12:16
14K
Fig9-14-A-cable-stayed-bridge-in-Lisbon-300x225.jpg
2021-10-29 12:16
25K
Fig9-14-A-cable-stayed-bridge-in-Lisbon-512x372.jpg
2021-10-29 12:16
62K
Fig9-14-A-cable-stayed-bridge-in-Lisbon.jpg
2021-10-29 12:16
54K
Fig9-15-A-floor-structure-experiencing-excessive-vibration-150x150.jpg
2021-10-29 12:17
5.7K
Fig9-15-A-floor-structure-experiencing-excessive-vibration-300x196.jpg
2021-10-29 12:17
12K
Fig9-15-A-floor-structure-experiencing-excessive-vibration-672x372.jpg
2021-10-29 12:17
39K
Fig9-15-A-floor-structure-experiencing-excessive-vibration.jpg
2021-10-29 12:17
50K
Fig10-5a-Two-pinned-ends-150x150.jpg
2021-10-29 12:30
10K
Fig10-5a-Two-pinned-ends-225x300.jpg
2021-10-29 12:30
17K
Fig10-5a-Two-pinned-ends-360x372.jpg
2021-10-29 12:30
25K
Fig10-5a-Two-pinned-ends.jpg
2021-10-29 12:30
27K
Fig10-5b-Two-fixed-ends-150x150.jpg
2021-10-29 12:30
9.8K
Fig10-5b-Two-fixed-ends-225x300.jpg
2021-10-29 12:30
16K
Fig10-5b-Two-fixed-ends-360x372.jpg
2021-10-29 12:30
24K
Fig10-5b-Two-fixed-ends.jpg
2021-10-29 12:30
27K
Fig10-5c-Two-pinned-ends-with-a-lateral-support-at-the-middle-of-the-ruler-150x150.jpg
2021-10-29 12:30
9.7K
Fig10-5c-Two-pinned-ends-with-a-lateral-support-at-the-middle-of-the-ruler-225x300.jpg
2021-10-29 12:30
17K
Fig10-5c-Two-pinned-ends-with-a-lateral-support-at-the-middle-of-the-ruler-360x372.jpg
2021-10-29 12:30
26K
Fig10-5c-Two-pinned-ends-with-a-lateral-support-at-the-middle-of-the-ruler.jpg
2021-10-29 12:30
29K
Fig10-6a-Four-columns-with-different-boundary-conditions-150x150.jpg
2021-10-29 15:56
9.1K
Fig10-6a-Four-columns-with-different-boundary-conditions-300x225.jpg
2021-10-29 15:56
15K
Fig10-6a-Four-columns-with-different-boundary-conditions.jpg
2021-10-29 15:56
27K
Fig10-6b-Critical-loads-and-buckling-shapes-150x150.jpg
2021-10-29 15:56
9.6K
Fig10-6b-Critical-loads-and-buckling-shapes-300x225.jpg
2021-10-29 15:56
16K
Fig10-6b-Critical-loads-and-buckling-shapes.jpg
2021-10-29 15:56
29K
Fig10-7a-Lateral-torsional-buckling-behaviour-150x150.jpg
2021-10-29 16:01
10K
Fig10-7a-Lateral-torsional-buckling-behaviour-225x300.jpg
2021-10-29 16:01
16K
Fig10-7a-Lateral-torsional-buckling-behaviour-360x372.jpg
2021-10-29 16:01
24K
Fig10-7a-Lateral-torsional-buckling-behaviour.jpg
2021-10-29 16:01
25K
Fig10-7b-10-7-Lateral-torsional-buckling-behaviour-150x150.jpg
2021-10-29 16:01
11K
Fig10-7b-10-7-Lateral-torsional-buckling-behaviour-225x300.jpg
2021-10-29 16:01
17K
Fig10-7b-10-7-Lateral-torsional-buckling-behaviour-360x372.jpg
2021-10-29 16:01
25K
Fig10-7b-10-7-Lateral-torsional-buckling-behaviour.jpg
2021-10-29 16:01
27K
Fig10-7c-Lateral-torsional-buckling-behaviour-150x150.jpg
2021-10-29 16:01
10K
Fig10-7c-Lateral-torsional-buckling-behaviour-225x300.jpg
2021-10-29 16:01
16K
Fig10-7c-Lateral-torsional-buckling-behaviour-360x372.jpg
2021-10-29 16:01
24K
Fig10-7c-Lateral-torsional-buckling-behaviour.jpg
2021-10-29 16:01
26K
Fig10-8a-Buckling-failure-of-empty-drinks-cans-150x150.jpg
2021-10-29 16:04
4.0K
Fig10-8a-Buckling-failure-of-empty-drinks-cans-300x225.jpg
2021-10-29 16:04
8.5K
Fig10-8a-Buckling-failure-of-empty-drinks-cans-615x372.jpg
2021-10-29 16:04
23K
Fig10-8a-Buckling-failure-of-empty-drinks-cans.jpg
2021-10-29 16:04
23K
Fig10-8b-Buckling-failure-of-empty-drinks-cans-150x150.jpg
2021-10-29 16:04
6.3K
Fig10-8b-Buckling-failure-of-empty-drinks-cans-225x300.jpg
2021-10-29 16:04
16K
Fig10-8b-Buckling-failure-of-empty-drinks-cans-308x372.jpg
2021-10-29 16:04
28K
Fig10-8b-Buckling-failure-of-empty-drinks-cans.jpg
2021-10-29 16:04
26K
Fig14-9-Inclinly-Suspended-Wooden-Bridge-1-150x150.jpg
2021-10-21 15:51
18K
Fig14-9-Inclinly-Suspended-Wooden-Bridge-1-300x225.jpg
2021-10-21 15:51
32K
Fig14-9-Inclinly-Suspended-Wooden-Bridge-1.jpg
2021-10-21 15:51
64K
Fig14-9-Inclinly-Suspended-Wooden-Bridge-2-150x150.jpg
2021-10-21 15:51
15K
Fig14-9-Inclinly-Suspended-Wooden-Bridge-2-225x300.jpg
2021-10-21 15:51
28K
Fig14-9-Inclinly-Suspended-Wooden-Bridge-2-360x372.jpg
2021-10-21 15:51
53K
Fig14-9-Inclinly-Suspended-Wooden-Bridge-2.jpg
2021-10-21 15:51
56K
Fig14-10-A-Translational-Suspended-Floor-150x150.jpg
2021-10-21 15:53
5.7K
Fig14-10-A-Translational-Suspended-Floor-300x170.jpg
2021-10-21 15:53
9.7K
Fig14-10-A-Translational-Suspended-Floor.jpg
2021-10-21 15:53
25K
Fig14-11-The-Foucault-Pendulum-150x150.jpg
2021-10-21 15:55
11K
Fig14-11-The-Foucault-Pendulum-225x300.jpg
2021-10-21 15:55
19K
Fig14-11-The-Foucault-Pendulum-360x372.jpg
2021-10-21 15:55
29K
Fig14-11-The-Foucault-Pendulum.jpg
2021-10-21 15:55
30K
Fig15-8-Free-vibration-and-natural-frequency-of-a-pendulum-system-150x150.jpg
2021-10-22 08:57
9.3K
Fig15-8-Free-vibration-and-natural-frequency-of-a-pendulum-system-300x225.jpg
2021-10-22 08:57
17K
Fig15-8-Free-vibration-and-natural-frequency-of-a-pendulum-system-512x372.jpg
2021-10-22 08:57
43K
Fig15-8-Free-vibration-and-natural-frequency-of-a-pendulum-system.jpg
2021-10-22 08:57
38K
Fig15-9a-Applying-initial-displacements-150x150.jpg
2021-10-22 09:11
5.1K
Fig15-9a-Applying-initial-displacements-300x254.jpg
2021-10-22 09:11
13K
Fig15-9a-Applying-initial-displacements.jpg
2021-10-22 09:11
20K
Fig15-10-Demonstration-of-an-overcritically-damped-system-150x150.jpg
2021-10-22 09:16
12K
Fig15-10-Demonstration-of-an-overcritically-damped-system-225x300.jpg
2021-10-22 09:16
19K
Fig15-10-Demonstration-of-an-overcritically-damped-system.jpg
2021-10-22 09:16
20K
Fig15-11a-The-first-mode-of-vibration-150x150.jpg
2021-10-22 09:37
7.2K
Fig15-11a-The-first-mode-of-vibration-225x300.jpg
2021-10-22 09:37
12K
Fig15-11a-The-first-mode-of-vibration-308x372.jpg
2021-10-22 09:37
17K
Fig15-11a-The-first-mode-of-vibration.jpg
2021-10-22 09:37
16K
Fig15-11b-the-second-mode-of-vibration-150x150.jpg
2021-10-22 09:37
7.7K
Fig15-11b-the-second-mode-of-vibration-225x300.jpg
2021-10-22 09:37
12K
Fig15-11b-the-second-mode-of-vibration-308x372.jpg
2021-10-22 09:37
17K
Fig15-11b-the-second-mode-of-vibration.jpg
2021-10-22 09:37
17K
Fig15-12a-The-first-mode-of-vibration-150x150.jpg
2021-10-22 09:41
8.4K
Fig15-12a-The-first-mode-of-vibration-225x300.jpg
2021-10-22 09:41
13K
Fig15-12a-The-first-mode-of-vibration-308x372.jpg
2021-10-22 09:41
18K
Fig15-12a-The-first-mode-of-vibration.jpg
2021-10-22 09:41
23K
Fig15-12b-The-second-mode-of-vibration-150x150.jpg
2021-10-22 09:41
8.1K
Fig15-12b-The-second-mode-of-vibration-225x300.jpg
2021-10-22 09:41
13K
Fig15-12b-The-second-mode-of-vibration-384x372.jpg
2021-10-22 09:41
20K
Fig15-12b-The-second-mode-of-vibration.jpg
2021-10-22 09:41
28K
Fig15-13a-The-first-mode-of-vibration-150x150.jpg
2021-10-22 09:44
14K
Fig15-13a-The-first-mode-of-vibration-300x225.jpg
2021-10-22 09:44
25K
Fig15-13a-The-first-mode-of-vibration.jpg
2021-10-22 09:44
36K
Fig15-13b-The-second-mode-of-vibration-150x150.jpg
2021-10-22 09:44
13K
Fig15-13b-The-second-mode-of-vibration-300x225.jpg
2021-10-22 09:44
21K
Fig15-13b-The-second-mode-of-vibration.jpg
2021-10-22 09:44
21K
Fig15-14a-A-musical-box-150x150.jpg
2021-10-22 10:19
11K
Fig15-14a-A-musical-box-300x225.jpg
2021-10-22 10:19
19K
Fig15-14a-A-musical-box.jpg
2021-10-22 10:19
28K
Fig15-14b-The-core-of-the-musical-box-150x150.jpg
2021-10-22 10:19
13K
Fig15-14b-The-core-of-the-musical-box-300x225.jpg
2021-10-22 10:19
20K
Fig15-14b-The-core-of-the-musical-box.jpg
2021-10-22 10:19
21K
Fig15-15a-Cantilever-beams-with-different-lengths-and-sections-in-the-music-box-150x150.jpg
2021-10-22 10:19
8.0K
Fig15-15a-Cantilever-beams-with-different-lengths-and-sections-in-the-music-box-300x202.jpg
2021-10-22 10:19
15K
Fig15-15a-Cantilever-beams-with-different-lengths-and-sections-in-the-music-box-572x372.jpg
2021-10-22 10:19
45K
Fig15-15a-Cantilever-beams-with-different-lengths-and-sections-in-the-music-box.jpg
2021-10-22 10:19
40K
Fig15-15b-Cantilever-beams-with-different-lengths-and-sections-in-the-music-box-150x150.jpg
2021-10-22 10:19
8.3K
Fig15-15b-Cantilever-beams-with-different-lengths-and-sections-in-the-music-box-300x242.jpg
2021-10-22 10:19
18K
Fig15-15b-Cantilever-beams-with-different-lengths-and-sections-in-the-music-box-672x372.jpg
2021-10-22 10:19
54K
Fig15-15b-Cantilever-beams-with-different-lengths-and-sections-in-the-music-box-744x576.jpg
2021-10-22 10:19
93K
Fig15-15b-Cantilever-beams-with-different-lengths-and-sections-in-the-music-box.jpg
2021-10-22 10:19
84K
Fig15-16-The-keyboard-of-a-piano-150x150.jpg
2021-10-22 10:19
14K
Fig15-16-The-keyboard-of-a-piano-300x225.jpg
2021-10-22 10:19
23K
Fig15-16-The-keyboard-of-a-piano-512x372.jpg
2021-10-22 10:19
48K
Fig15-16-The-keyboard-of-a-piano.jpg
2021-10-22 10:19
43K
Fig15-17-The-test-building-150x150.jpg
2021-10-22 11:01
7.5K
Fig15-17-The-test-building-242x300.jpg
2021-10-22 11:01
21K
Fig15-17-The-test-building-508x372.jpg
2021-10-22 11:01
54K
Fig15-17-The-test-building-508x576.jpg
2021-10-22 11:01
81K
Fig15-17-The-test-building.jpg
2021-10-22 11:01
73K
Fig15-19-A-multiflare-stack-150x150.jpg
2021-10-22 11:03
9.5K
Fig15-19-A-multiflare-stack-192x300.jpg
2021-10-22 11:03
15K
Fig15-19-A-multiflare-stack-438x372.jpg
2021-10-22 11:03
33K
Fig15-19-A-multiflare-stack-438x576.jpg
2021-10-22 11:03
47K
Fig15-19-A-multiflare-stack.jpg
2021-10-22 11:03
53K
Fig15-20-The-London-Eye-150x150.jpg
2021-10-22 11:05
5.8K
Fig15-20-The-London-Eye-225x300.jpg
2021-10-22 11:05
14K
Fig15-20-The-London-Eye-384x372.jpg
2021-10-22 11:05
39K
Fig15-20-The-London-Eye.jpg
2021-10-22 11:05
38K
Fig16-9-The-model-of-a-SDOF-system-150x150.jpg
2021-10-22 13:03
2.4K
Fig16-9-The-model-of-a-SDOF-system-203x300.jpg
2021-10-22 13:03
5.6K
Fig16-9-The-model-of-a-SDOF-system-263x372.jpg
2021-10-22 13:03
7.7K
Fig16-9-The-model-of-a-SDOF-system.jpg
2021-10-22 13:03
7.9K
Fig16-10a-A-medical-shaker-and-two-cantilevers-150x150.jpg
2021-10-22 13:05
9.7K
Fig16-10a-A-medical-shaker-and-two-cantilevers-300x225.jpg
2021-10-22 13:05
15K
Fig16-10a-A-medical-shaker-and-two-cantilevers.jpg
2021-10-22 13:05
27K
Fig16-10b-Simulated-shaking-table-test-150x150.jpg
2021-10-22 13:05
11K
Fig16-10b-Simulated-shaking-table-test-225x300.jpg
2021-10-22 13:05
15K
Fig16-10b-Simulated-shaking-table-test-308x372.jpg
2021-10-22 13:05
21K
Fig16-10b-Simulated-shaking-table-test.jpg
2021-10-22 13:05
25K
Fig16-11a-The-London-Millennium-Footbridge-150x150.jpg
2021-10-22 15:57
11K
Fig16-11a-The-London-Millennium-Footbridge-300x225.jpg
2021-10-22 15:57
20K
Fig16-11a-The-London-Millennium-Footbridge.jpg
2021-10-22 15:57
30K
Fig16-11b-The-London-Millennium-Footbridge-150x150.jpg
2021-10-22 15:57
12K
Fig16-11b-The-London-Millennium-Footbridge-300x225.jpg
2021-10-22 15:57
20K
Fig16-11b-The-London-Millennium-Footbridge.jpg
2021-10-22 15:57
29K
Fig16-12-Periods-of-walking-forces-150x150.jpg
2021-10-22 15:59
2.8K
Fig16-12-Periods-of-walking-forces-300x169.jpg
2021-10-22 15:59
5.7K
Fig16-12-Periods-of-walking-forces.jpg
2021-10-22 15:59
11K
Fig16-13-Distribution-of-frequency-of-walking-loads-in-the-vertical-direction-150x150.jpg
2021-10-22 16:01
3.9K
Fig16-13-Distribution-of-frequency-of-walking-loads-in-the-vertical-direction-300x171.jpg
2021-10-22 16:01
7.6K
Fig16-13-Distribution-of-frequency-of-walking-loads-in-the-vertical-direction-672x372.jpg
2021-10-22 16:01
24K
Fig16-13-Distribution-of-frequency-of-walking-loads-in-the-vertical-direction-768x437.jpg
2021-10-22 16:01
30K
Fig16-13-Distribution-of-frequency-of-walking-loads-in-the-vertical-direction.jpg
2021-10-22 16:01
49K
Fig16-14-At-a-pop-concert-150x150.jpg
2021-10-25 11:16
13K
Fig16-14-At-a-pop-concert-300x212.jpg
2021-10-25 11:16
23K
Fig16-14-At-a-pop-concert.jpg
2021-10-25 11:16
49K
Fig16-15-Structural-response-to-the-music-beat-frequency-at-a-pop-concert-150x150.jpg
2021-10-25 11:17
3.3K
Fig16-15-Structural-response-to-the-music-beat-frequency-at-a-pop-concert-300x171.jpg
2021-10-25 11:17
7.0K
Fig16-15-Structural-response-to-the-music-beat-frequency-at-a-pop-concert.jpg
2021-10-25 11:17
15K
Fig16-17-Frequency-spectrum-in-one-main-direction-of-the-building-shown-in-Fig.-15-17-150x150.jpg
2021-10-25 11:24
3.7K
Fig16-17-Frequency-spectrum-in-one-main-direction-of-the-building-shown-in-Fig.-15-17-300x209.jpg
2021-10-25 11:24
10K
Fig16-17-Frequency-spectrum-in-one-main-direction-of-the-building-shown-in-Fig.-15-17.jpg
2021-10-25 11:24
14K
Fig16-18a-Replica-bronze-washbowl-150x150.jpg
2021-10-25 11:34
12K
Fig16-18a-Replica-bronze-washbowl-300x225.jpg
2021-10-25 11:34
22K
Fig16-18a-Replica-bronze-washbowl.jpg
2021-10-25 11:34
34K
Fig16-18b-Four-fishes-cast-into-the-bottom-of-the-bowl-150x150.jpg
2021-10-25 11:34
12K
Fig16-18b-Four-fishes-cast-into-the-bottom-of-the-bowl-300x225.jpg
2021-10-25 11:34
23K
Fig16-18b-Four-fishes-cast-into-the-bottom-of-the-bowl.jpg
2021-10-25 11:34
38K
Fig16-18c-Ripple-on-water-surface-150x150.jpg
2021-10-25 11:34
11K
Fig16-18c-Ripple-on-water-surface-300x225.jpg
2021-10-25 11:34
20K
Fig16-18c-Ripple-on-water-surface.jpg
2021-10-25 11:34
28K
Fig16-18d-Water-jumping-out-vertically-150x150.jpg
2021-10-25 11:34
11K
Fig16-18d-Water-jumping-out-vertically-300x225.jpg
2021-10-25 11:34
19K
Fig16-18d-Water-jumping-out-vertically.jpg
2021-10-25 11:34
26K
Fig17-2a-Effect-of-the-damping-provided-by-oil-150x150.jpg
2021-10-25 12:34
14K
Fig17-2a-Effect-of-the-damping-provided-by-oil-225x300.jpg
2021-10-25 12:34
20K
Fig17-2a-Effect-of-the-damping-provided-by-oil-308x372.jpg
2021-10-25 12:34
27K
Fig17-2a-Effect-of-the-damping-provided-by-oil.jpg
2021-10-25 12:34
32K
Fig17-2b-Effect-of-the-damping-provided-by-oil-150x150.jpg
2021-10-25 12:34
11K
Fig17-2b-Effect-of-the-damping-provided-by-oil-225x300.jpg
2021-10-25 12:34
19K
Fig17-2b-Effect-of-the-damping-provided-by-oil-360x372.jpg
2021-10-25 12:34
28K
Fig17-2b-Effect-of-the-damping-provided-by-oil.jpg
2021-10-25 12:34
30K
Fig17-3a-Effect-of-damping-on-sound-transmission-113x300.jpg
2021-10-25 12:37
6.1K
Fig17-3a-Effect-of-damping-on-sound-transmission-150x150.jpg
2021-10-25 12:37
4.0K
Fig17-3a-Effect-of-damping-on-sound-transmission-240x372.jpg
2021-10-25 12:37
8.3K
Fig17-3a-Effect-of-damping-on-sound-transmission-240x576.jpg
2021-10-25 12:37
11K
Fig17-3a-Effect-of-damping-on-sound-transmission.jpg
2021-10-25 12:37
17K
Fig17-3b-Effect-of-damping-on-sound-transmission-113x300.jpg
2021-10-25 12:37
6.5K
Fig17-3b-Effect-of-damping-on-sound-transmission-150x150.jpg
2021-10-25 12:37
3.9K
Fig17-3b-Effect-of-damping-on-sound-transmission-300x372.jpg
2021-10-25 12:37
11K
Fig17-3b-Effect-of-damping-on-sound-transmission-300x576.jpg
2021-10-25 12:37
14K
Fig17-3b-Effect-of-damping-on-sound-transmission.jpg
2021-10-25 12:37
25K
Fig17-4-Extraction-of-natural-frequency-and-damping-ratio-from-free-vibration-records-Ellis-B.-R.-and-Ji-T.-1996-1-150x150.jpg
2021-10-25 12:42
4.1K
Fig17-4-Extraction-of-natural-frequency-and-damping-ratio-from-free-vibration-records-Ellis-B.-R.-and-Ji-T.-1996-1-300x194.jpg
2021-10-25 12:42
9.5K
Fig17-4-Extraction-of-natural-frequency-and-damping-ratio-from-free-vibration-records-Ellis-B.-R.-and-Ji-T.-1996-1.jpg
2021-10-25 12:42
18K
Fig17-4-Extraction-of-natural-frequency-and-damping-ratio-from-free-vibration-records-Ellis-B.-R.-and-Ji-T.-1996-150x150.jpg
2021-10-25 12:42
4.1K
Fig17-4-Extraction-of-natural-frequency-and-damping-ratio-from-free-vibration-records-Ellis-B.-R.-and-Ji-T.-1996-300x194.jpg
2021-10-25 12:42
9.5K
Fig17-4-Extraction-of-natural-frequency-and-damping-ratio-from-free-vibration-records-Ellis-B.-R.-and-Ji-T.-1996.jpg
2021-10-25 12:42
18K
Fig17-5a-Damping-devices-installed-on-the-London-Millennium-Footbridge-150x150.jpg
2021-10-25 15:36
13K
Fig17-5a-Damping-devices-installed-on-the-London-Millennium-Footbridge-300x225.jpg
2021-10-25 15:36
24K
Fig17-5a-Damping-devices-installed-on-the-London-Millennium-Footbridge.jpg
2021-10-25 15:36
36K
Fig17-5b-Damping-devices-installed-on-the-London-Millennium-Footbridge-150x150.jpg
2021-10-25 15:36
12K
Fig17-5b-Damping-devices-installed-on-the-London-Millennium-Footbridge-300x225.jpg
2021-10-25 15:36
21K
Fig17-5b-Damping-devices-installed-on-the-London-Millennium-Footbridge.jpg
2021-10-25 15:36
30K
Fig17-6-Deformation-of-bonded-layers-150x150.jpg
2021-10-25 15:44
5.0K
Fig17-6-Deformation-of-bonded-layers-300x294.jpg
2021-10-25 15:44
13K
Fig17-6-Deformation-of-bonded-layers.jpg
2021-10-25 15:44
17K
Fig17-7-The-test-floor-Courtesy-of-Dr-B-Ellis-150x150.jpg
2021-10-25 15:44
4.6K
Fig17-7-The-test-floor-Courtesy-of-Dr-B-Ellis-300x197.jpg
2021-10-25 15:44
10K
Fig17-7-The-test-floor-Courtesy-of-Dr-B-Ellis-602x372.jpg
2021-10-25 15:44
35K
Fig17-7-The-test-floor-Courtesy-of-Dr-B-Ellis.jpg
2021-10-25 15:44
30K
Fig17-8-Floor-vibration-induced-by-walking-loads-with-and-without-the-damping-layer-Courtesy-of-Dr-B-Ellis-150x150.jpg
2021-10-25 15:44
5.2K
Fig17-8-Floor-vibration-induced-by-walking-loads-with-and-without-the-damping-layer-Courtesy-of-Dr-B-Ellis-300x234.jpg
2021-10-25 15:44
13K
Fig17-8-Floor-vibration-induced-by-walking-loads-with-and-without-the-damping-layer-Courtesy-of-Dr-B-Ellis-672x372.jpg
2021-10-25 15:44
35K
Fig17-8-Floor-vibration-induced-by-walking-loads-with-and-without-the-damping-layer-Courtesy-of-Dr-B-Ellis-768x599.jpg
2021-10-25 15:44
55K
Fig17-8-Floor-vibration-induced-by-walking-loads-with-and-without-the-damping-layer-Courtesy-of-Dr-B-Ellis-881x576.jpg
2021-10-25 15:44
62K
Fig17-8-Floor-vibration-induced-by-walking-loads-with-and-without-the-damping-layer-Courtesy-of-Dr-B-Ellis.jpg
2021-10-25 15:44
70K
Fig18-5-Comparison-of-vibration-with-and-without-a-tuned-mass-damper-150x150.jpg
2021-10-25 15:52
3.9K
Fig18-5-Comparison-of-vibration-with-and-without-a-tuned-mass-damper.jpg
2021-10-25 15:52
8.1K
Fig18-6-Comparison-of-vibration-with-and-without-the-Effect-of-liquid-150x150.jpg
2021-10-25 15:55
9.7K
Fig18-6-Comparison-of-vibration-with-and-without-the-Effect-of-liquid-300x225.jpg
2021-10-25 15:55
15K
Fig18-6-Comparison-of-vibration-with-and-without-the-Effect-of-liquid-615x372.jpg
2021-10-25 15:55
40K
Fig18-6-Comparison-of-vibration-with-and-without-the-Effect-of-liquid.jpg
2021-10-25 15:55
39K
Fig18-7-Altering-structural-frequency-using-base-isolation-150x150.jpg
2021-10-25 15:58
8.1K
Fig18-7-Altering-structural-frequency-using-base-isolation-225x300.jpg
2021-10-25 15:58
13K
Fig18-7-Altering-structural-frequency-using-base-isolation-384x372.jpg
2021-10-25 15:58
22K
Fig18-7-Altering-structural-frequency-using-base-isolation.jpg
2021-10-25 15:58
24K
Fig18-8-Tyres-used-for-base-isolation-150x150.jpg
2021-10-26 08:48
3.8K
Fig18-8-Tyres-used-for-base-isolation-196x300.jpg
2021-10-26 08:48
9.1K
Fig18-8-Tyres-used-for-base-isolation-339x372.jpg
2021-10-26 08:48
17K
Fig18-8-Tyres-used-for-base-isolation.jpg
2021-10-26 08:48
21K
Fig18-9a-Front-View-150x150.jpg
2021-10-26 08:52
5.9K
Fig18-9a-Front-View-225x300.jpg
2021-10-26 08:52
14K
Fig18-9a-Front-View-384x372.jpg
2021-10-26 08:52
39K
Fig18-9a-Front-View.jpg
2021-10-26 08:52
38K
Fig18-9b-A-tuned-mass-damper-placed-inside-of-a-tube-150x150.jpg
2021-10-26 08:52
6.1K
Fig18-9b-A-tuned-mass-damper-placed-inside-of-a-tube-300x279.jpg
2021-10-26 08:52
18K
Fig18-9b-A-tuned-mass-damper-placed-inside-of-a-tube.jpg
2021-10-26 08:52
20K
Fig18-10-A-tuned-mass-damper-in-a-tube-of-the-London-Eye-150x111.jpg
2021-10-26 08:58
2.5K
Fig18-10-A-tuned-mass-damper-in-a-tube-of-the-London-Eye-300x46.jpg
2021-10-26 08:58
2.6K
Fig18-10-A-tuned-mass-damper-in-a-tube-of-the-London-Eye-672x111.jpg
2021-10-26 08:58
6.8K
Fig18-10-A-tuned-mass-damper-in-a-tube-of-the-London-Eye.jpg
2021-10-26 08:58
8.9K
Fig18-11-Two-tuned-mass-dampers-under-the-deck-of-the-London-Millennium-Footbridge-150x150.jpg
2021-10-26 09:01
11K
Fig18-11-Two-tuned-mass-dampers-under-the-deck-of-the-London-Millennium-Footbridge-300x225.jpg
2021-10-26 09:01
20K
Fig18-11-Two-tuned-mass-dampers-under-the-deck-of-the-London-Millennium-Footbridge.jpg
2021-10-26 09:01
28K
Fig18-A1a-The-set-up-of-the-test-150x150.jpg
2021-10-25 16:01
6.8K
Fig18-A1a-The-set-up-of-the-test-225x300.jpg
2021-10-25 16:01
12K
Fig18-A1a-The-set-up-of-the-test-360x372.jpg
2021-10-25 16:01
20K
Fig18-A1a-The-set-up-of-the-test.jpg
2021-10-25 16:01
46K
Fig18-A1b-The-two-structures-150x150.jpg
2021-10-25 16:01
9.4K
Fig18-A1b-The-two-structures-300x225.jpg
2021-10-25 16:01
13K
Fig18-A1b-The-two-structures.jpg
2021-10-25 16:01
43K
Fig19-6a-An-empty-beam-150x150.jpg
2021-10-26 09:07
6.3K
Fig19-6a-An-empty-beam-300x198.jpg
2021-10-26 09:07
14K
Fig19-6a-An-empty-beam-600x372.jpg
2021-10-26 09:07
42K
Fig19-6a-An-empty-beam.jpg
2021-10-26 09:07
36K
Fig19-6b-A-person-standing-on-the-beam-150x150.jpg
2021-10-26 09:07
6.4K
Fig19-6b-A-person-standing-on-the-beam-300x210.jpg
2021-10-26 09:07
15K
Fig19-6b-A-person-standing-on-the-beam-672x372.jpg
2021-10-26 09:07
46K
Fig19-6b-A-person-standing-on-the-beam.jpg
2021-10-26 09:07
56K
Fig19-7a-Free-vibration-of-the-beam-alone-150x150.jpg
2021-10-26 09:10
1.5K
Fig19-7a-Free-vibration-of-the-beam-alone-300x185.jpg
2021-10-26 09:10
5.3K
Fig19-7a-Free-vibration-of-the-beam-alone.jpg
2021-10-26 09:10
19K
Fig19-7b-Response-spectrum-of-the-beam-alone-150x150.jpg
2021-10-26 09:17
1.9K
Fig19-7b-Response-spectrum-of-the-beam-alone-300x195.jpg
2021-10-26 09:17
4.2K
Fig19-7b-Response-spectrum-of-the-beam-alone-664x372.jpg
2021-10-26 09:17
12K
Fig19-7b-Response-spectrum-of-the-beam-alone.jpg
2021-10-26 09:17
22K
Fig19-7c-Free-vibration-of-a-human-beam-system-150x150.jpg
2021-10-26 09:10
1.3K
Fig19-7c-Free-vibration-of-a-human-beam-system-300x185.jpg
2021-10-26 09:10
4.5K
Fig19-7c-Free-vibration-of-a-human-beam-system.jpg
2021-10-26 09:10
15K
Fig19-7d-Response-spectrum-of-the-human-beam-system-150x150.jpg
2021-10-26 09:17
2.5K
Fig19-7d-Response-spectrum-of-the-human-beam-system-300x197.jpg
2021-10-26 09:17
5.9K
Fig19-7d-Response-spectrum-of-the-human-beam-system-664x372.jpg
2021-10-26 09:17
18K
Fig19-7d-Response-spectrum-of-the-human-beam-system.jpg
2021-10-26 09:17
29K
Fig19-8a-A-SDOF-test-rig-150x150.jpg
2021-10-26 09:29
5.1K
Fig19-8a-A-SDOF-test-rig-300x208.jpg
2021-10-26 09:29
13K
Fig19-8a-A-SDOF-test-rig-625x372.jpg
2021-10-26 09:29
45K
Fig19-8a-A-SDOF-test-rig.jpg
2021-10-26 09:29
44K
Fig19-8b-A-person-standing-on-the-test-rig-150x150.jpg
2021-10-26 09:29
5.6K
Fig19-8b-A-person-standing-on-the-test-rig-300x204.jpg
2021-10-26 09:29
12K
Fig19-8b-A-person-standing-on-the-test-rig-625x372.jpg
2021-10-26 09:29
40K
Fig19-8b-A-person-standing-on-the-test-rig.jpg
2021-10-26 09:29
37K
Fig19-10-The-North-Stand-Twickenham-150x150.jpg
2021-10-26 09:38
10K
Fig19-10-The-North-Stand-Twickenham-300x206.jpg
2021-10-26 09:38
20K
Fig19-10-The-North-Stand-Twickenham.jpg
2021-10-26 09:38
48K
Fig19-11a-Without-spectators-150x150.jpg
2021-10-26 09:38
1.9K
Fig19-11a-Without-spectators-300x202.jpg
2021-10-26 09:38
4.5K
Fig19-11a-Without-spectators-612x372.jpg
2021-10-26 09:38
16K
Fig19-11a-Without-spectators.jpg
2021-10-26 09:38
16K
Fig19-11b-With-spectators-150x150.jpg
2021-10-26 09:38
2.7K
Fig19-11b-With-spectators-300x205.jpg
2021-10-26 09:38
6.2K
Fig19-11b-With-spectators-604x372.jpg
2021-10-26 09:38
18K
Fig19-11b-With-spectators.jpg
2021-10-26 09:38
20K
Fig19-12-A-grandstand-full-of-spectators-150x150.jpg
2021-10-26 09:42
7.9K
Fig19-12-A-grandstand-full-of-spectators-300x212.jpg
2021-10-26 09:42
21K
Fig19-12-A-grandstand-full-of-spectators-672x372.jpg
2021-10-26 09:42
79K
Fig19-12-A-grandstand-full-of-spectators.jpg
2021-10-26 09:42
82K
Fig19-13-Indirect-measurement-of-the-natural-frequency-of-a-chicken-150x150.jpg
2021-10-26 09:47
5.3K
Fig19-13-Indirect-measurement-of-the-natural-frequency-of-a-chicken-300x176.jpg
2021-10-26 09:47
10K
Fig19-13-Indirect-measurement-of-the-natural-frequency-of-a-chicken.jpg
2021-10-26 09:47
36K
Folding-bag-hanger-Why-it-works-pdf-106x150.jpg
2021-10-20 14:45
7.0K
Folding-bag-hanger-Why-it-works-pdf-212x300.jpg
2021-10-20 14:45
17K
Folding-bag-hanger-Why-it-works-pdf-724x1024.jpg
2021-10-20 14:45
116K
Folding-bag-hanger-Why-it-works-pdf.jpg
2021-10-20 14:45
232K
Folding-bag-hanger-Why-it-works.pdf
2021-10-20 14:45
492K
Frequency-distribution-of-the-210-modern-songs-150x150.jpg
2021-10-25 11:17
4.1K
Frequency-distribution-of-the-210-modern-songs-300x162.jpg
2021-10-25 11:17
5.6K
Frequency-distribution-of-the-210-modern-songs-672x372.jpg
2021-10-25 11:17
20K
Frequency-distribution-of-the-210-modern-songs-768x414.jpg
2021-10-25 11:17
25K
Frequency-distribution-of-the-210-modern-songs.jpg
2021-10-25 11:17
41K
Good-Use-of-Cracks-pdf-106x150.jpg
2021-10-20 15:26
7.3K
Good-Use-of-Cracks-pdf-212x300.jpg
2021-10-20 15:26
17K
Good-Use-of-Cracks-pdf-724x1024.jpg
2021-10-20 15:26
112K
Good-Use-of-Cracks-pdf.jpg
2021-10-20 15:26
219K
Good-Use-of-Cracks.pdf
2021-10-20 15:26
262K
HEELLESS-SHOES-pdf-106x150.jpg
2021-10-20 14:45
6.9K
HEELLESS-SHOES-pdf-212x300.jpg
2021-10-20 14:45
18K
HEELLESS-SHOES-pdf-724x1024.jpg
2021-10-20 14:45
146K
HEELLESS-SHOES-pdf.jpg
2021-10-20 14:45
302K
HEELLESS-SHOES.pdf
2021-10-20 14:45
351K
Impact-Resistance-Fibre-Reinforcement-pdf-106x150.jpg
2021-10-20 15:44
6.9K
Impact-Resistance-Fibre-Reinforcement-pdf-212x300.jpg
2021-10-20 15:44
16K
Impact-Resistance-Fibre-Reinforcement-pdf-724x1024.jpg
2021-10-20 15:44
116K
Impact-Resistance-Fibre-Reinforcement-pdf.jpg
2021-10-20 15:44
237K
Impact-Resistance-Fibre-Reinforcement.pdf
2021-10-20 15:44
446K
Increasing-Stiffness-of-a-Bookshelf-pdf-106x150.jpg
2021-10-20 15:27
6.9K
Increasing-Stiffness-of-a-Bookshelf-pdf-212x300.jpg
2021-10-20 15:27
16K
Increasing-Stiffness-of-a-Bookshelf-pdf-724x1024.jpg
2021-10-20 15:27
112K
Increasing-Stiffness-of-a-Bookshelf-pdf.jpg
2021-10-20 15:27
240K
Increasing-Stiffness-of-a-Bookshelf.pdf
2021-10-20 15:27
261K
Increasing-the-Stiffness-creating-Self-Balancing-structures-pdf-106x150.jpg
2021-10-20 15:31
7.0K
Increasing-the-Stiffness-creating-Self-Balancing-structures-pdf-212x300.jpg
2021-10-20 15:31
18K
Increasing-the-Stiffness-creating-Self-Balancing-structures-pdf-724x1024.jpg
2021-10-20 15:31
116K
Increasing-the-Stiffness-creating-Self-Balancing-structures-pdf.jpg
2021-10-20 15:31
227K
Increasing-the-Stiffness-creating-Self-Balancing-structures.pdf
2021-10-20 15:31
338K
Inwards-Inclined-Suspension-System-150x150.jpg
2021-10-21 15:20
2.9K
Inwards-Inclined-Suspension-System-300x223.jpg
2021-10-21 15:20
8.3K
Inwards-Inclined-Suspension-System.jpg
2021-10-21 15:20
16K
Leonardo-Da-Vincis-Self-Supporting-Bridge-pdf-106x150.jpg
2021-10-20 15:29
6.4K
Leonardo-Da-Vincis-Self-Supporting-Bridge-pdf-212x300.jpg
2021-10-20 15:29
15K
Leonardo-Da-Vincis-Self-Supporting-Bridge-pdf-724x1024.jpg
2021-10-20 15:29
109K
Leonardo-Da-Vincis-Self-Supporting-Bridge-pdf.jpg
2021-10-20 15:29
221K
Leonardo-Da-Vincis-Self-Supporting-Bridge.pdf
2021-10-20 15:29
782K
MICHAEL-JACKSONS-ANTI-GRAVITY-LEAN-pdf-106x150.jpg
2021-10-20 14:36
6.9K
MICHAEL-JACKSONS-ANTI-GRAVITY-LEAN-pdf-212x300.jpg
2021-10-20 14:36
16K
MICHAEL-JACKSONS-ANTI-GRAVITY-LEAN-pdf-724x1024.jpg
2021-10-20 14:36
101K
MICHAEL-JACKSONS-ANTI-GRAVITY-LEAN-pdf.jpg
2021-10-20 14:36
200K
MICHAEL-JACKSONS-ANTI-GRAVITY-LEAN.pdf
2021-10-20 14:36
161K
Model-2-Anti-Symmetric-Frame-A-150x150.jpg
2021-10-20 09:18
4.2K
Model-2-Anti-Symmetric-Frame-A-225x300.jpg
2021-10-20 09:18
8.8K
Model-2-Anti-Symmetric-Frame-A.jpg
2021-10-20 09:18
9.2K
Model-2-Anti-Symmetric-Frame-B-150x150.jpg
2021-10-20 09:18
4.3K
Model-2-Anti-Symmetric-Frame-B-225x300.jpg
2021-10-20 09:18
9.0K
Model-2-Anti-Symmetric-Frame-B.jpg
2021-10-20 09:18
9.5K
Model-3-A-Asymmetric-Frame-A-150x150.jpg
2021-10-20 09:22
4.0K
Model-3-A-Asymmetric-Frame-A-225x300.jpg
2021-10-20 09:22
7.2K
Model-3-A-Asymmetric-Frame-A.jpg
2021-10-20 09:22
7.5K
Model-3-A-Asymmetric-Frame-B-150x150.jpg
2021-10-20 09:22
4.2K
Model-3-A-Asymmetric-Frame-B-225x300.jpg
2021-10-20 09:22
7.6K
Model-3-A-Asymmetric-Frame-B.jpg
2021-10-20 09:22
7.9K
Outward-Inclined-Suspension-System-150x150.jpg
2021-10-21 15:20
2.7K
Outward-Inclined-Suspension-System-300x225.jpg
2021-10-21 15:20
8.7K
Outward-Inclined-Suspension-System.jpg
2021-10-21 15:20
17K
Playstation-3-CD-Release-Mechanism-pdf-106x150.jpg
2021-10-20 15:44
6.4K
Playstation-3-CD-Release-Mechanism-pdf-212x300.jpg
2021-10-20 15:44
15K
Playstation-3-CD-Release-Mechanism-pdf-724x1024.jpg
2021-10-20 15:44
109K
Playstation-3-CD-Release-Mechanism-pdf.jpg
2021-10-20 15:44
206K
Playstation-3-CD-Release-Mechanism.pdf
2021-10-20 15:44
119K
Pre-stressed-Post-tensioned-Concept-In-Asian-Ball-jointed-Dolls-pdf-106x150.jpg
2021-10-20 15:39
7.3K
Pre-stressed-Post-tensioned-Concept-In-Asian-Ball-jointed-Dolls-pdf-212x300.jpg
2021-10-20 15:39
17K
Pre-stressed-Post-tensioned-Concept-In-Asian-Ball-jointed-Dolls-pdf-724x1024.jpg
2021-10-20 15:39
107K
Pre-stressed-Post-tensioned-Concept-In-Asian-Ball-jointed-Dolls-pdf.jpg
2021-10-20 15:39
215K
Pre-stressed-Post-tensioned-Concept-In-Asian-Ball-jointed-Dolls.pdf
2021-10-20 15:39
179K
Prestress-pdf-106x150.jpg
2021-10-20 15:39
6.1K
Prestress-pdf-212x300.jpg
2021-10-20 15:39
12K
Prestress-pdf-724x1024.jpg
2021-10-20 15:39
57K
Prestress-pdf.jpg
2021-10-20 15:39
107K
Prestress.pdf
2021-10-20 15:39
145K
Prestressing-in-Simple-Structural-Applications-pdf-106x150.jpg
2021-10-20 15:39
7.5K
Prestressing-in-Simple-Structural-Applications-pdf-212x300.jpg
2021-10-20 15:39
19K
Prestressing-in-Simple-Structural-Applications-pdf-724x1024.jpg
2021-10-20 15:39
142K
Prestressing-in-Simple-Structural-Applications-pdf.jpg
2021-10-20 15:39
291K
Prestressing-in-Simple-Structural-Applications.pdf
2021-10-20 15:39
623K
Projecting-Sign-against-Typhoon-pdf-106x150.jpg
2021-10-20 15:44
7.5K
Projecting-Sign-against-Typhoon-pdf-212x300.jpg
2021-10-20 15:44
18K
Projecting-Sign-against-Typhoon-pdf-724x1024.jpg
2021-10-20 15:44
129K
Projecting-Sign-against-Typhoon-pdf.jpg
2021-10-20 15:44
262K
Projecting-Sign-against-Typhoon.pdf
2021-10-20 15:44
359K
Resonance-Foot-Bridge.mp4
2021-10-22 16:06
2.6M
Resonance-Shaking-Video.mp4
2021-10-22 15:53
2.8M
Rope-inforced-Ice-pdf-106x150.jpg
2021-10-20 15:39
7.3K
Rope-inforced-Ice-pdf-212x300.jpg
2021-10-20 15:39
18K
Rope-inforced-Ice-pdf-724x1024.jpg
2021-10-20 15:39
127K
Rope-inforced-Ice-pdf.jpg
2021-10-20 15:39
254K
Rope-inforced-Ice.pdf
2021-10-20 15:39
125K
Self-Healing-Building-pdf-106x150.jpg
2021-10-20 15:44
6.7K
Self-Healing-Building-pdf-212x300.jpg
2021-10-20 15:44
16K
Self-Healing-Building-pdf-724x1024.jpg
2021-10-20 15:44
120K
Self-Healing-Building-pdf.jpg
2021-10-20 15:44
242K
Self-Healing-Building.pdf
2021-10-20 15:44
524K
Shear-Stress-Nail-Clipper-Mechanism-pdf-106x150.jpg
2021-10-20 14:36
7.0K
Shear-Stress-Nail-Clipper-Mechanism-pdf-212x300.jpg
2021-10-20 14:36
17K
Shear-Stress-Nail-Clipper-Mechanism-pdf-724x1024.jpg
2021-10-20 14:36
121K
Shear-Stress-Nail-Clipper-Mechanism-pdf.jpg
2021-10-20 14:36
237K
Shear-Stress-Nail-Clipper-Mechanism.pdf
2021-10-20 14:36
169K
Skin-friction-concept-pdf-106x150.jpg
2021-10-20 15:44
7.2K
Skin-friction-concept-pdf-212x300.jpg
2021-10-20 15:44
17K
Skin-friction-concept-pdf-724x1024.jpg
2021-10-20 15:44
131K
Skin-friction-concept-pdf.jpg
2021-10-20 15:44
258K
Skin-friction-concept.pdf
2021-10-20 15:44
113K
Smaller-Internal-Forces-Example-Alloz-Aqueduct-pdf-106x150.jpg
2021-10-20 15:31
7.0K
Smaller-Internal-Forces-Example-Alloz-Aqueduct-pdf-212x300.jpg
2021-10-20 15:31
17K
Smaller-Internal-Forces-Example-Alloz-Aqueduct-pdf-724x1024.jpg
2021-10-20 15:31
129K
Smaller-Internal-Forces-Example-Alloz-Aqueduct-pdf.jpg
2021-10-20 15:31
258K
Smaller-Internal-Forces-Example-Alloz-Aqueduct.pdf
2021-10-20 15:31
119K
Stability-of-a-chest-drawers-pdf-106x150.jpg
2021-10-20 14:45
7.2K
Stability-of-a-chest-drawers-pdf-212x300.jpg
2021-10-20 14:45
18K
Stability-of-a-chest-drawers-pdf-724x1024.jpg
2021-10-20 14:45
137K
Stability-of-a-chest-drawers-pdf.jpg
2021-10-20 14:45
281K
Stability-of-a-chest-drawers.pdf
2021-10-20 14:45
177K
Stress-Distribution-of-Foot-during-Standing-Stance-pdf-106x150.jpg
2021-10-20 15:25
7.0K
Stress-Distribution-of-Foot-during-Standing-Stance-pdf-212x300.jpg
2021-10-20 15:25
17K
Stress-Distribution-of-Foot-during-Standing-Stance-pdf-724x1024.jpg
2021-10-20 15:25
119K
Stress-Distribution-of-Foot-during-Standing-Stance-pdf.jpg
2021-10-20 15:25
250K
Stress-Distribution-of-Foot-during-Standing-Stance.pdf
2021-10-20 15:25
216K
Structural-Concepts-of-a-Hole-Punch-pdf-106x150.jpg
2021-10-20 14:36
6.7K
Structural-Concepts-of-a-Hole-Punch-pdf-212x300.jpg
2021-10-20 14:36
16K
Structural-Concepts-of-a-Hole-Punch-pdf-724x1024.jpg
2021-10-20 14:36
113K
Structural-Concepts-of-a-Hole-Punch-pdf.jpg
2021-10-20 14:36
225K
Structural-Concepts-of-a-Hole-Punch.pdf
2021-10-20 14:36
95K
Tensegrity-Geodesic-Domes-pdf-106x150.jpg
2021-10-20 15:44
7.5K
Tensegrity-Geodesic-Domes-pdf-212x300.jpg
2021-10-20 15:44
18K
Tensegrity-Geodesic-Domes-pdf-724x1024.jpg
2021-10-20 15:44
149K
Tensegrity-Geodesic-Domes-pdf.jpg
2021-10-20 15:44
300K
Tensegrity-Geodesic-Domes.pdf
2021-10-20 15:44
219K
Tensegrity-Kurilpa-Bridge-pdf-106x150.jpg
2021-10-20 15:39
7.5K
Tensegrity-Kurilpa-Bridge-pdf-212x300.jpg
2021-10-20 15:39
18K
Tensegrity-Kurilpa-Bridge-pdf-724x1024.jpg
2021-10-20 15:39
133K
Tensegrity-Kurilpa-Bridge-pdf.jpg
2021-10-20 15:39
268K
Tensegrity-Kurilpa-Bridge.pdf
2021-10-20 15:39
246K
Tensegrity-Tower-pdf-106x150.jpg
2021-10-20 15:29
6.5K
Tensegrity-Tower-pdf-212x300.jpg
2021-10-20 15:29
15K
Tensegrity-Tower-pdf-724x1024.jpg
2021-10-20 15:29
110K
Tensegrity-Tower-pdf.jpg
2021-10-20 15:29
222K
Tensegrity-Tower.pdf
2021-10-20 15:29
258K
Tension-Fields-in-Plate-Girders-pdf-106x150.jpg
2021-10-20 15:35
6.3K
Tension-Fields-in-Plate-Girders-pdf-212x300.jpg
2021-10-20 15:35
15K
Tension-Fields-in-Plate-Girders-pdf-724x1024.jpg
2021-10-20 15:35
102K
Tension-Fields-in-Plate-Girders-pdf.jpg
2021-10-20 15:35
201K
Tension-Fields-in-Plate-Girders.pdf
2021-10-20 15:35
765K
The-Centre-of-Gravity-over-an-Indo-Board-pdf-106x150.jpg
2021-10-20 14:45
7.2K
The-Centre-of-Gravity-over-an-Indo-Board-pdf-212x300.jpg
2021-10-20 14:45
18K
The-Centre-of-Gravity-over-an-Indo-Board-pdf-724x1024.jpg
2021-10-20 14:45
126K
The-Centre-of-Gravity-over-an-Indo-Board-pdf.jpg
2021-10-20 14:45
253K
The-Centre-of-Gravity-over-an-Indo-Board.pdf
2021-10-20 14:45
221K
The-Concept-of-Shear-Between-Layers-pdf-106x150.jpg
2021-10-20 15:05
7.9K
The-Concept-of-Shear-Between-Layers-pdf-212x300.jpg
2021-10-20 15:05
21K
The-Concept-of-Shear-Between-Layers-pdf-724x1024.jpg
2021-10-20 15:05
162K
The-Concept-of-Shear-Between-Layers-pdf.jpg
2021-10-20 15:05
330K
The-Concept-of-Shear-Between-Layers.pdf
2021-10-20 15:05
330K
The-Heelless-Shoe-Centre-of-mass-pdf-106x150.jpg
2021-10-20 14:45
6.9K
The-Heelless-Shoe-Centre-of-mass-pdf-212x300.jpg
2021-10-20 14:45
16K
The-Heelless-Shoe-Centre-of-mass-pdf-724x1024.jpg
2021-10-20 14:45
102K
The-Heelless-Shoe-Centre-of-mass-pdf.jpg
2021-10-20 14:45
203K
The-Heelless-Shoe-Centre-of-mass.pdf
2021-10-20 14:45
153K
The-Lazy-Bridge-Partial-Self-balancing-pdf-106x150.jpg
2021-10-20 14:36
7.5K
The-Lazy-Bridge-Partial-Self-balancing-pdf-212x300.jpg
2021-10-20 14:36
18K
The-Lazy-Bridge-Partial-Self-balancing-pdf-724x1024.jpg
2021-10-20 14:36
130K
The-Lazy-Bridge-Partial-Self-balancing-pdf.jpg
2021-10-20 14:36
266K
The-Lazy-Bridge-Partial-Self-balancing.pdf
2021-10-20 14:36
322K
The-Sponge-I-Beam-pdf-106x150.jpg
2021-10-20 15:03
7.4K
The-Sponge-I-Beam-pdf-212x300.jpg
2021-10-20 15:03
18K
The-Sponge-I-Beam-pdf-724x1024.jpg
2021-10-20 15:03
142K
The-Sponge-I-Beam-pdf.jpg
2021-10-20 15:03
288K
The-Sponge-I-Beam.pdf
2021-10-20 15:03
123K
The-free-vibration-record-of-the-building-150x150.jpg
2021-10-22 11:01
3.2K
The-free-vibration-record-of-the-building-300x195.jpg
2021-10-22 11:01
8.3K
The-free-vibration-record-of-the-building-578x372.jpg
2021-10-22 11:01
34K
The-free-vibration-record-of-the-building.jpg
2021-10-22 11:01
21K
Torsion-and-Shear-Stress-in-an-Oreo-pdf-106x150.jpg
2021-10-20 15:06
7.0K
Torsion-and-Shear-Stress-in-an-Oreo-pdf-212x300.jpg
2021-10-20 15:06
15K
Torsion-and-Shear-Stress-in-an-Oreo-pdf-724x1024.jpg
2021-10-20 15:06
96K
Torsion-and-Shear-Stress-in-an-Oreo-pdf.jpg
2021-10-20 15:06
192K
Torsion-and-Shear-Stress-in-an-Oreo.pdf
2021-10-20 15:05
247K
Understanding-Structural-Concept-of-Cable-Stayed-Bridge-pdf-106x150.jpg
2021-10-20 15:31
6.4K
Understanding-Structural-Concept-of-Cable-Stayed-Bridge-pdf-212x300.jpg
2021-10-20 15:31
14K
Understanding-Structural-Concept-of-Cable-Stayed-Bridge-pdf-724x1024.jpg
2021-10-20 15:31
98K
Understanding-Structural-Concept-of-Cable-Stayed-Bridge-pdf.jpg
2021-10-20 15:31
210K
Understanding-Structural-Concept-of-Cable-Stayed-Bridge.pdf
2021-10-20 15:31
726K
Unstable-Equilibrium-State-150x150.jpg
2021-10-21 15:20
3.1K
Unstable-Equilibrium-State-300x226.jpg
2021-10-21 15:20
8.9K
Unstable-Equilibrium-State.jpg
2021-10-21 15:20
15K
Using-global-buckling-to-open-an-earphone-carry-pouch-pdf-106x150.jpg
2021-10-20 15:35
6.7K
Using-global-buckling-to-open-an-earphone-carry-pouch-pdf-212x300.jpg
2021-10-20 15:35
16K
Using-global-buckling-to-open-an-earphone-carry-pouch-pdf-724x1024.jpg
2021-10-20 15:35
100K
Using-global-buckling-to-open-an-earphone-carry-pouch-pdf.jpg
2021-10-20 15:35
201K
Using-global-buckling-to-open-an-earphone-carry-pouch.pdf
2021-10-20 15:35
170K
Vacuum-lifting-pdf-106x150.jpg
2021-10-20 15:44
6.9K
Vacuum-lifting-pdf-212x300.jpg
2021-10-20 15:44
16K
Vacuum-lifting-pdf-724x1024.jpg
2021-10-20 15:44
110K
Vacuum-lifting-pdf.jpg
2021-10-20 15:44
221K
Vacuum-lifting.pdf
2021-10-20 15:44
227K
Vertical-Suspension-System-150x150.jpg
2021-10-21 15:20
6.9K
Vertical-Suspension-System-300x225.jpg
2021-10-21 15:20
13K
Vertical-Suspension-System-615x372.jpg
2021-10-21 15:20
32K
Vertical-Suspension-System.jpg
2021-10-21 15:20
35K
Walking-Difficulties-in-Snow-Stress-Distribution-pdf-106x150.jpg
2021-10-20 15:26
7.1K
Walking-Difficulties-in-Snow-Stress-Distribution-pdf-212x300.jpg
2021-10-20 15:26
17K
Walking-Difficulties-in-Snow-Stress-Distribution-pdf-724x1024.jpg
2021-10-20 15:26
122K
Walking-Difficulties-in-Snow-Stress-Distribution-pdf.jpg
2021-10-20 15:26
241K
Walking-Difficulties-in-Snow-Stress-Distribution.pdf
2021-10-20 15:26
423K
Why-Beam-String-Structure-BSS-pdf-106x150.jpg
2021-10-20 15:31
7.1K
Why-Beam-String-Structure-BSS-pdf-212x300.jpg
2021-10-20 15:31
18K
Why-Beam-String-Structure-BSS-pdf-724x1024.jpg
2021-10-20 15:31
142K
Why-Beam-String-Structure-BSS-pdf.jpg
2021-10-20 15:31
292K
Why-Beam-String-Structure-BSS.pdf
2021-10-20 15:31
743K
grandstand-150x150.gif
2021-10-20 09:31
4.8K
grandstand-300x224.gif
2021-10-20 09:31
10K
grandstand-672x372.gif
2021-10-20 09:31
16K
grandstand.gif
2021-10-20 09:31
7.5K
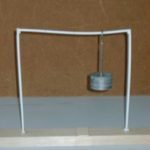
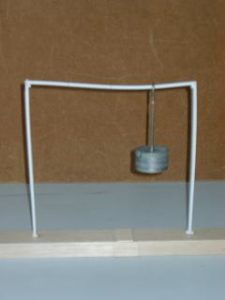
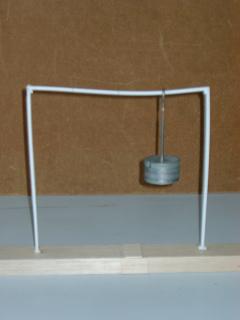
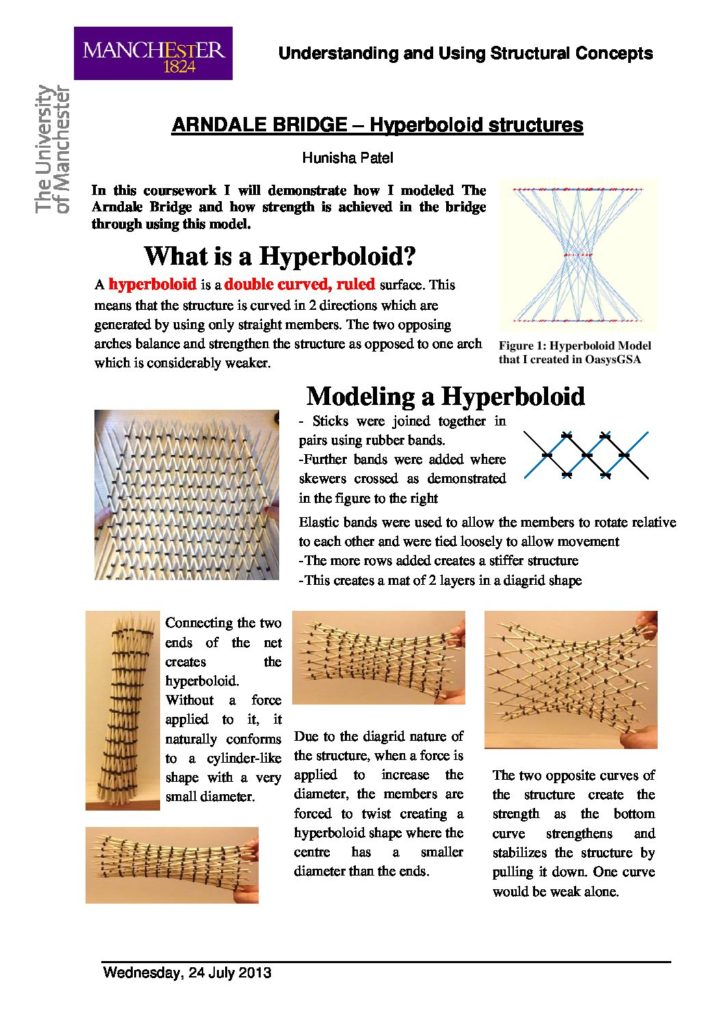
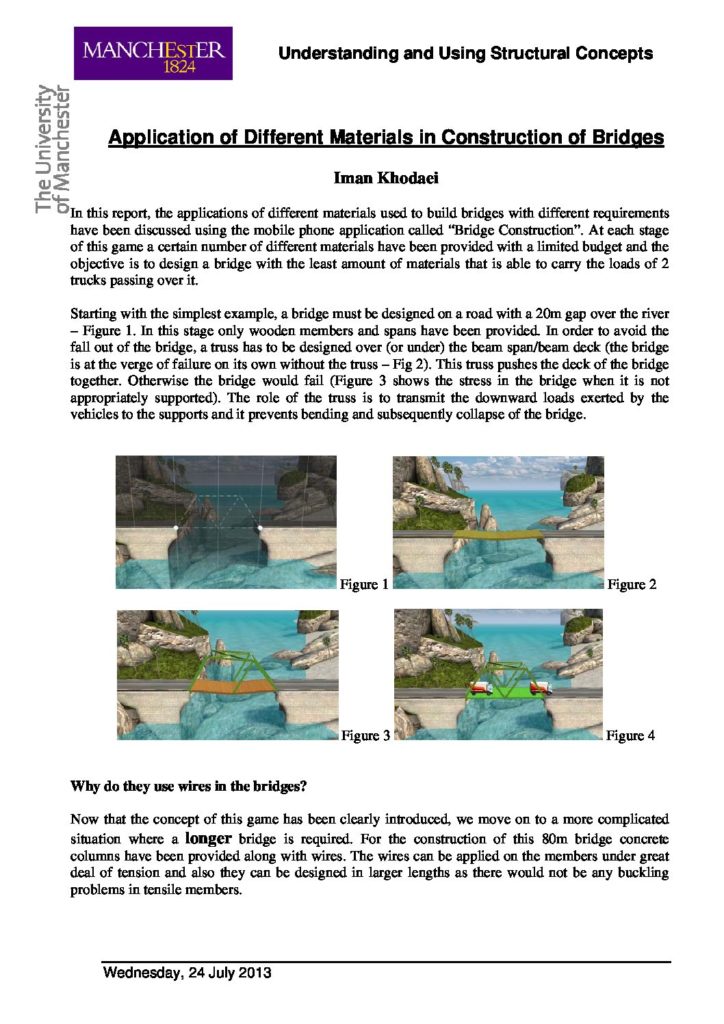
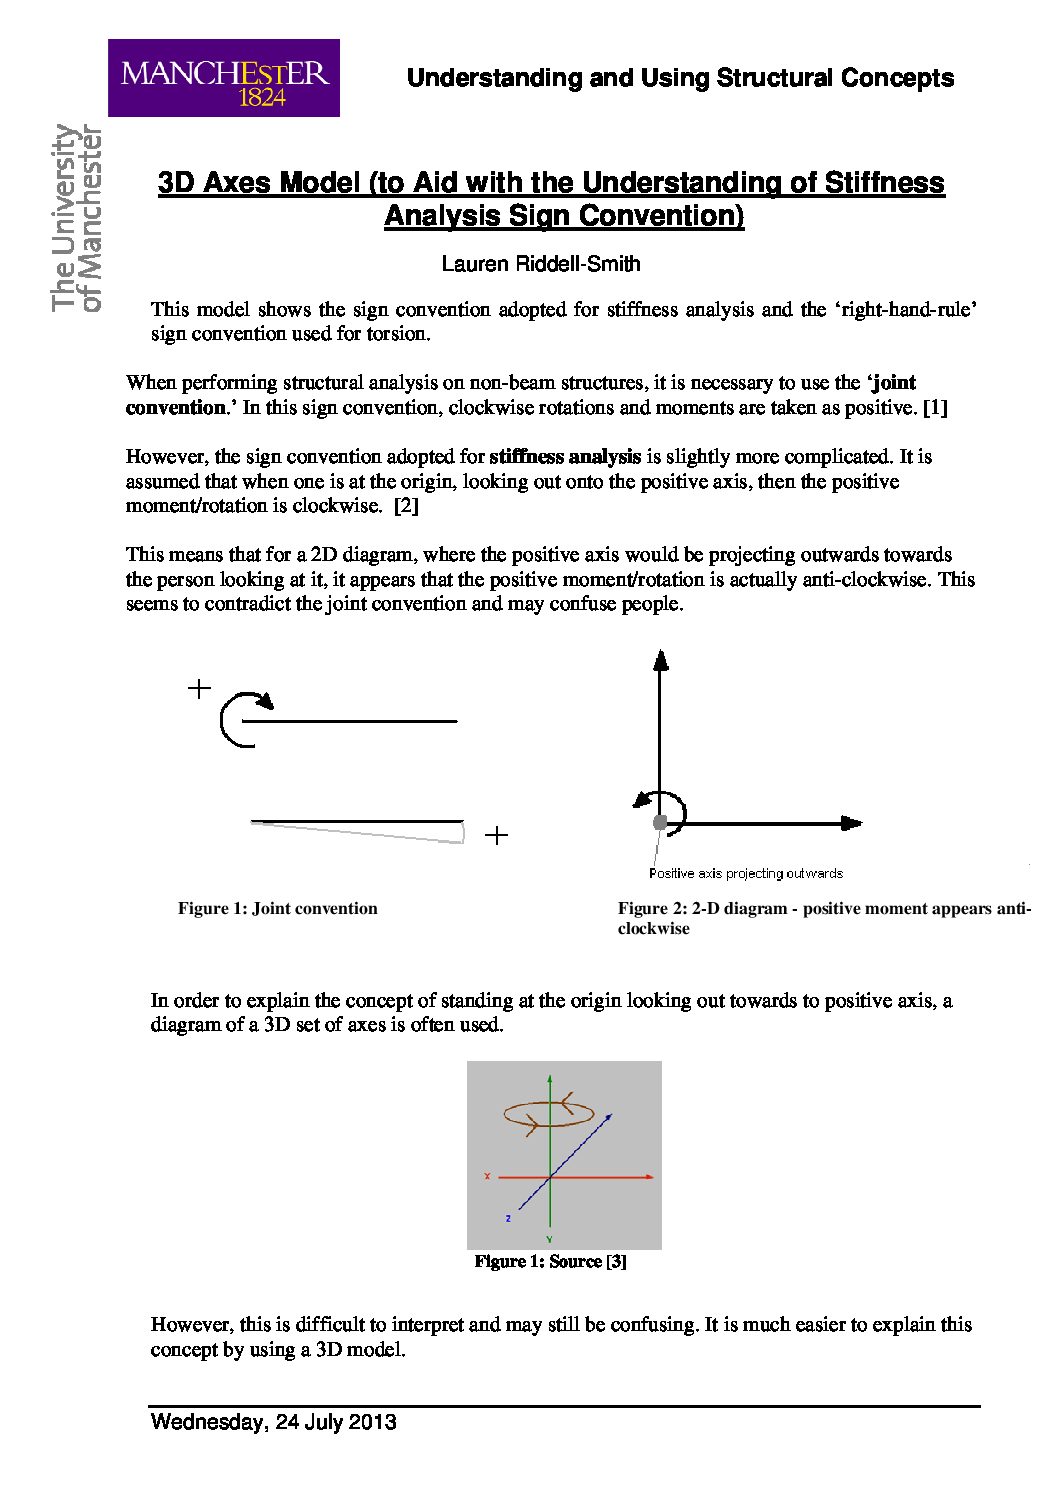
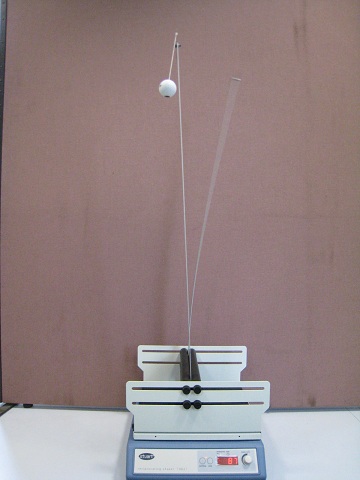
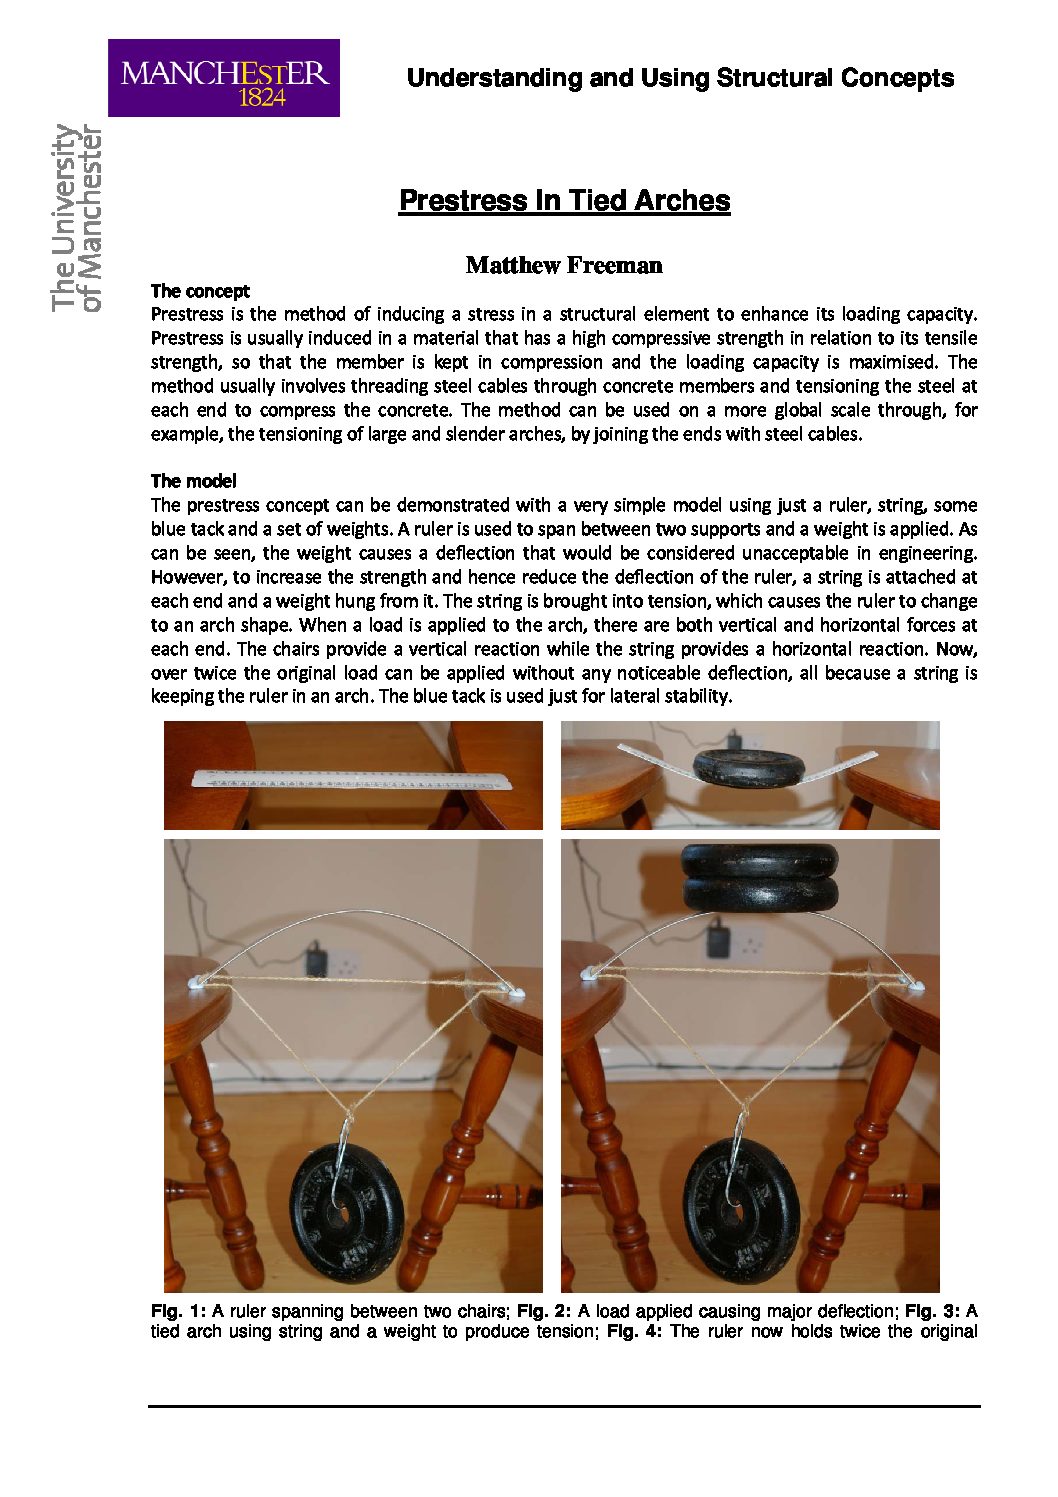
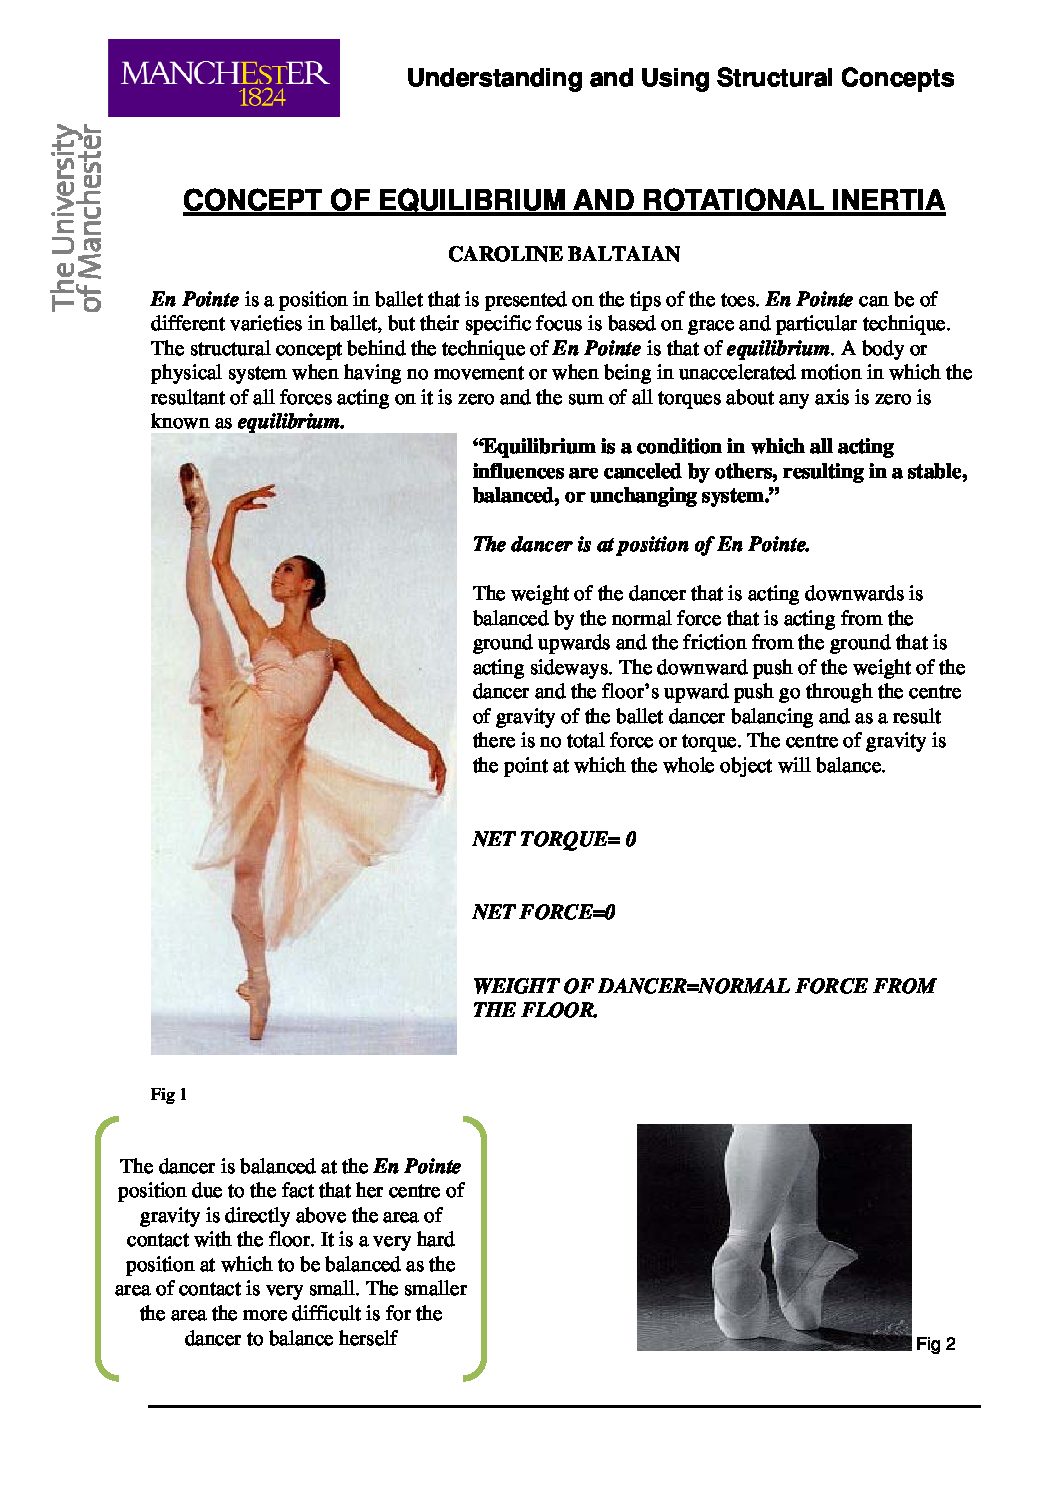
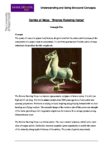
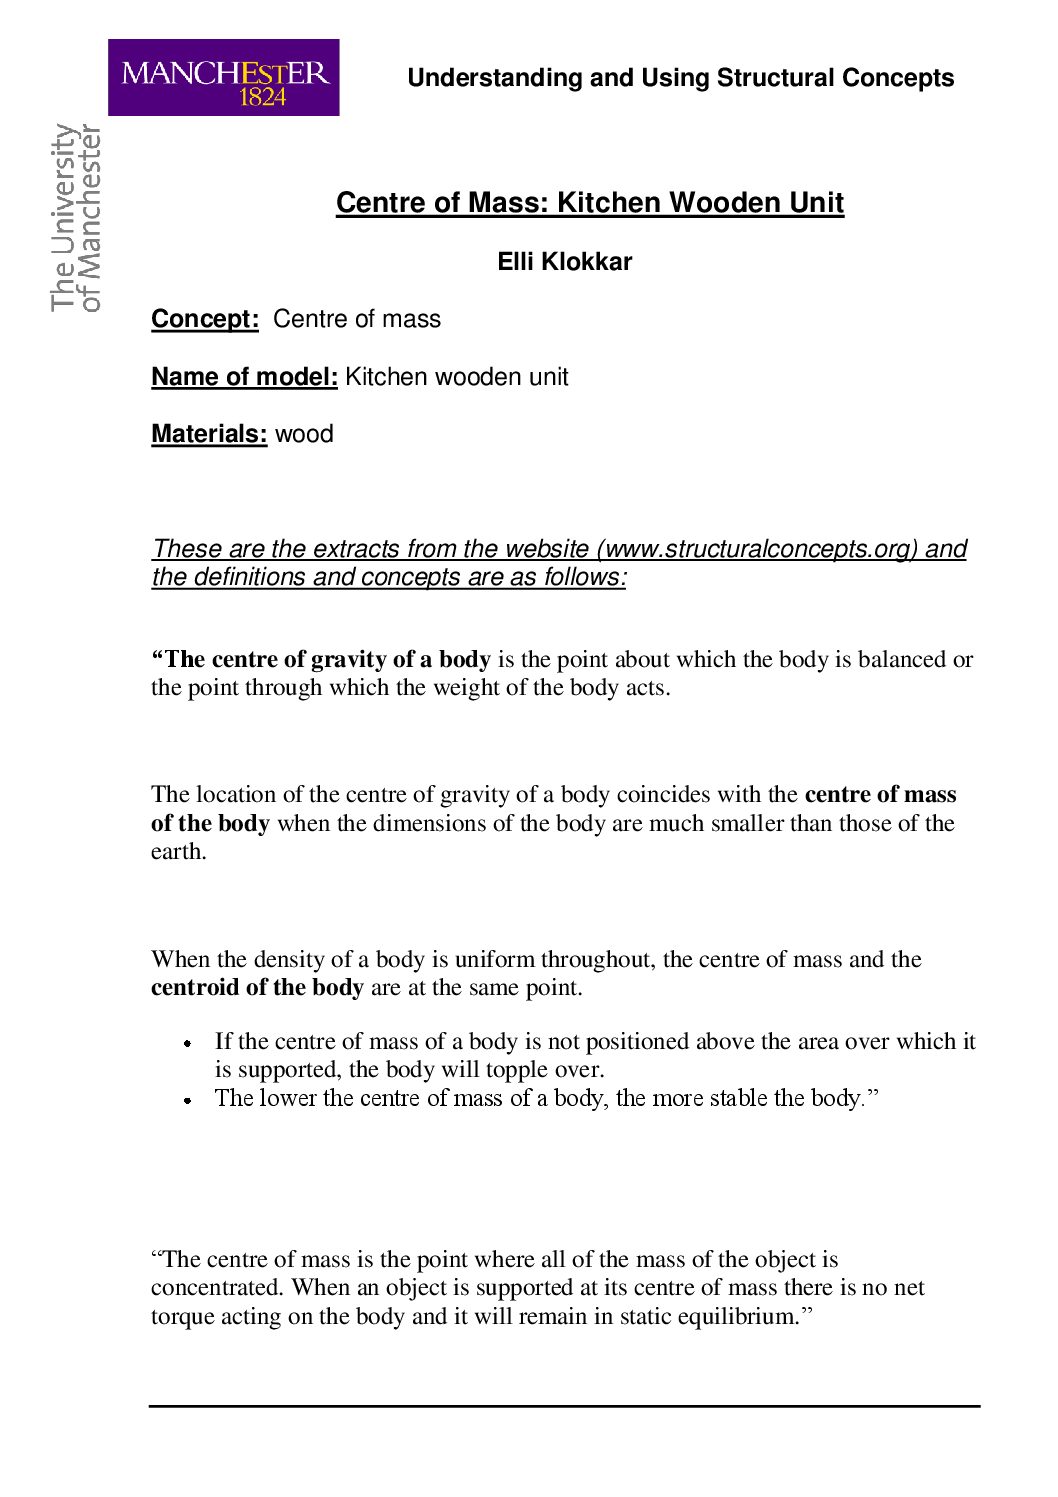
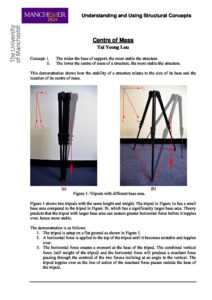
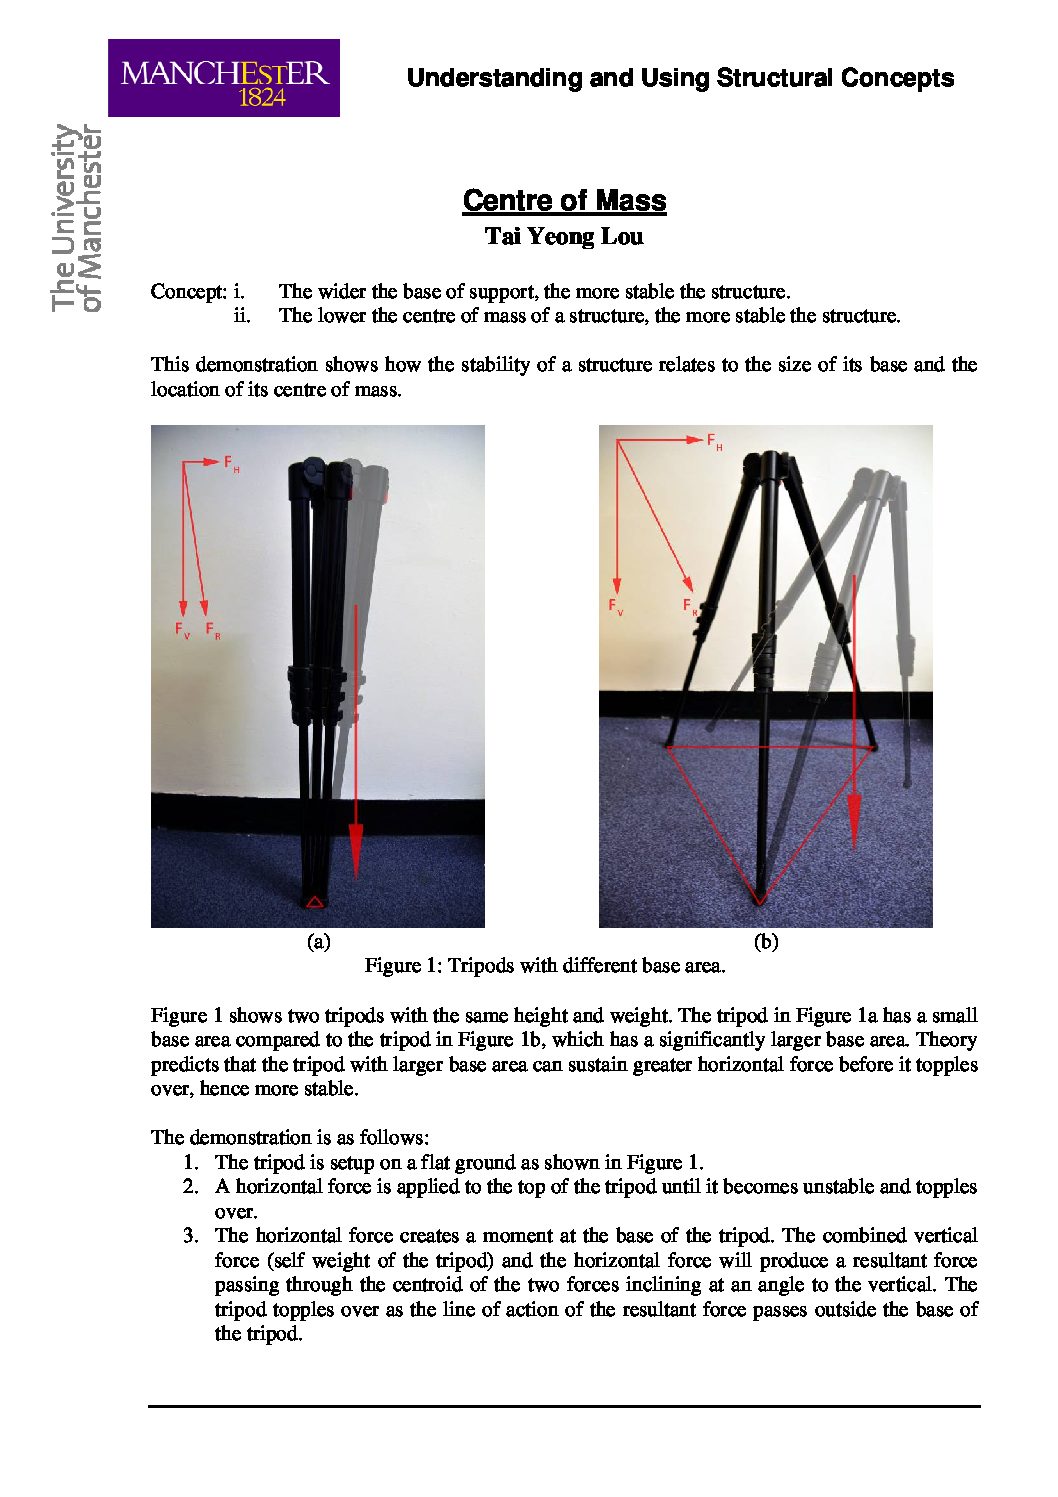
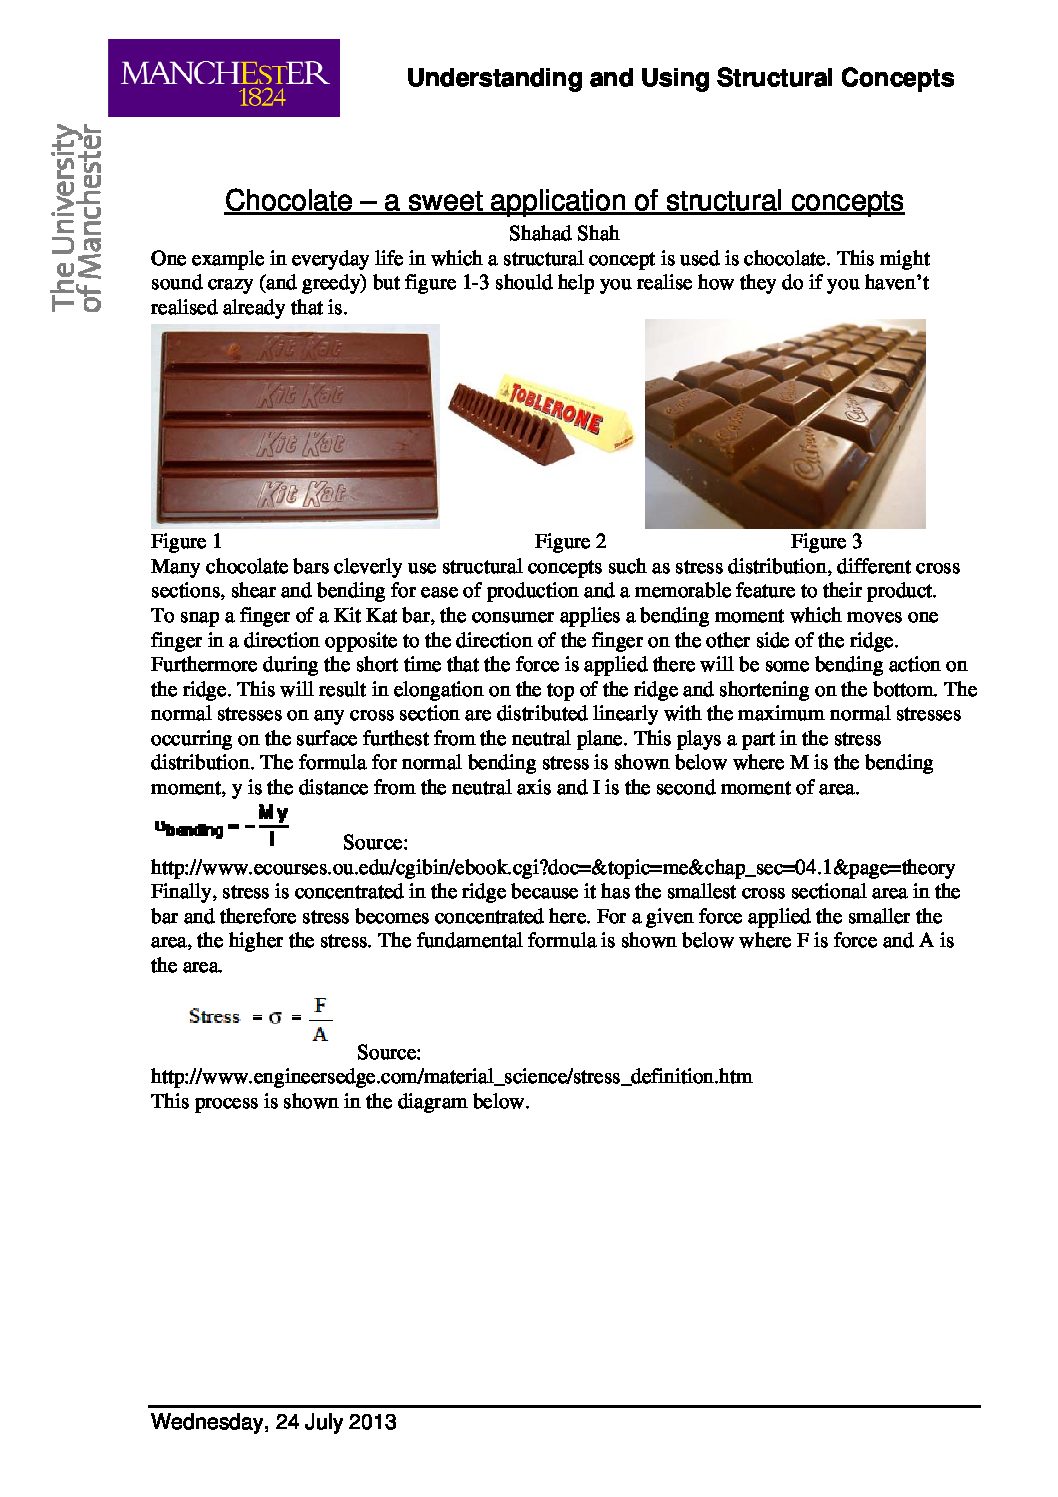
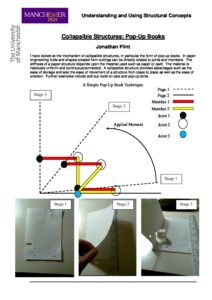
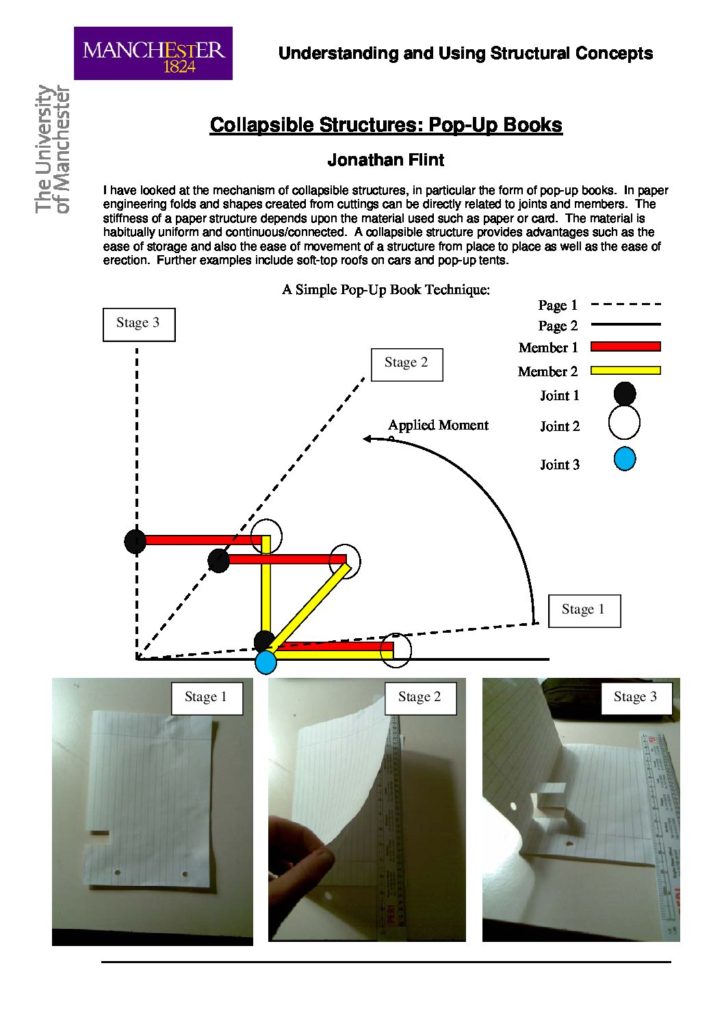
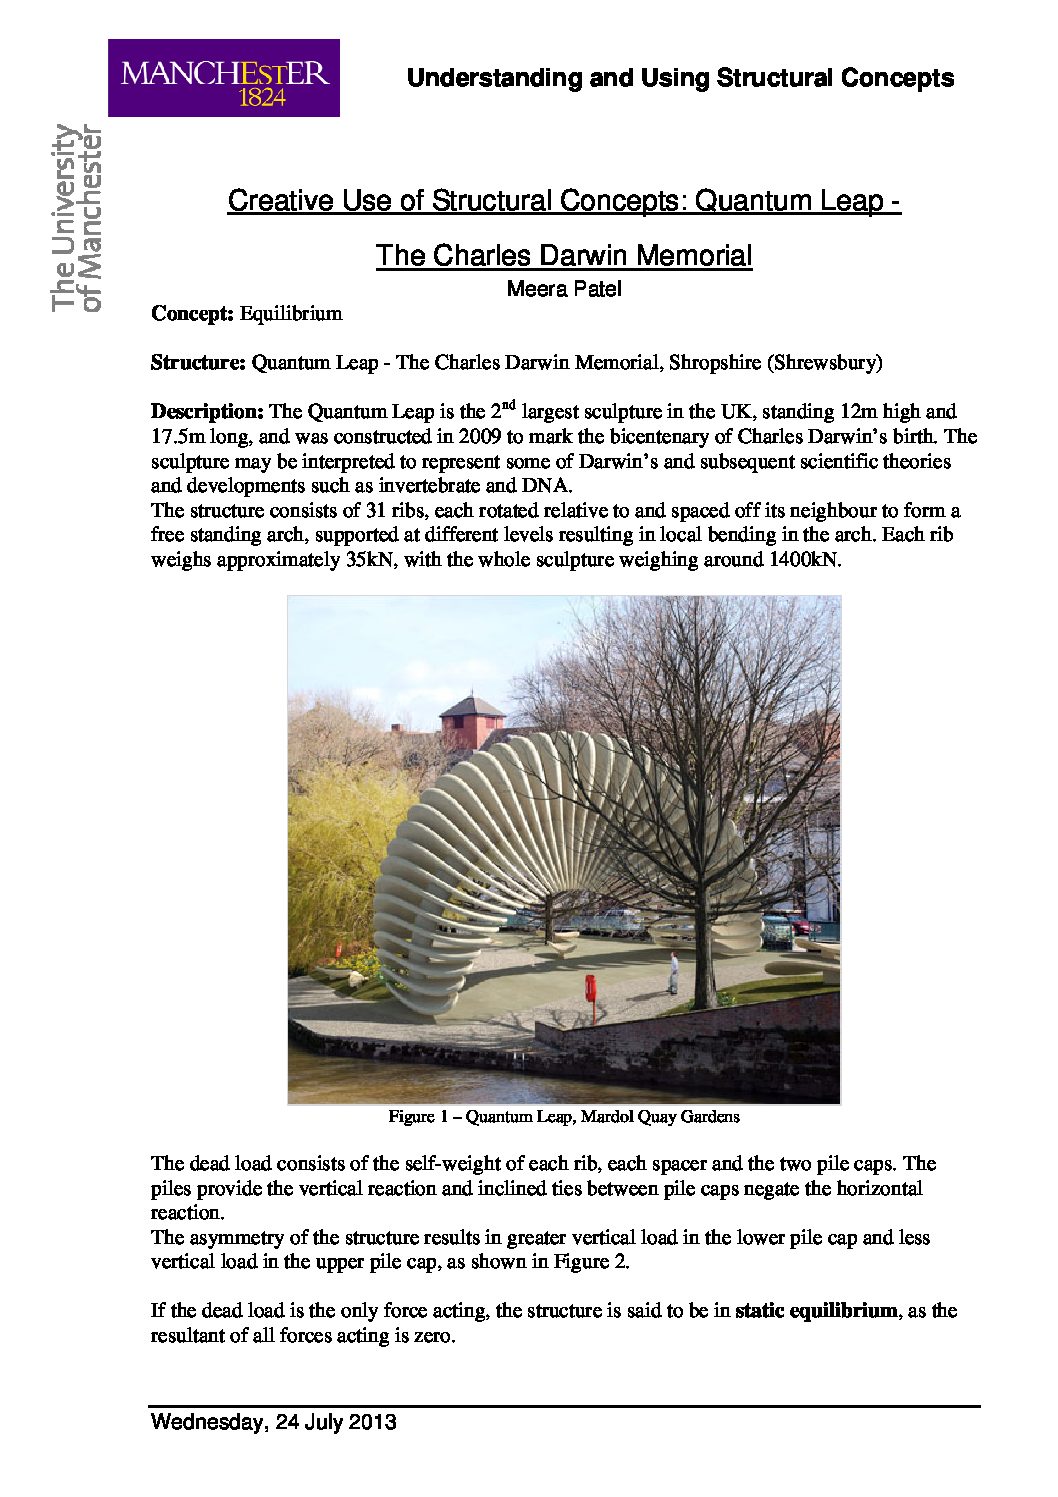
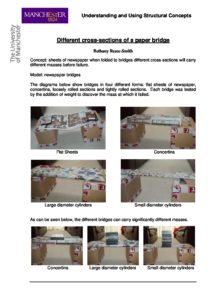
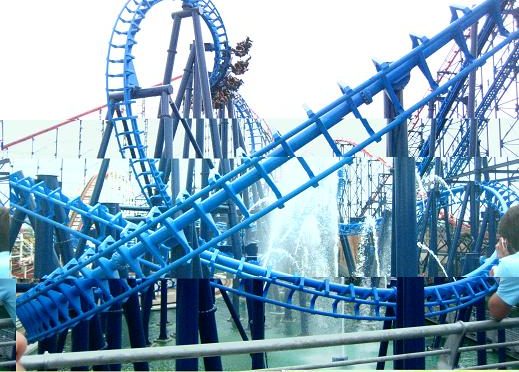
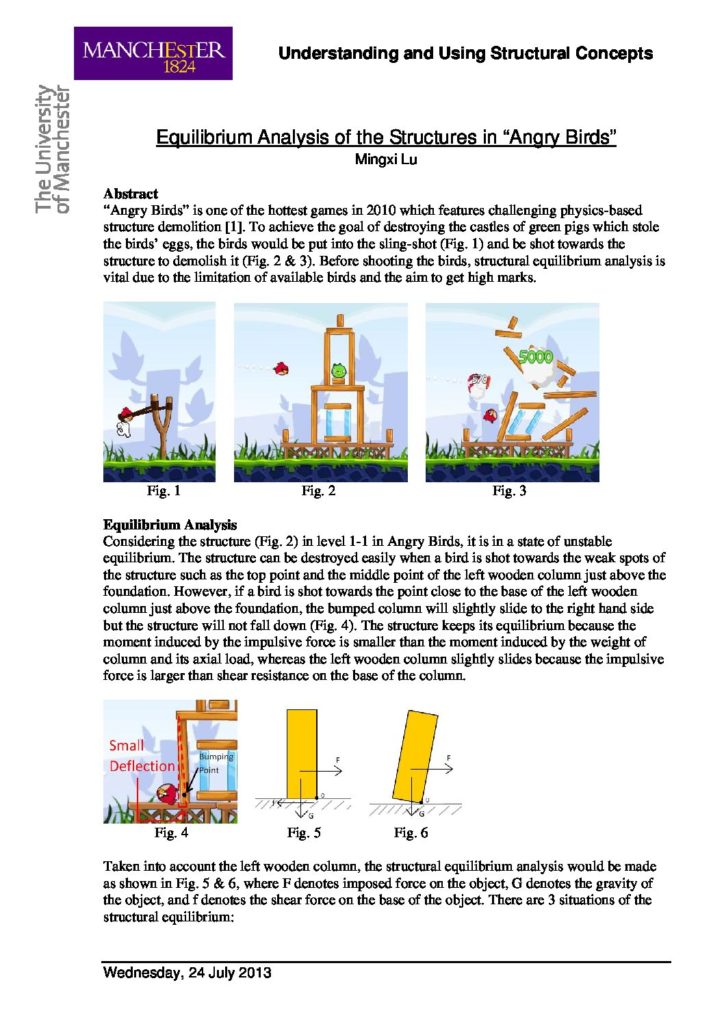
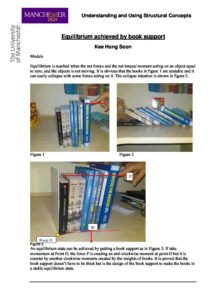
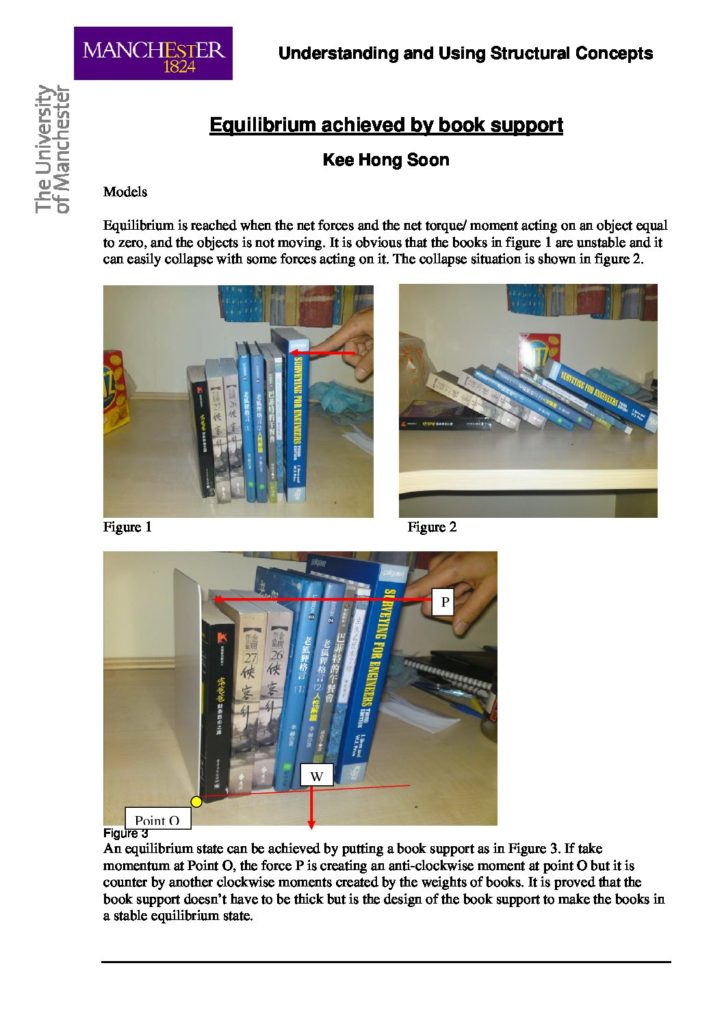
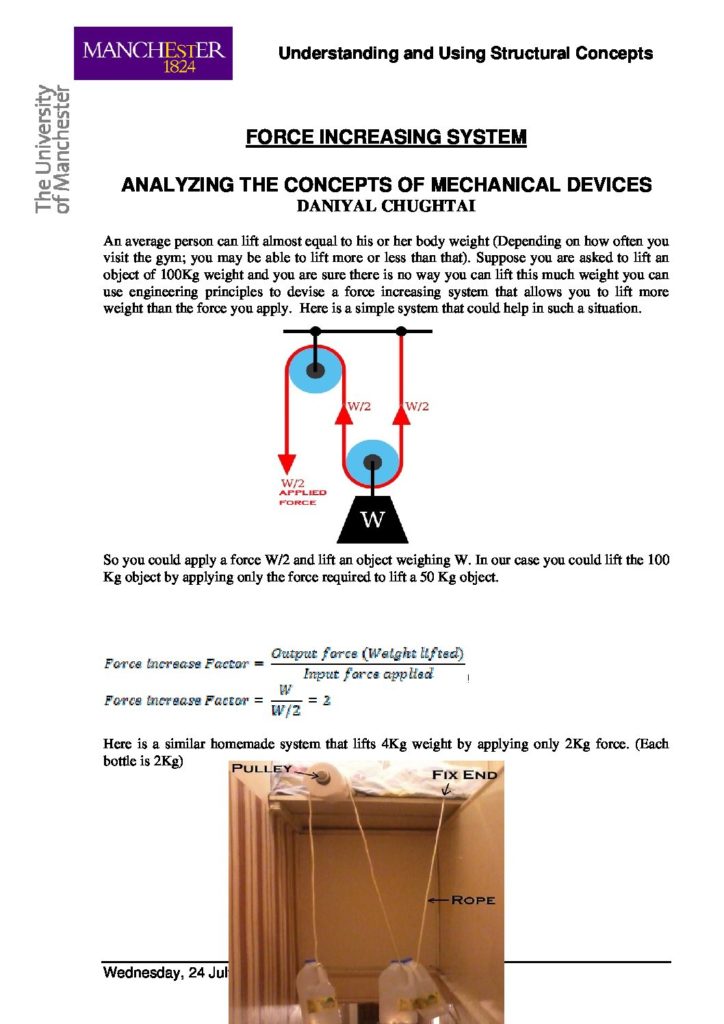
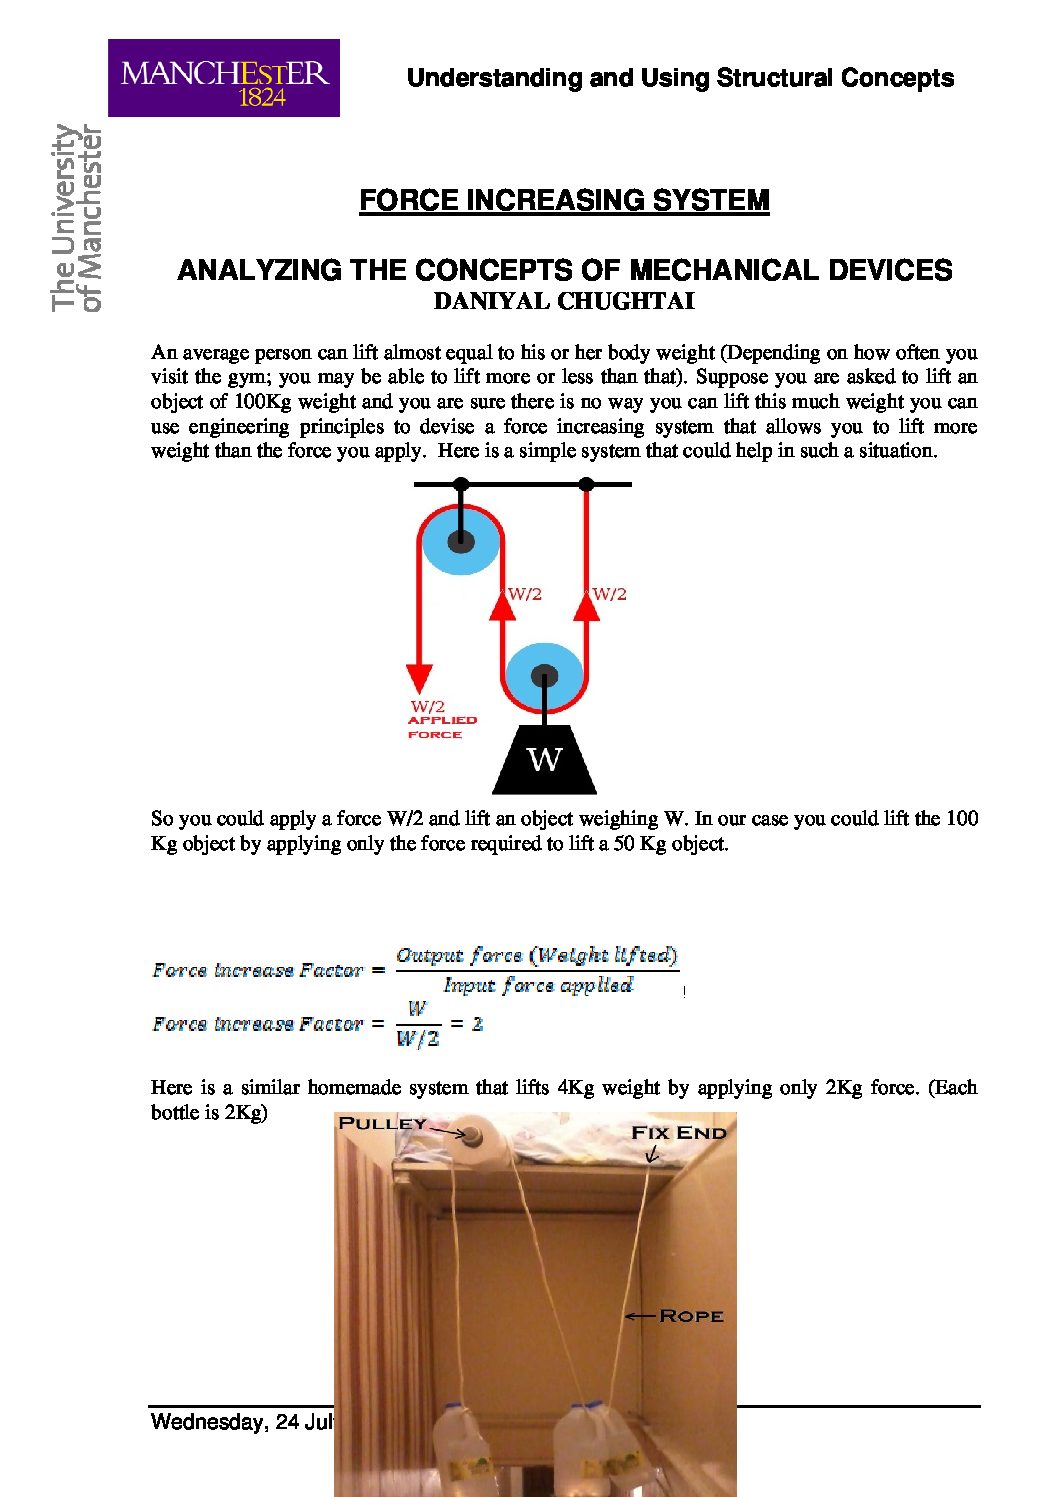
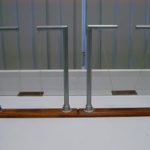
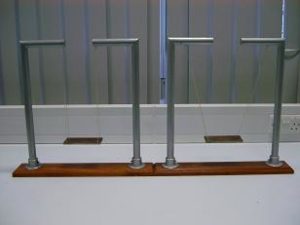
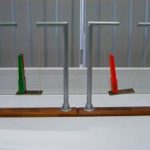
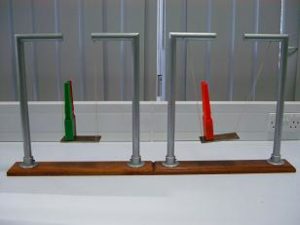
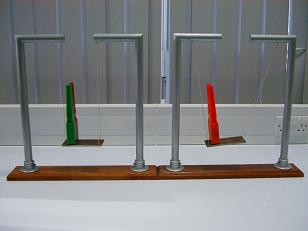
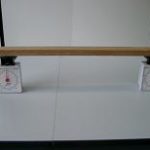
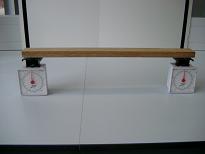
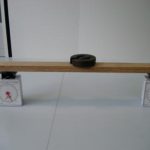
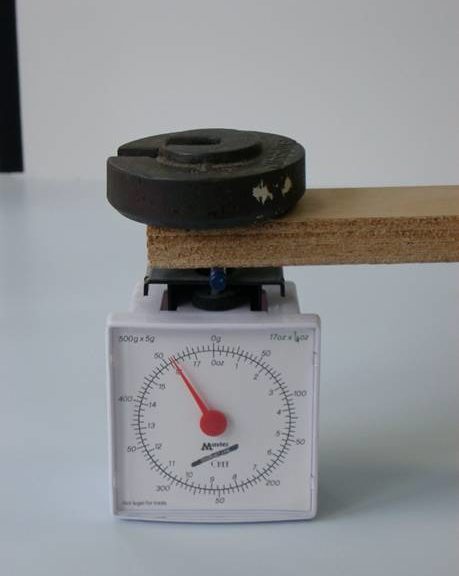
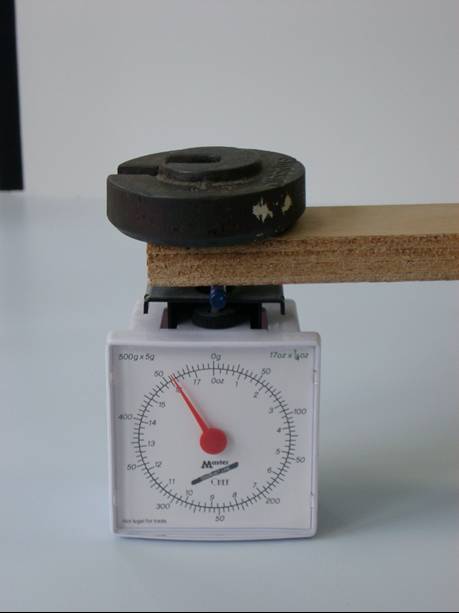
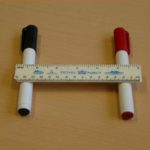
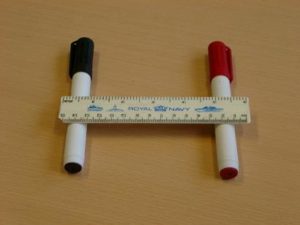
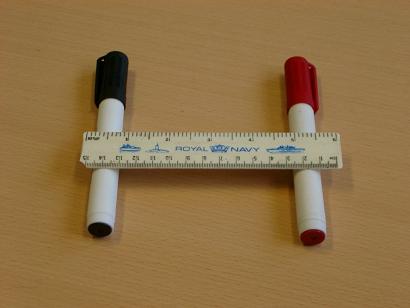
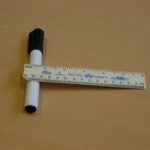
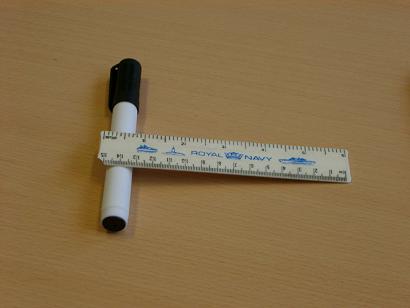
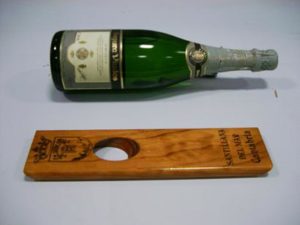
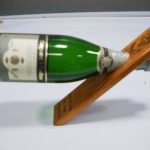
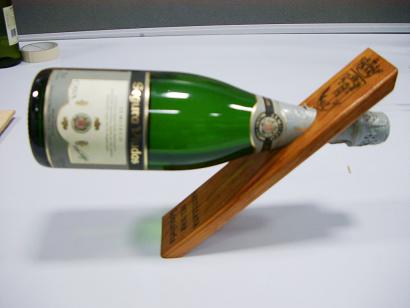
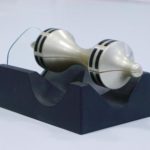
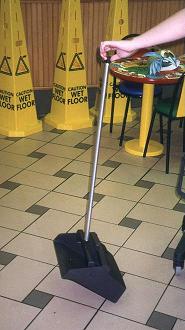
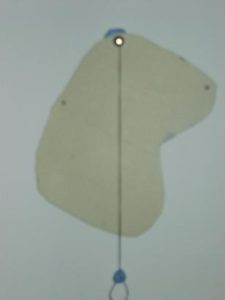
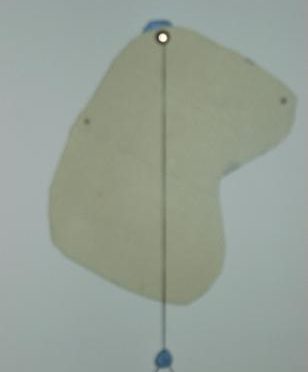
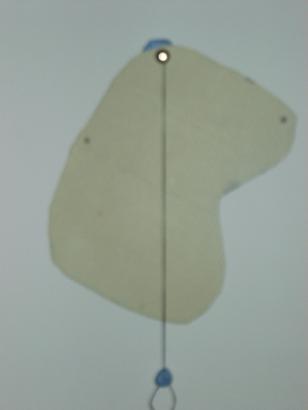
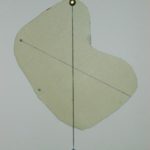
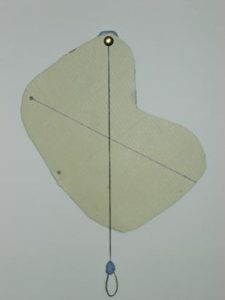
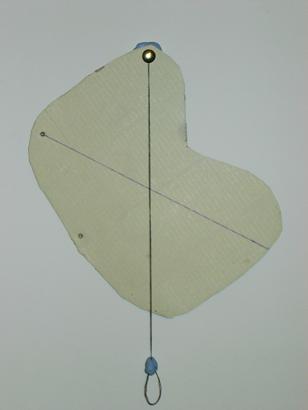
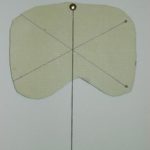
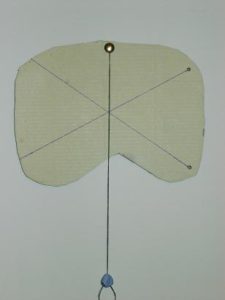
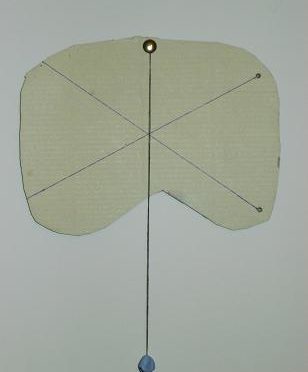
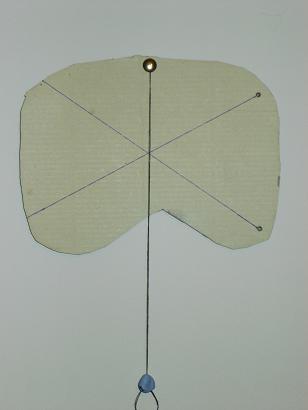
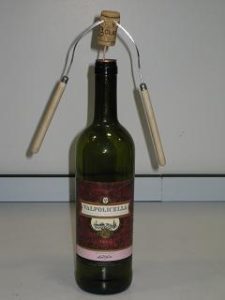
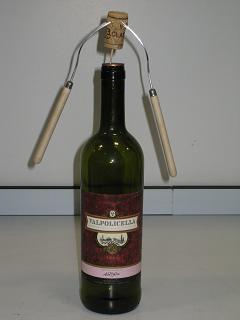
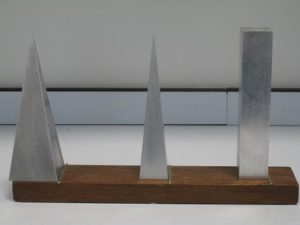
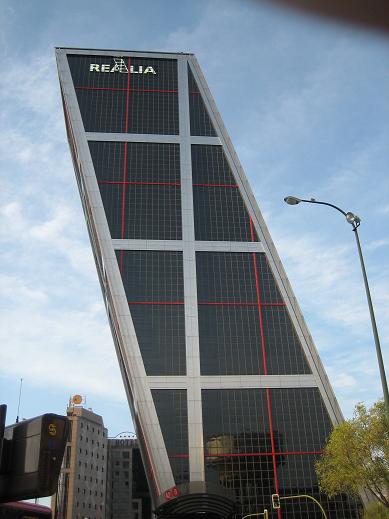
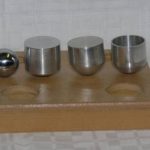
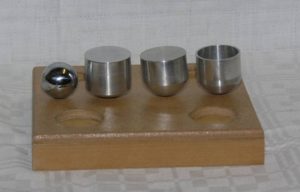
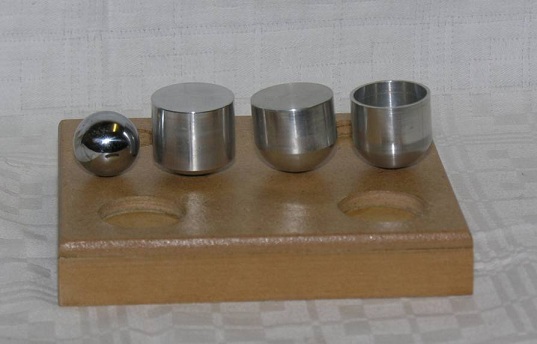
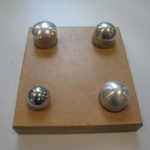
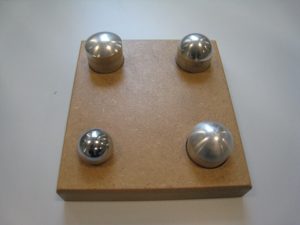
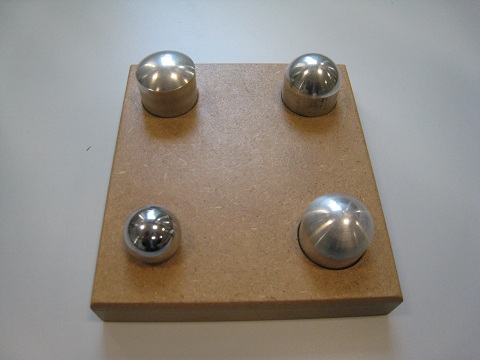
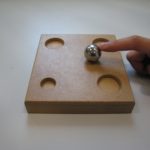
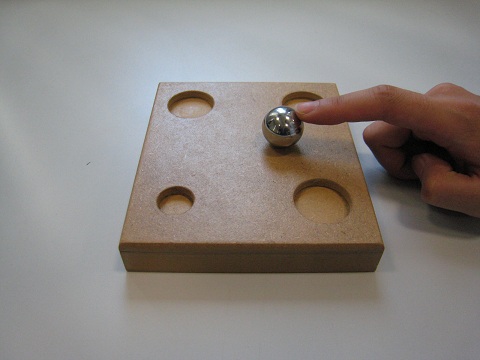
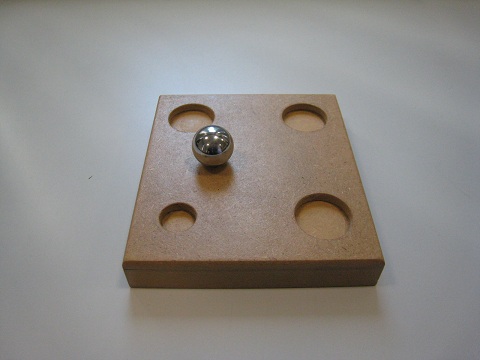
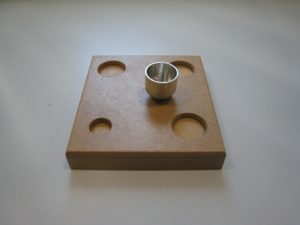
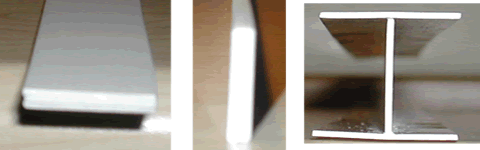
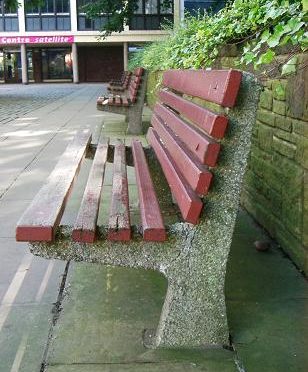
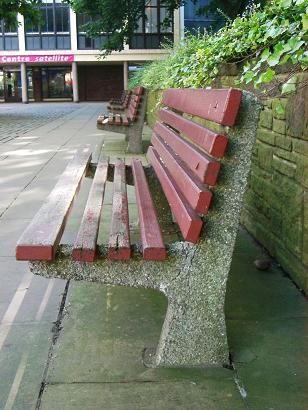
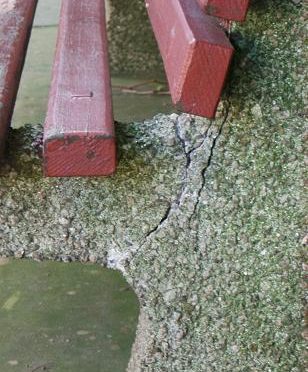
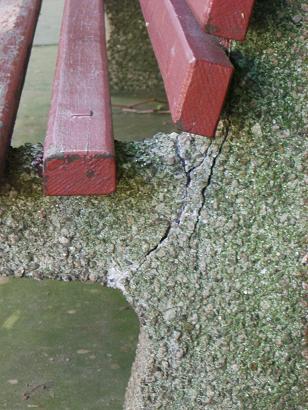
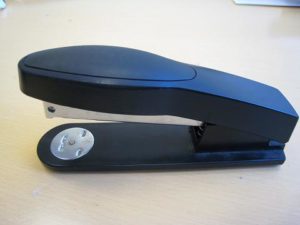
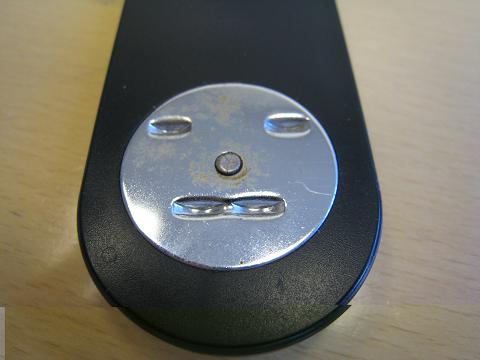
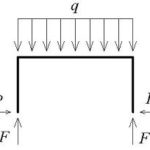
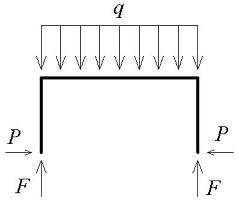
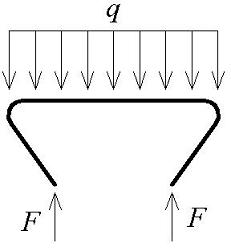
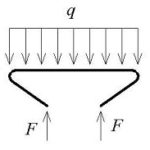
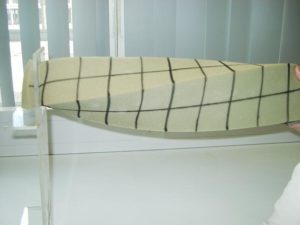
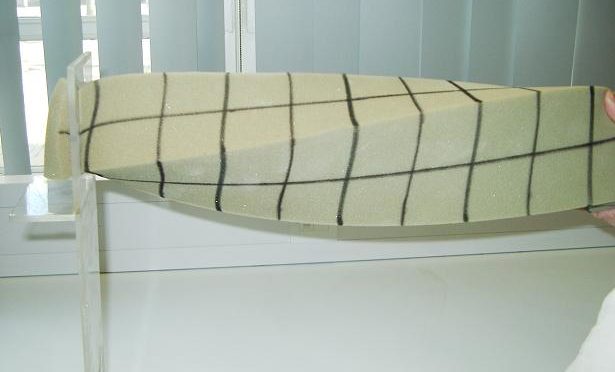
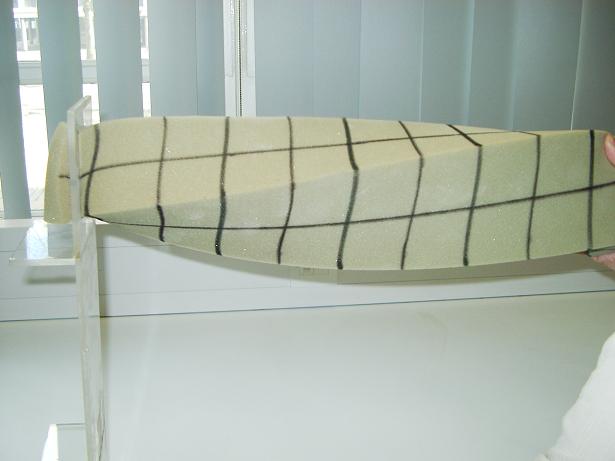
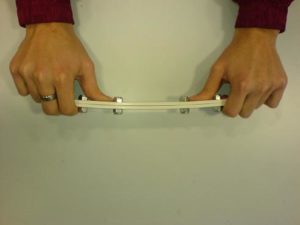
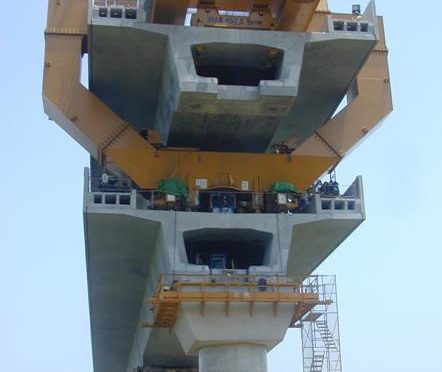
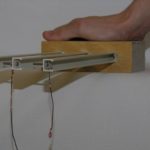
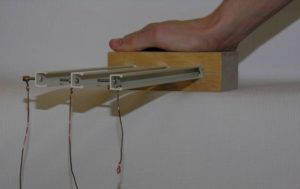
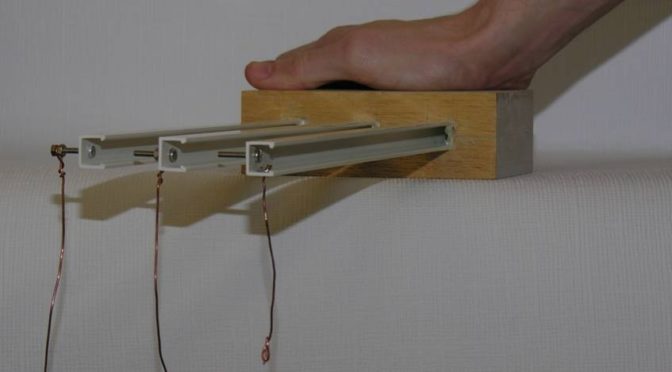
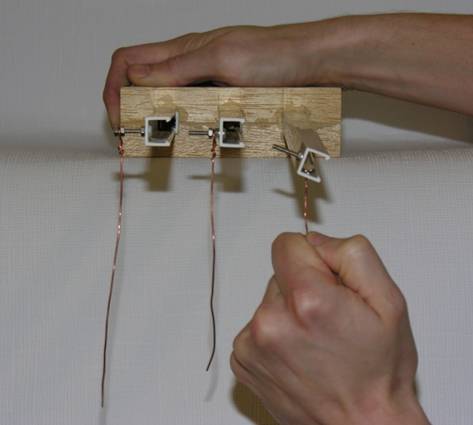
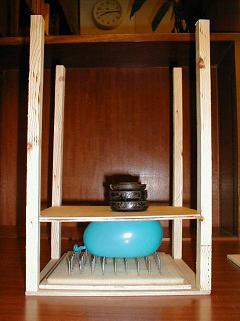
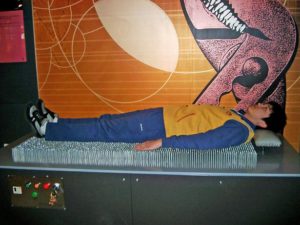
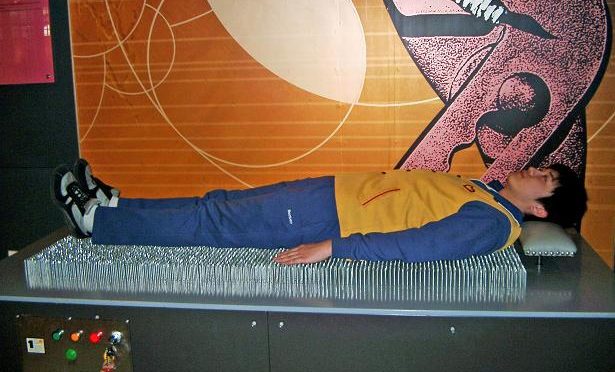
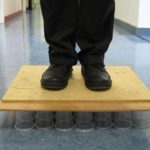
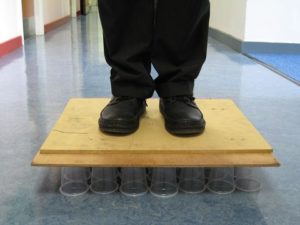
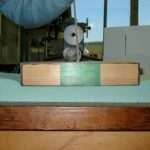
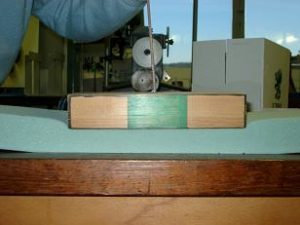
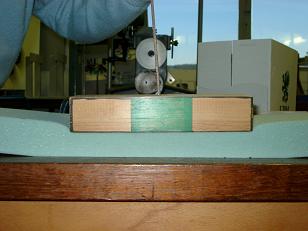
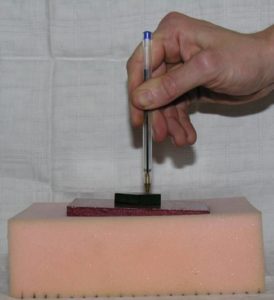
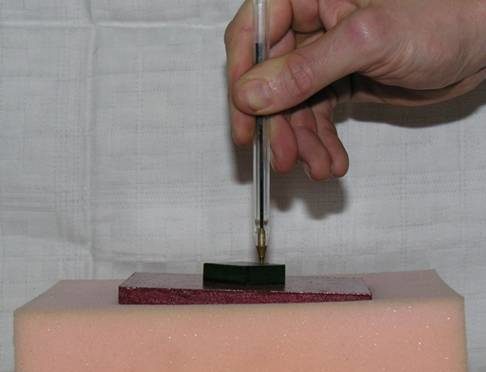
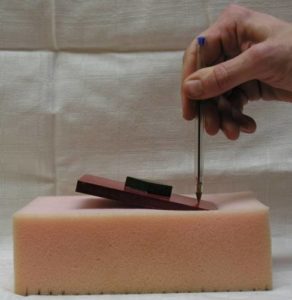
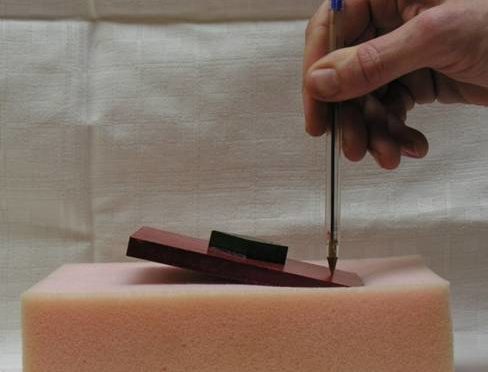
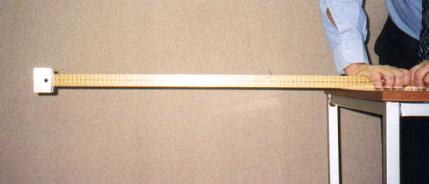
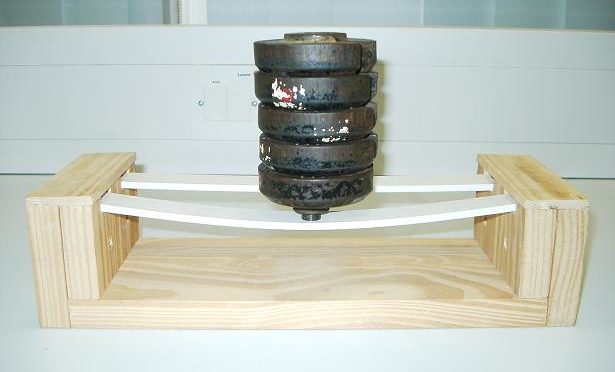
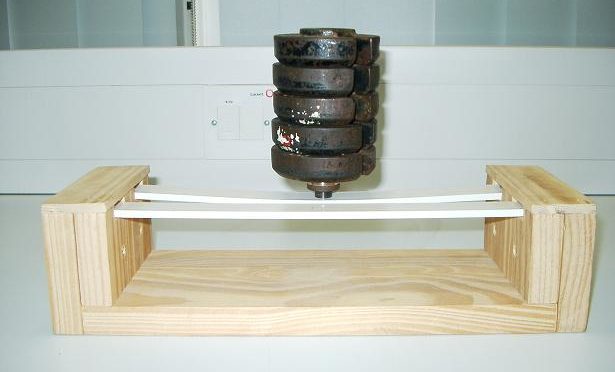
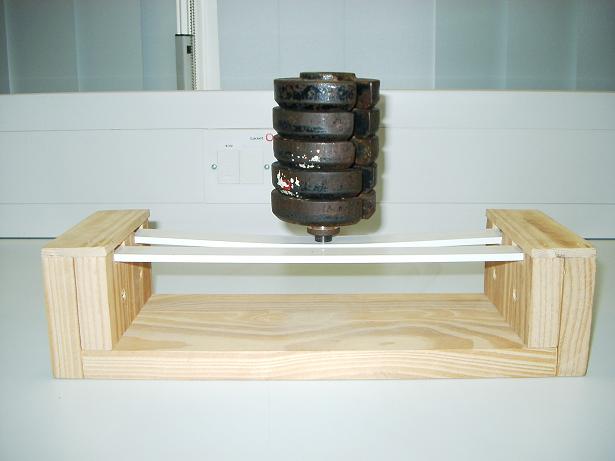
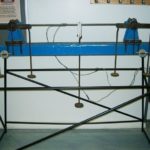
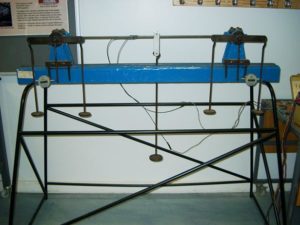
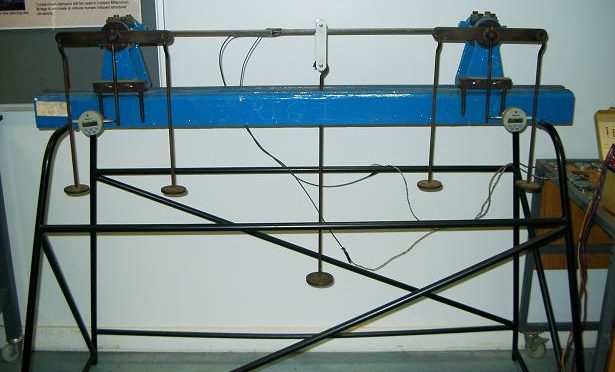
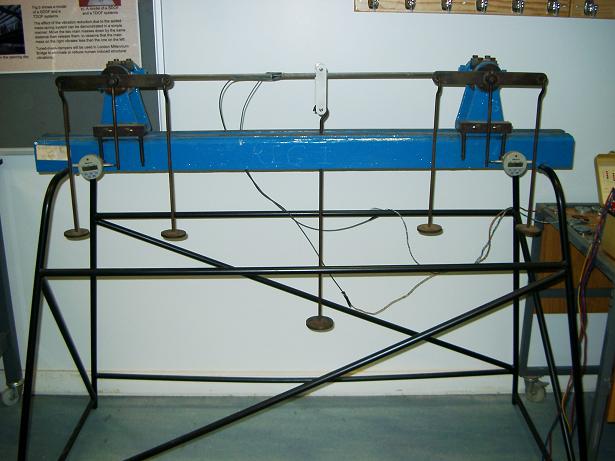
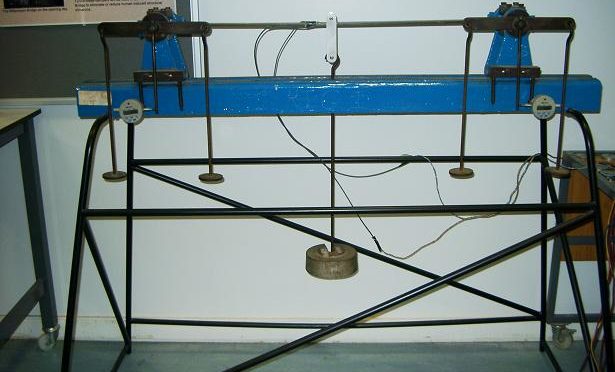
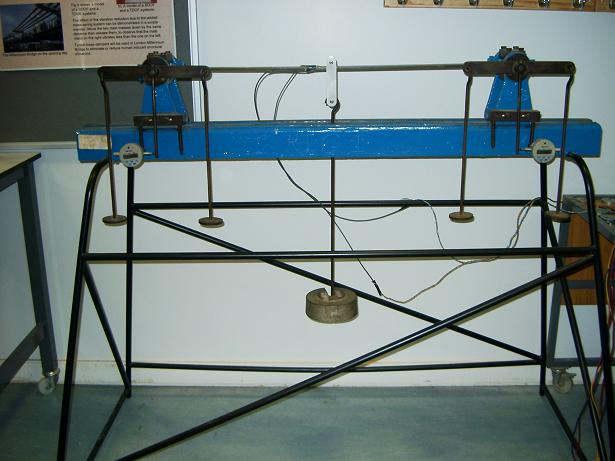
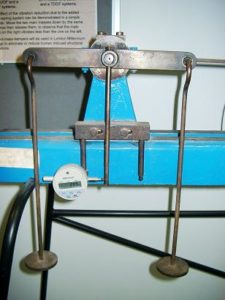
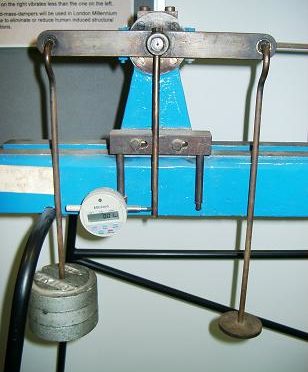
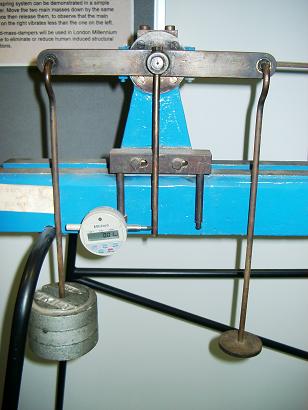
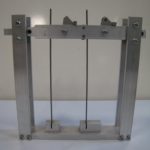
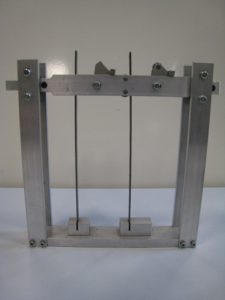
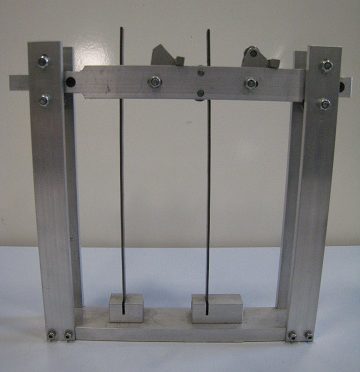
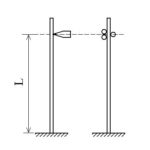
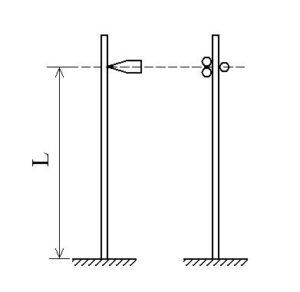
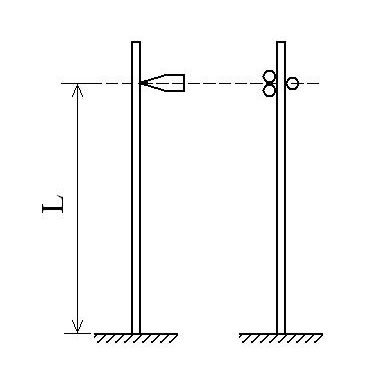
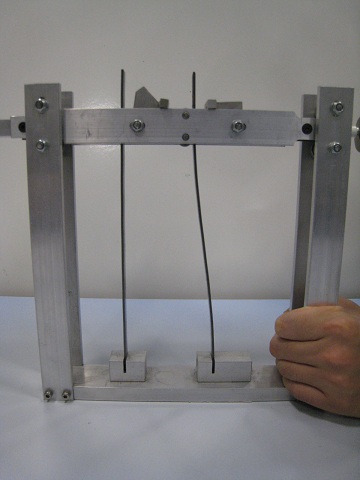
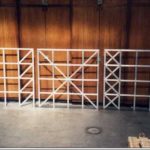
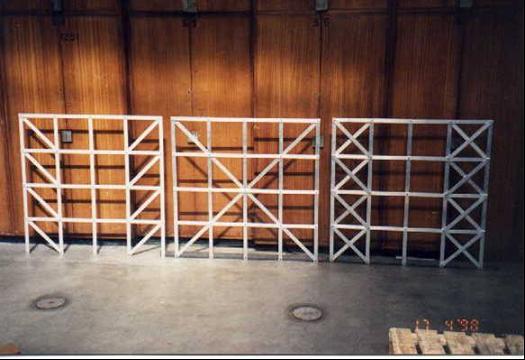
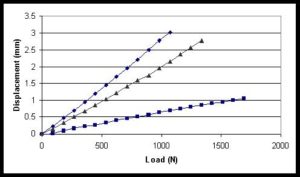
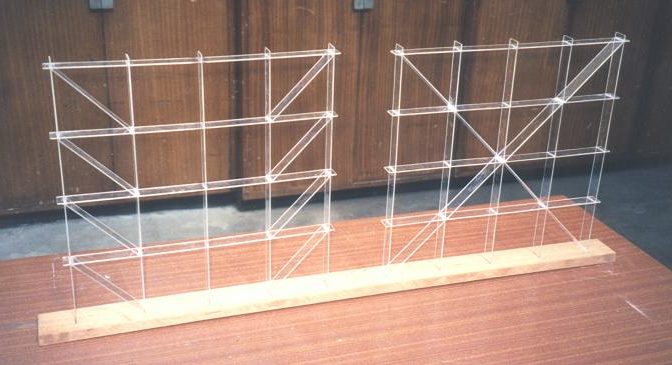
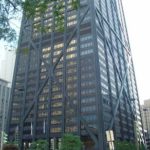
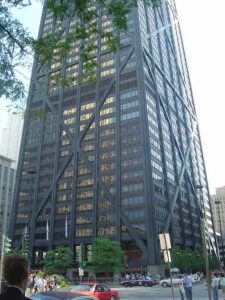
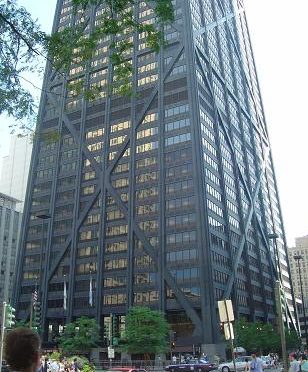
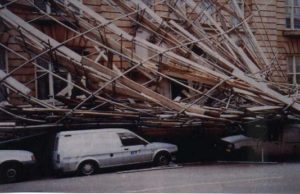
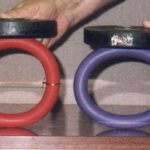
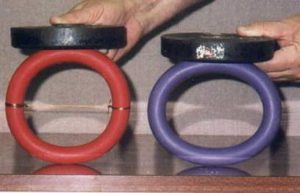
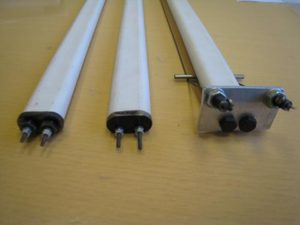
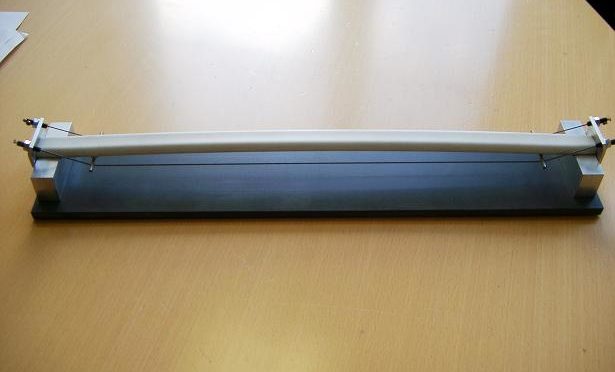
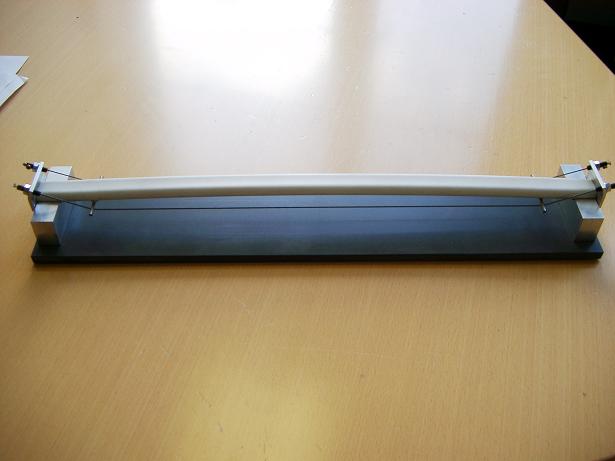
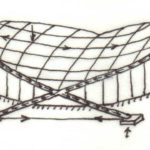
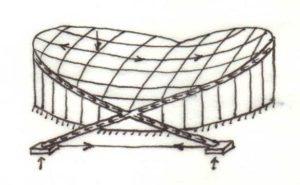
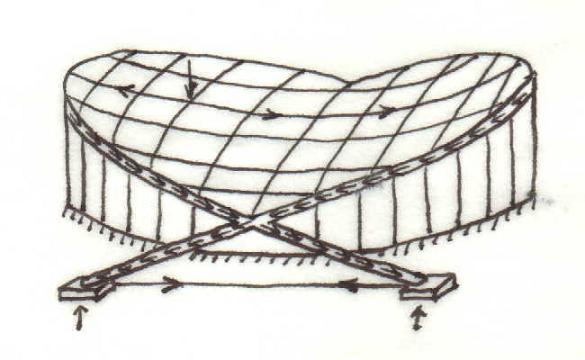
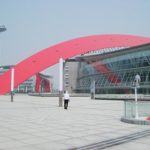
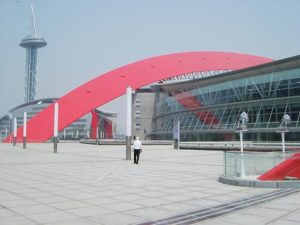
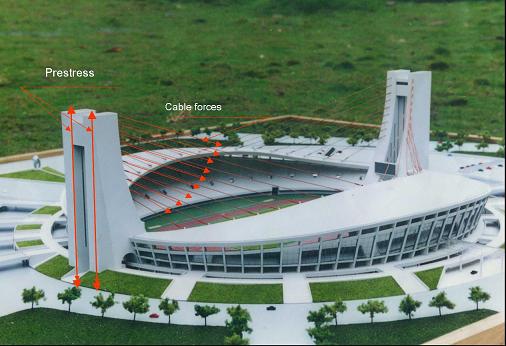
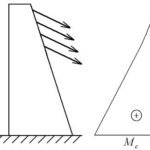
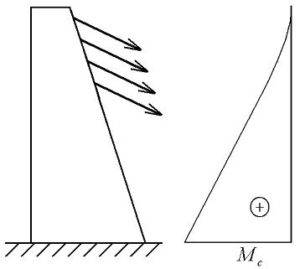
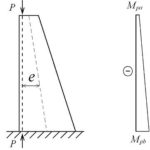
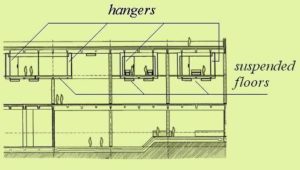
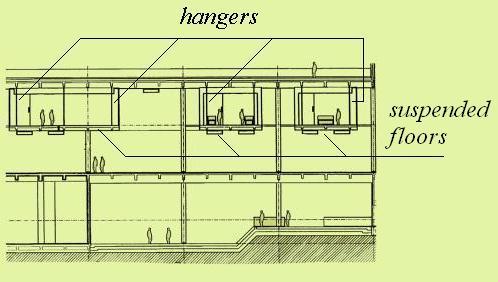
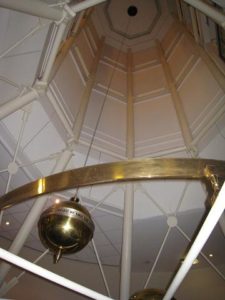
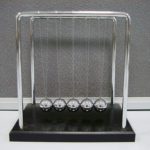
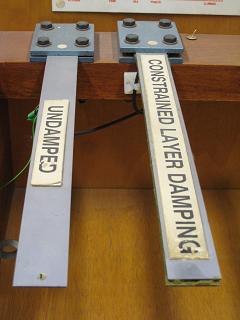
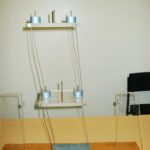
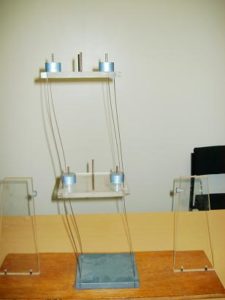
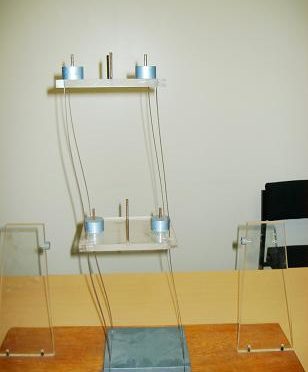
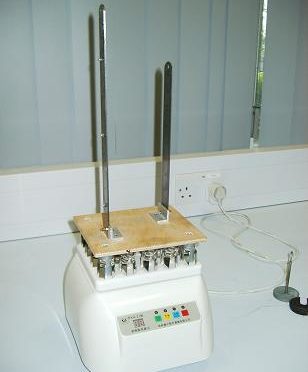
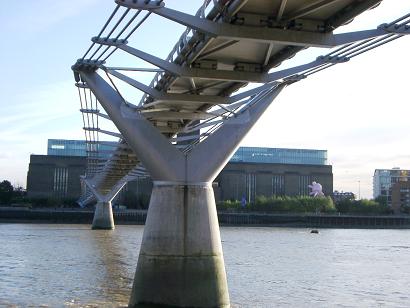
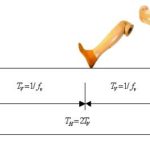
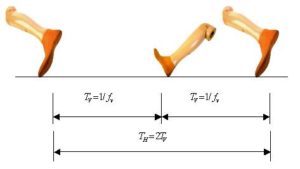
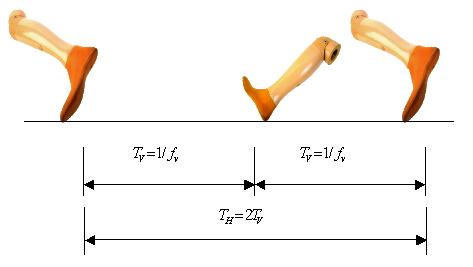
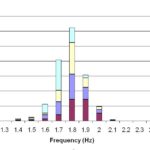
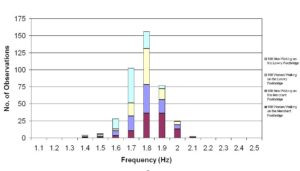
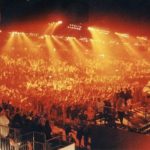
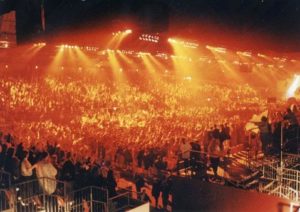
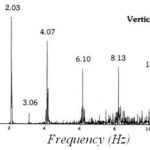
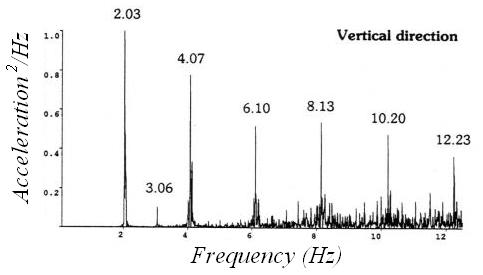
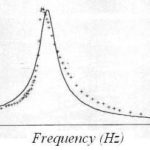
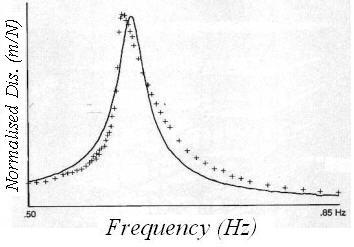
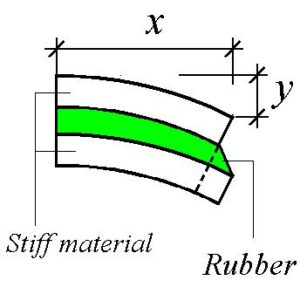
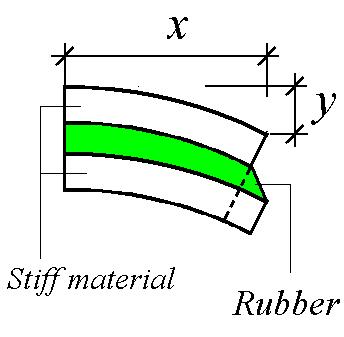
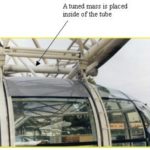
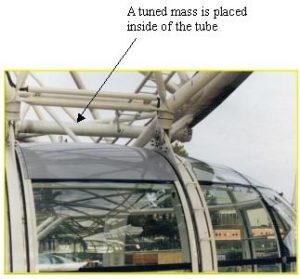
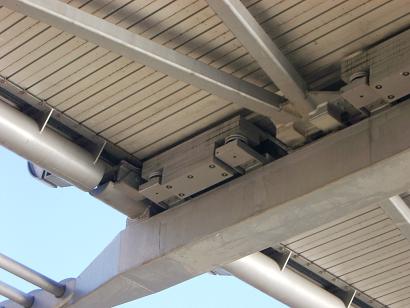
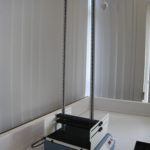
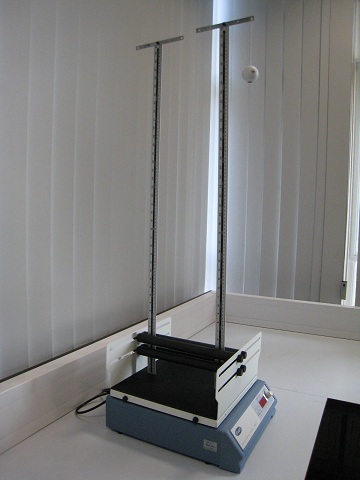
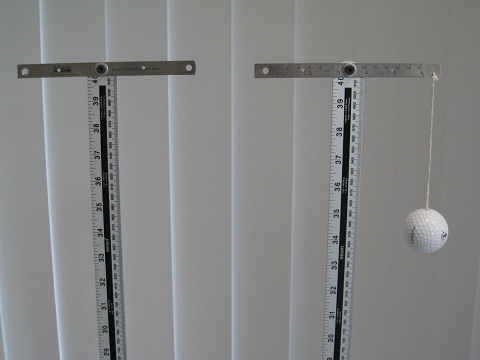
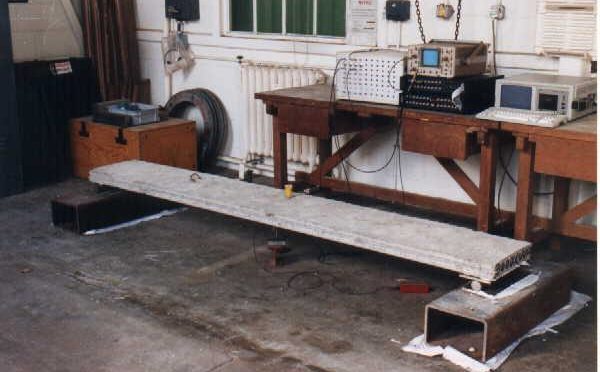
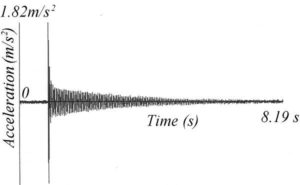
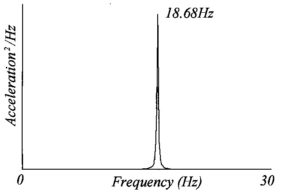
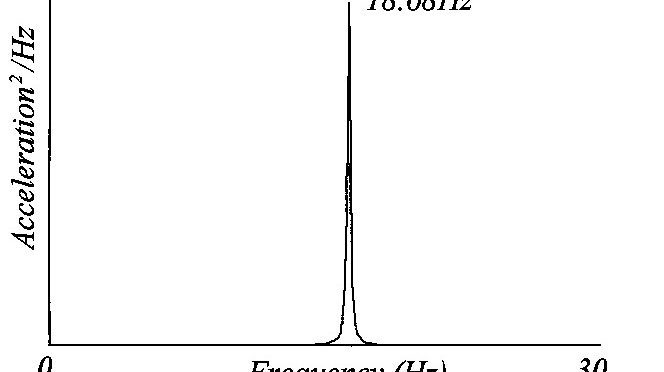
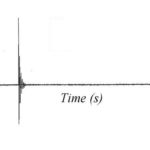
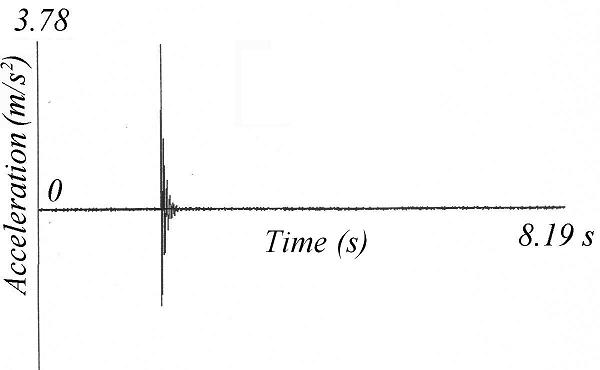
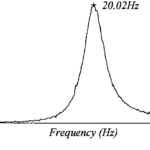
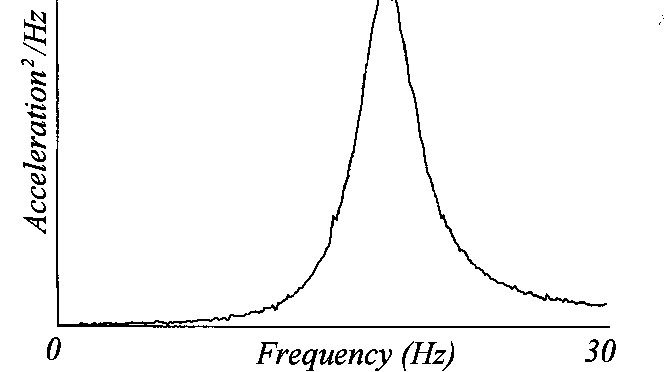
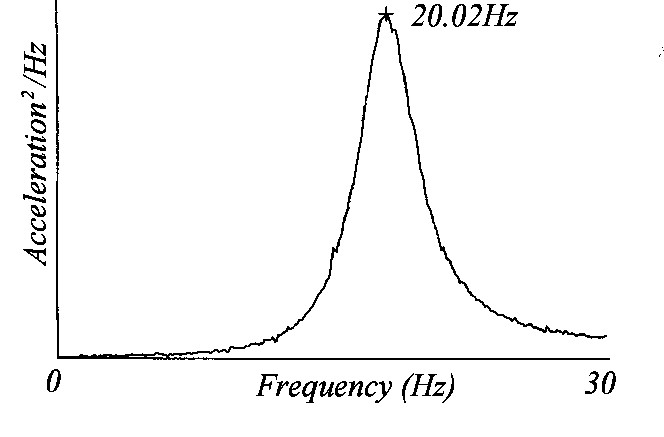
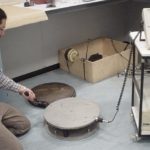
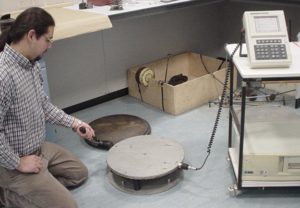
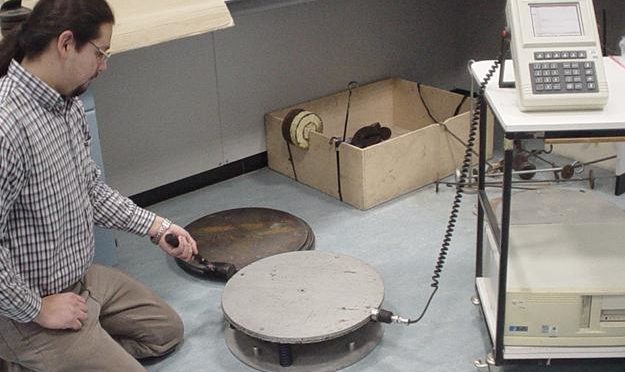
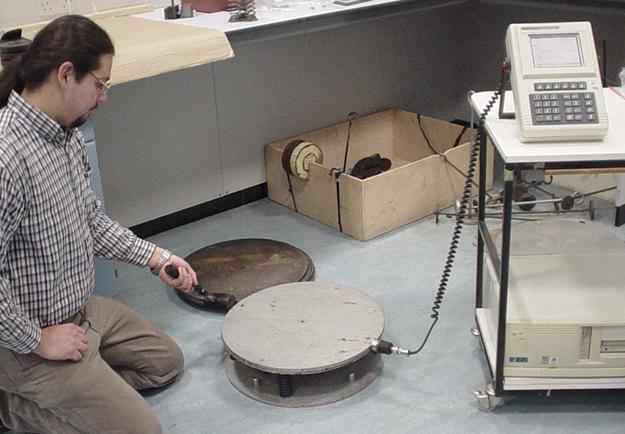
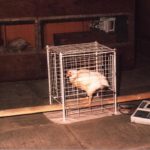
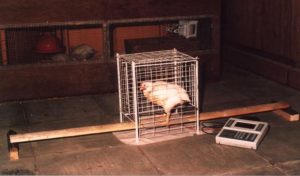
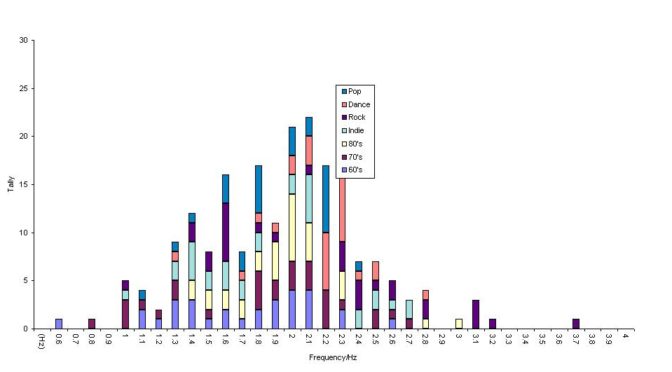
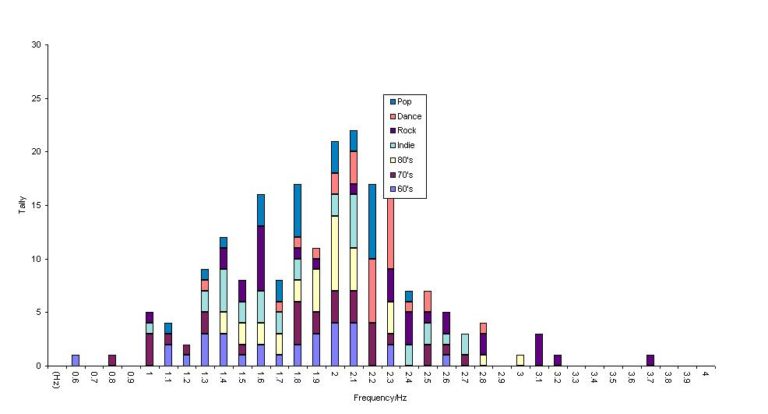
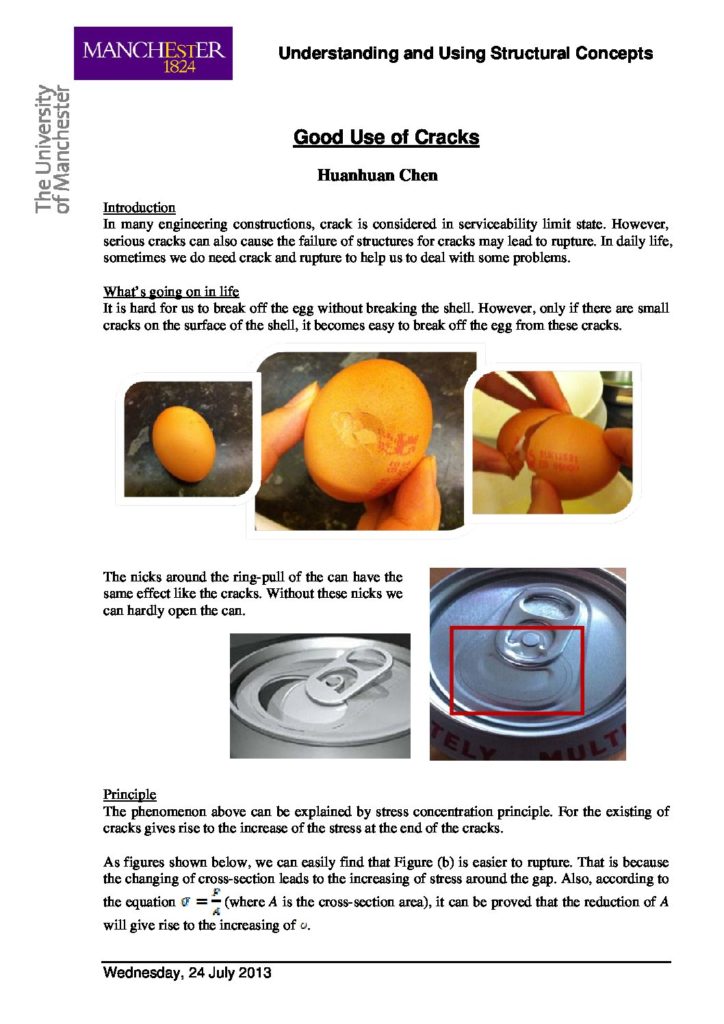
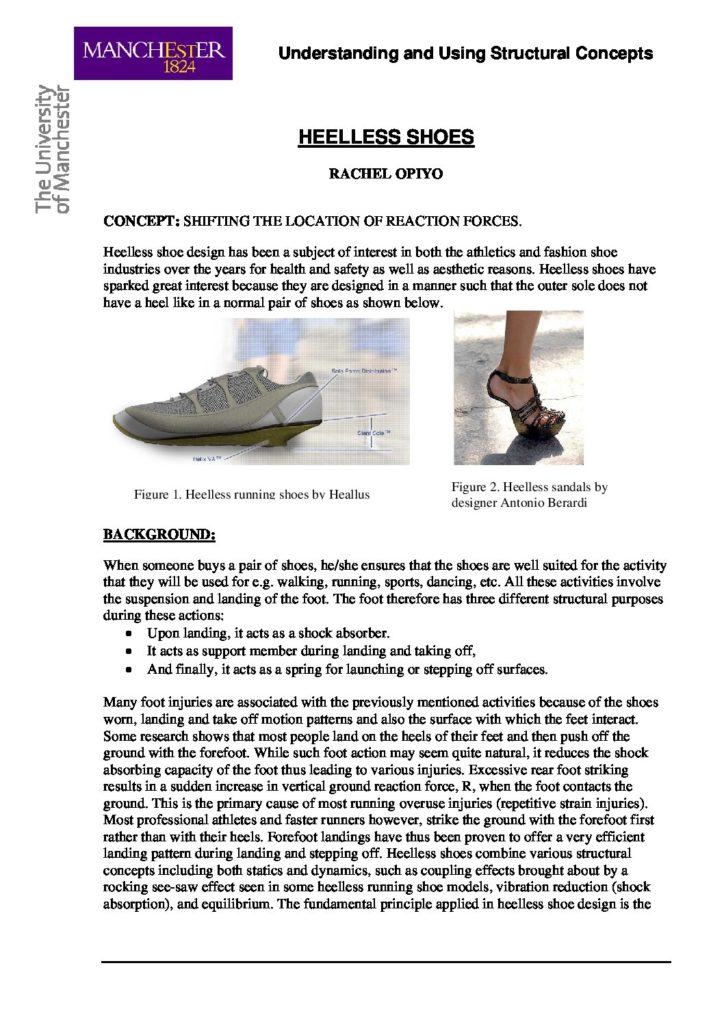
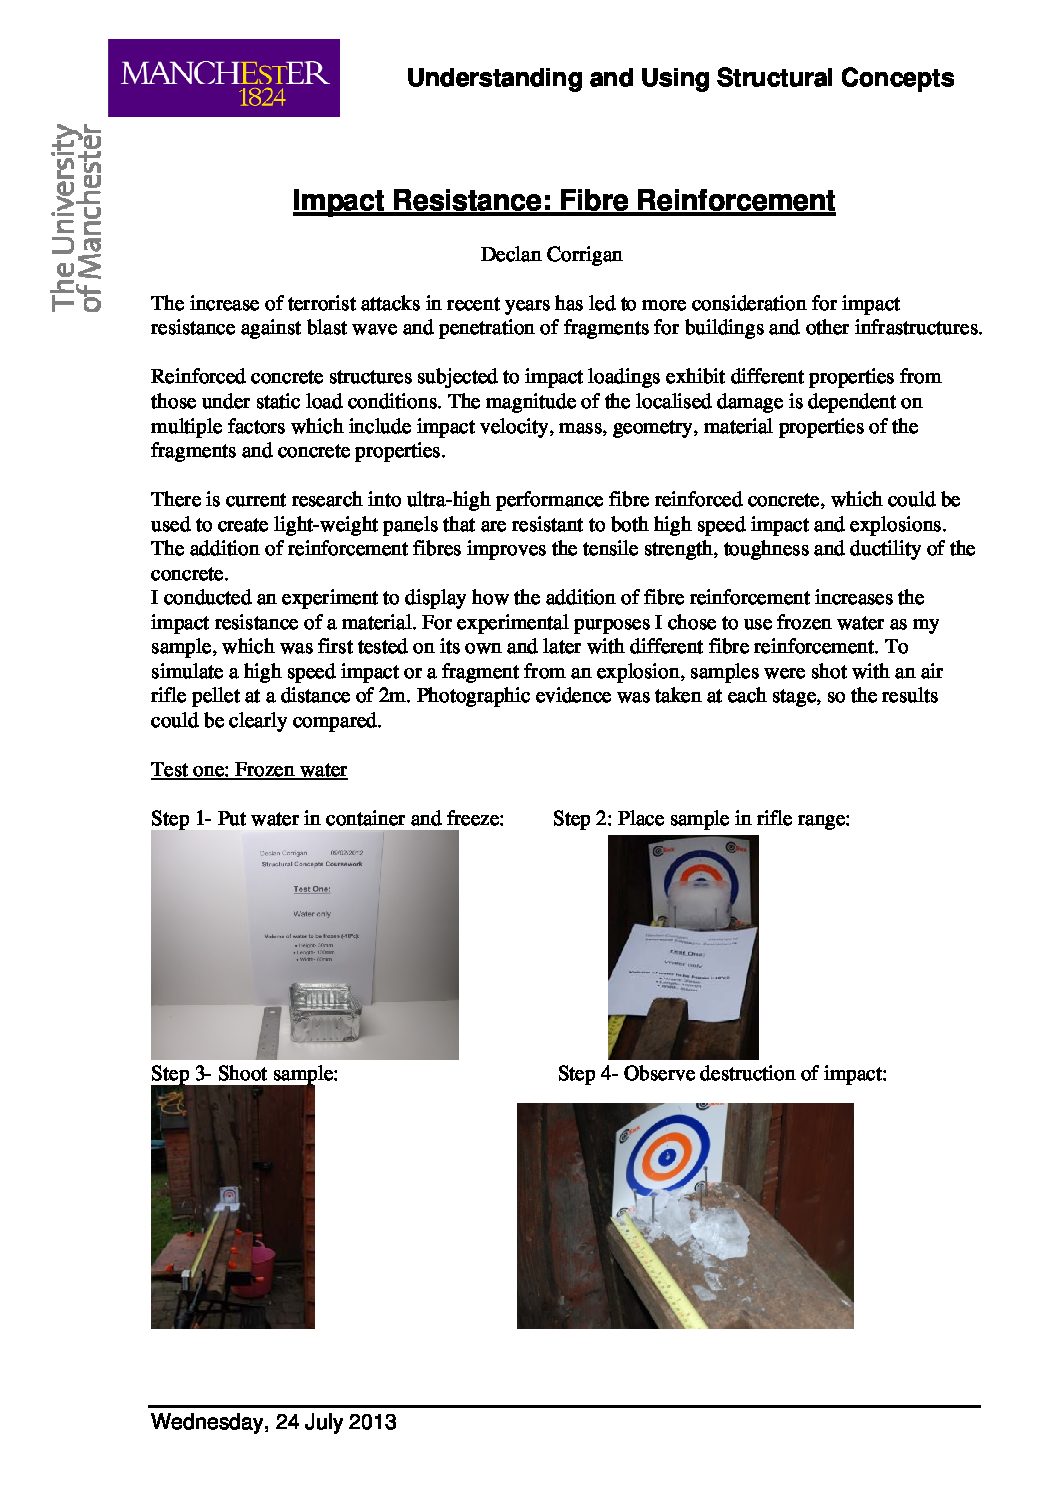
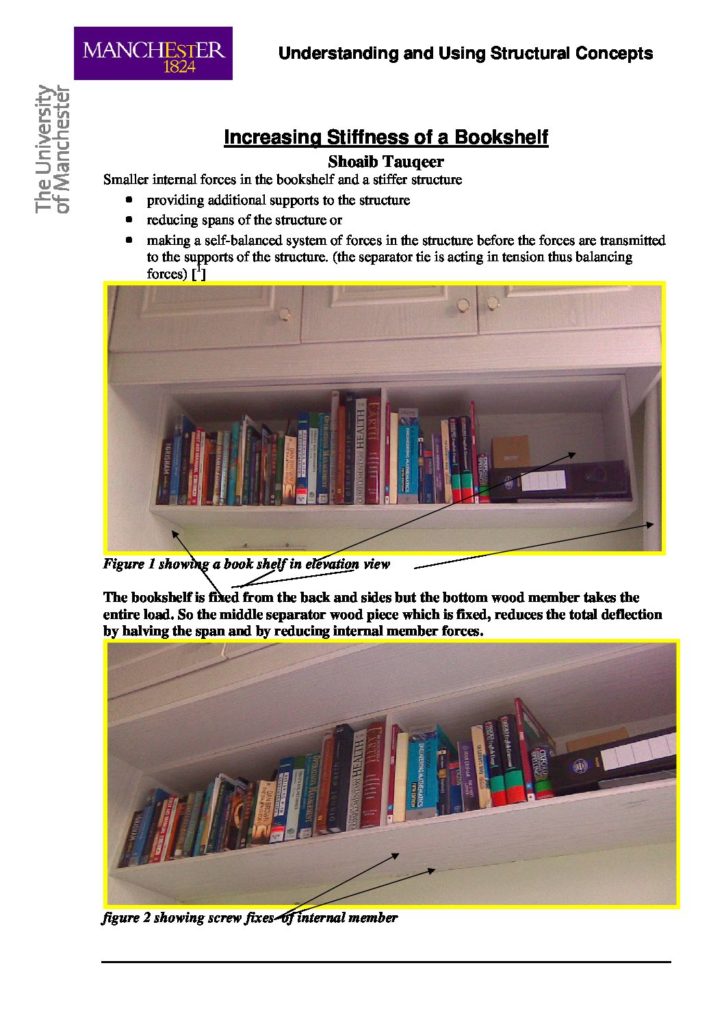
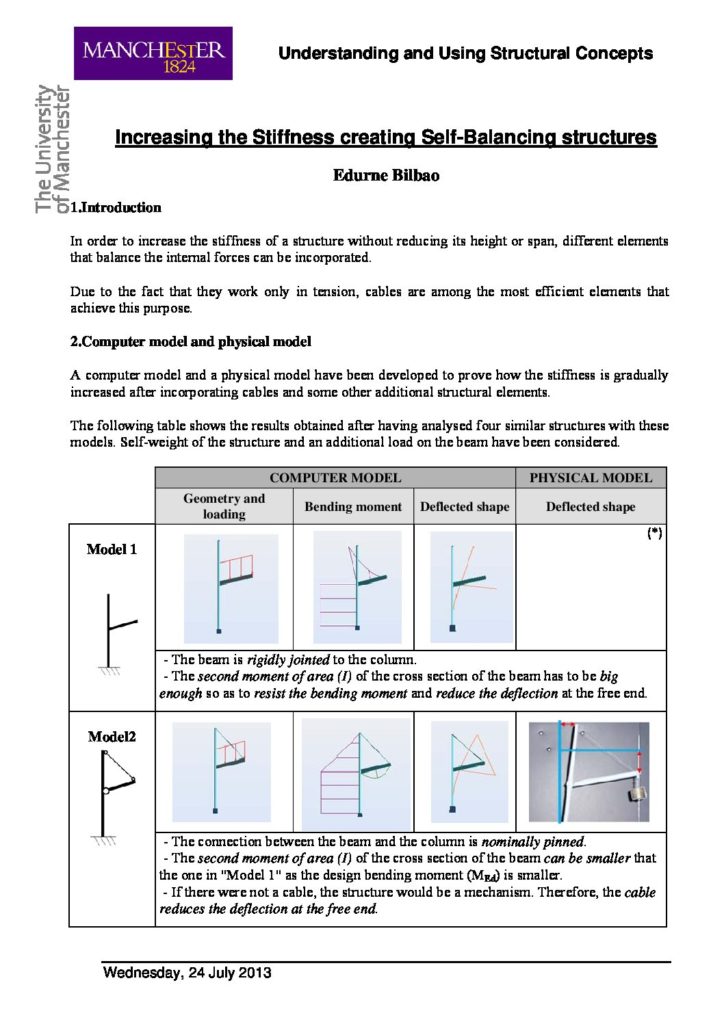
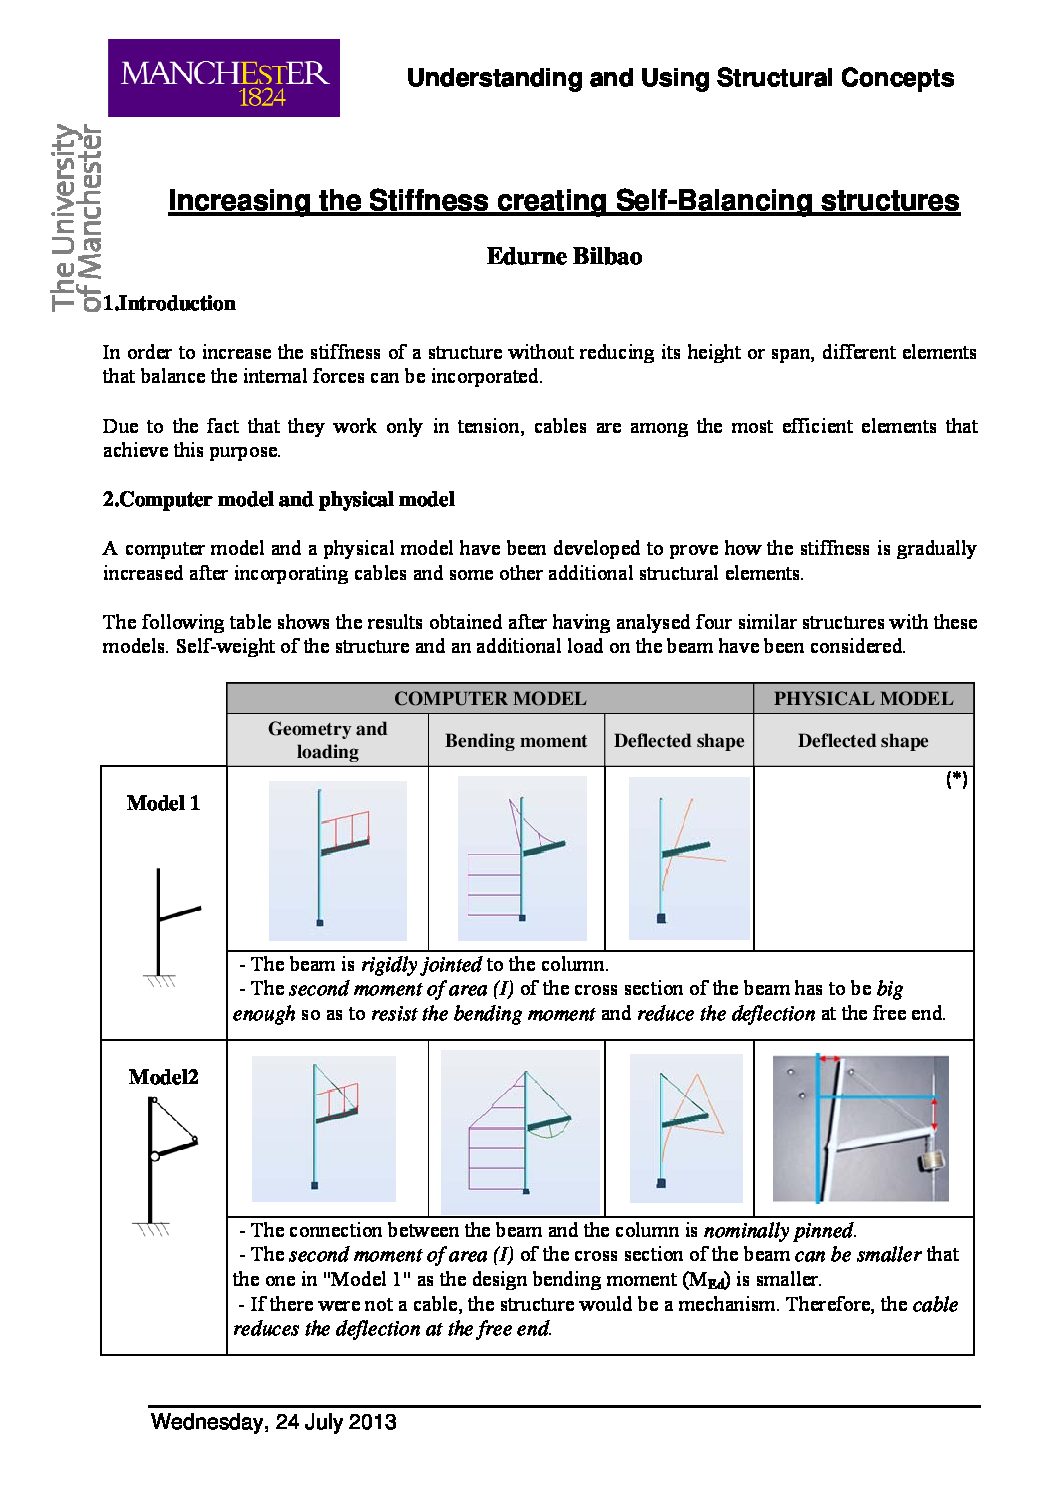
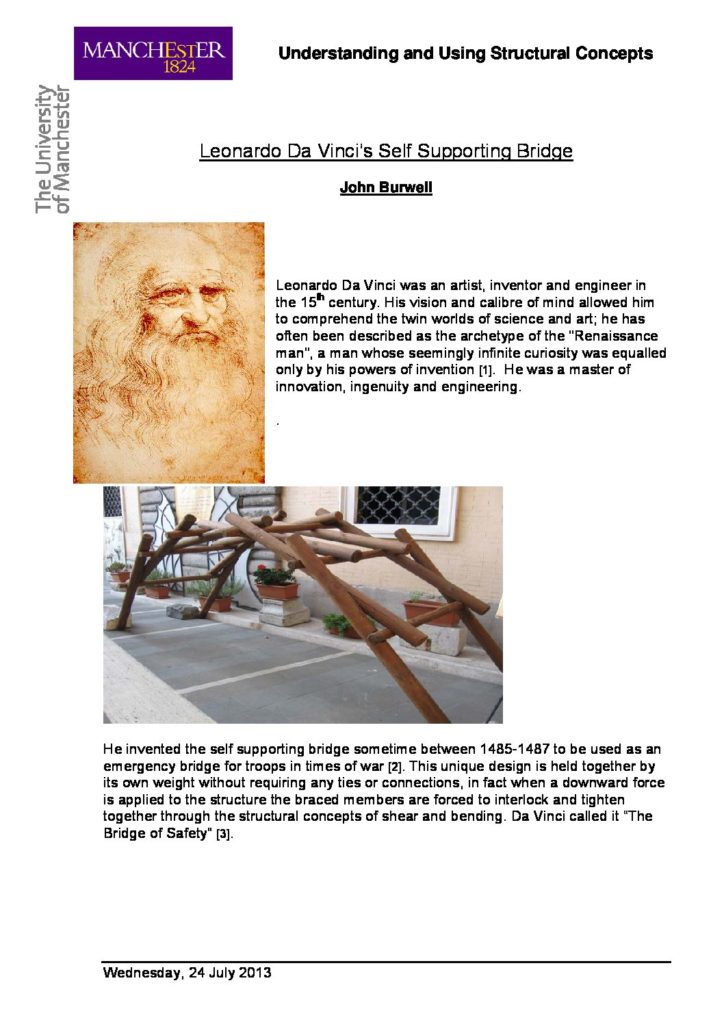
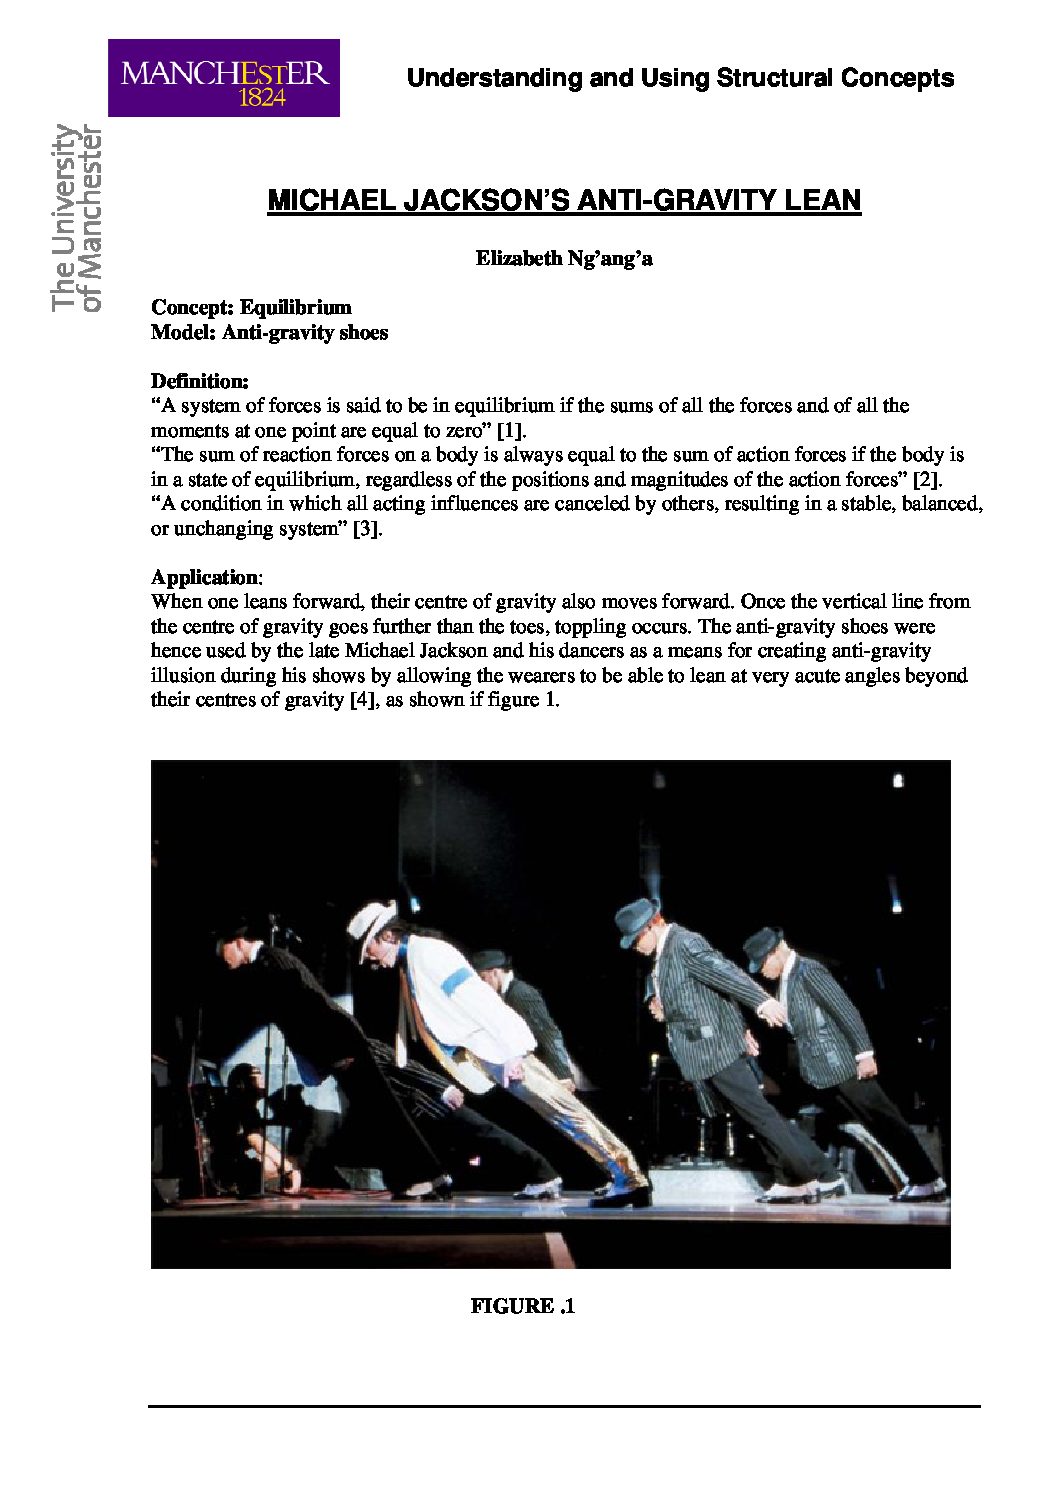
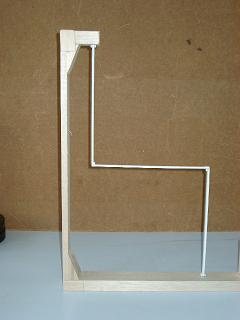
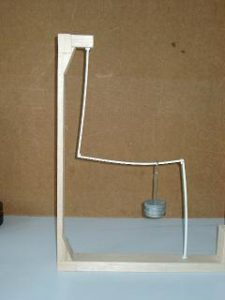
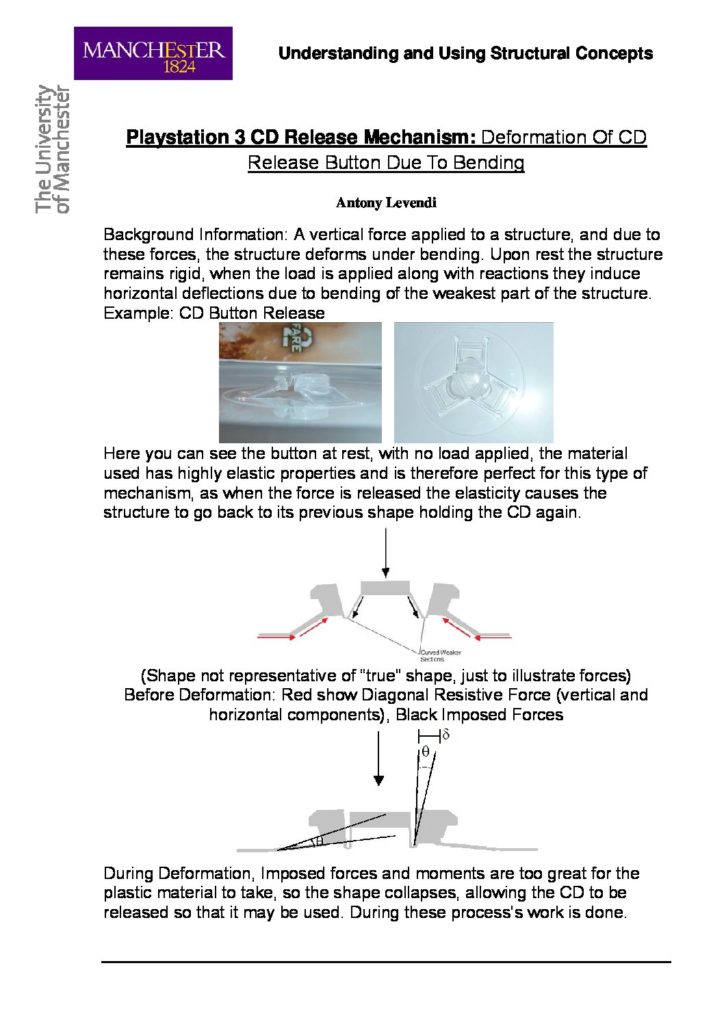
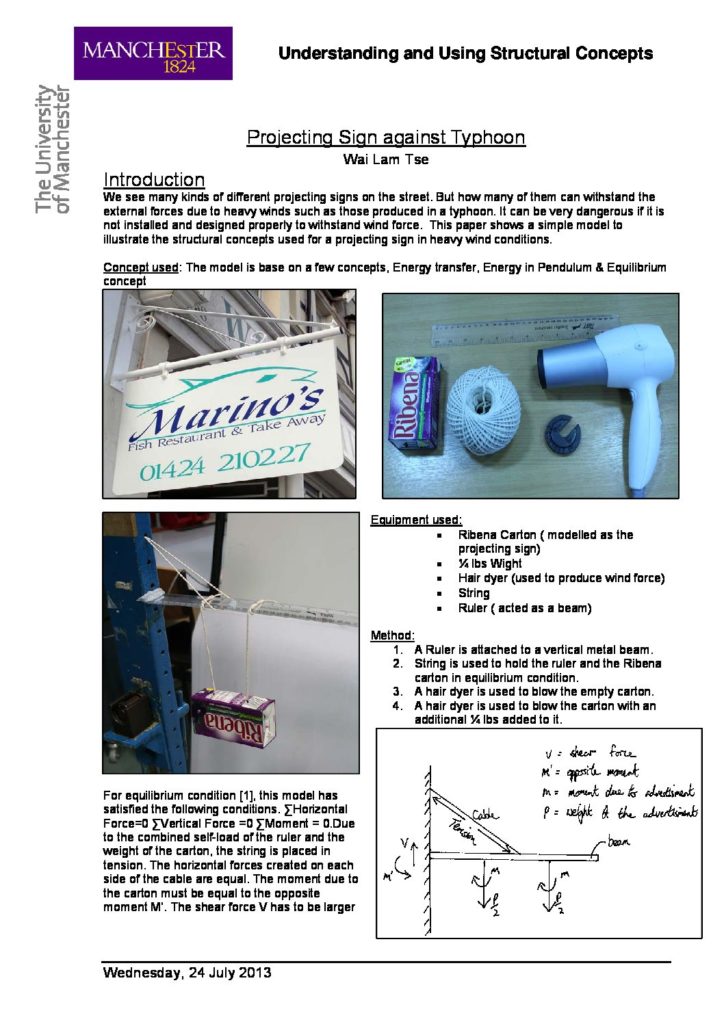
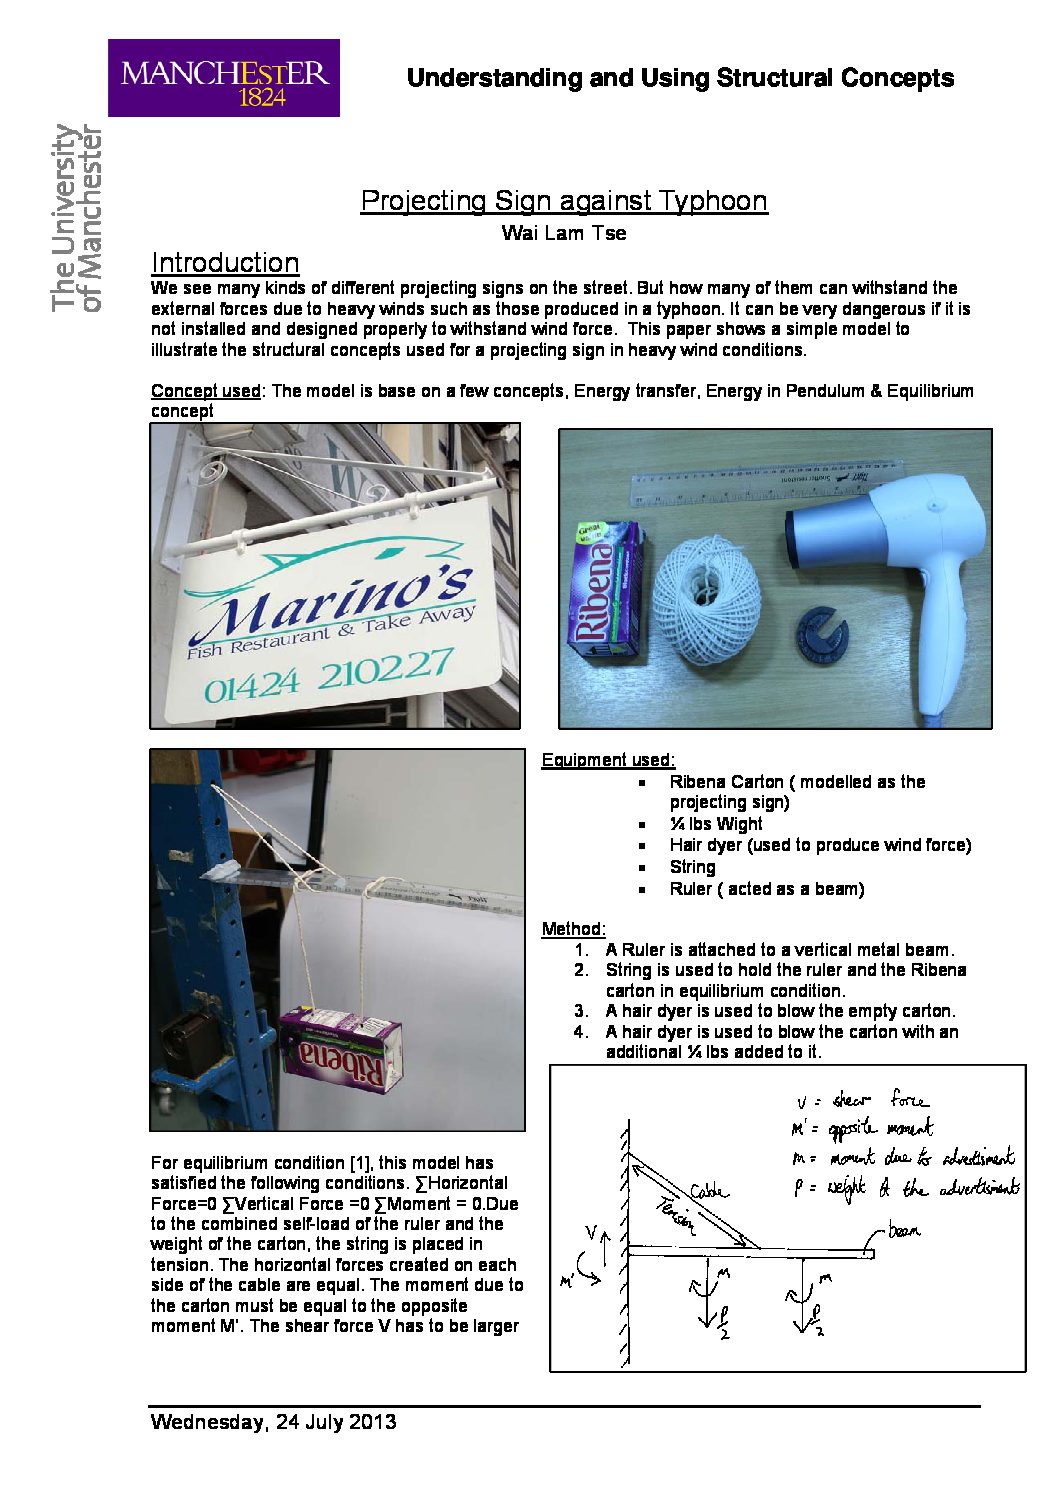
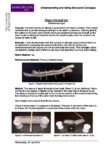
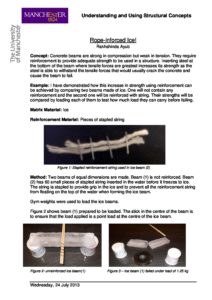
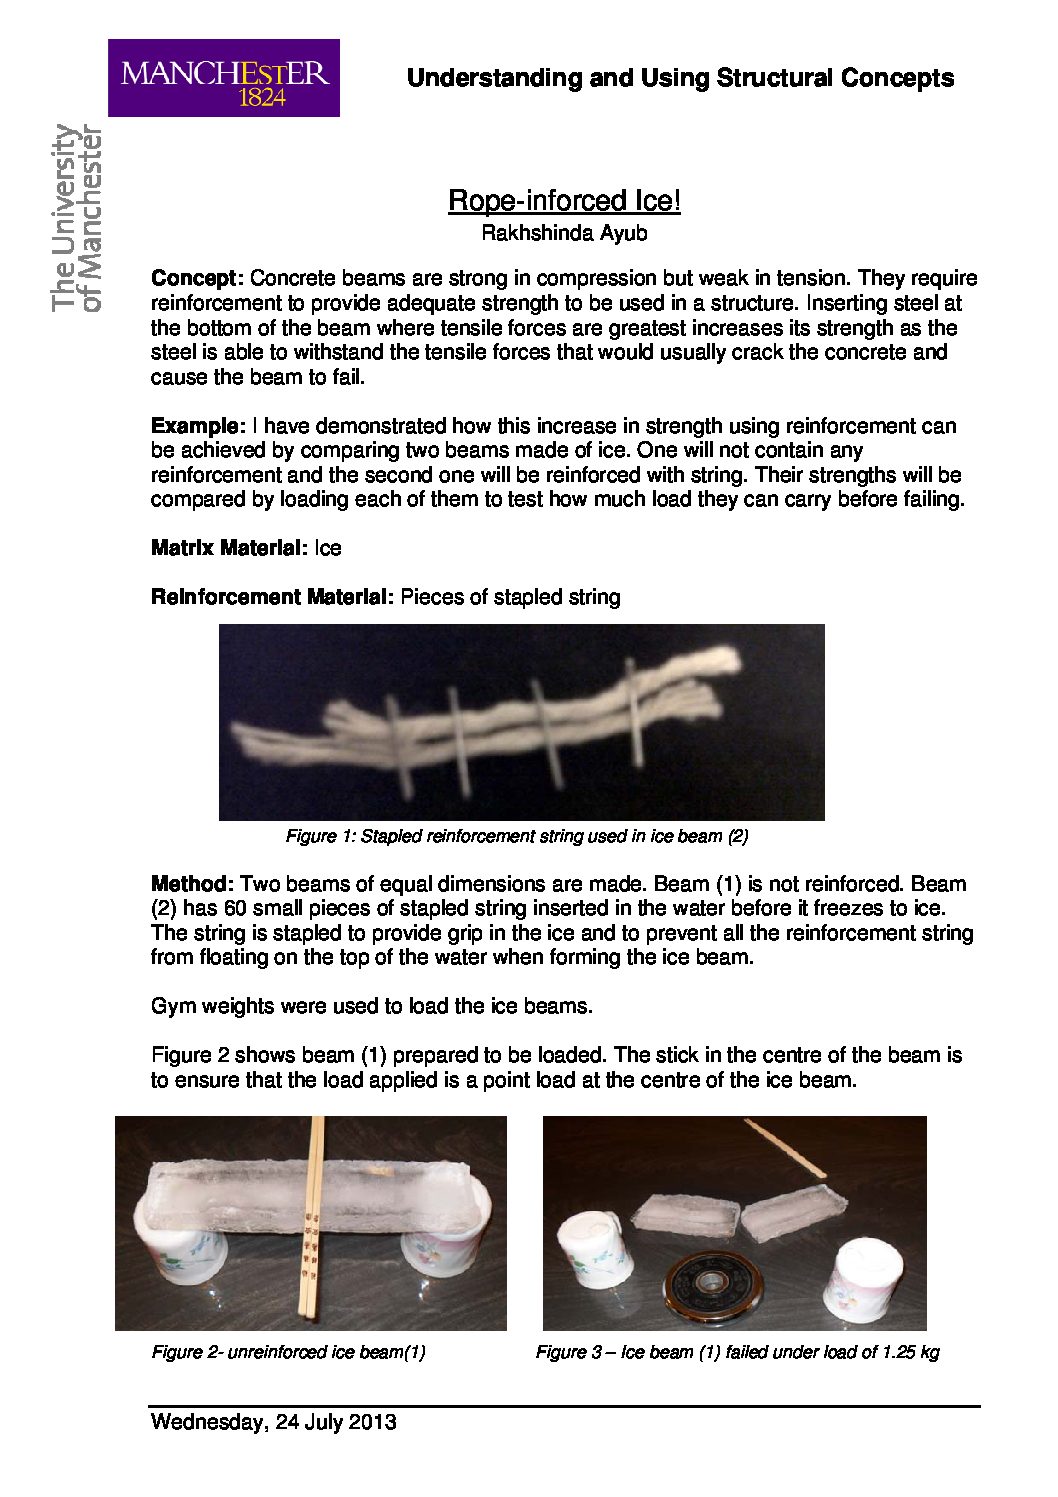
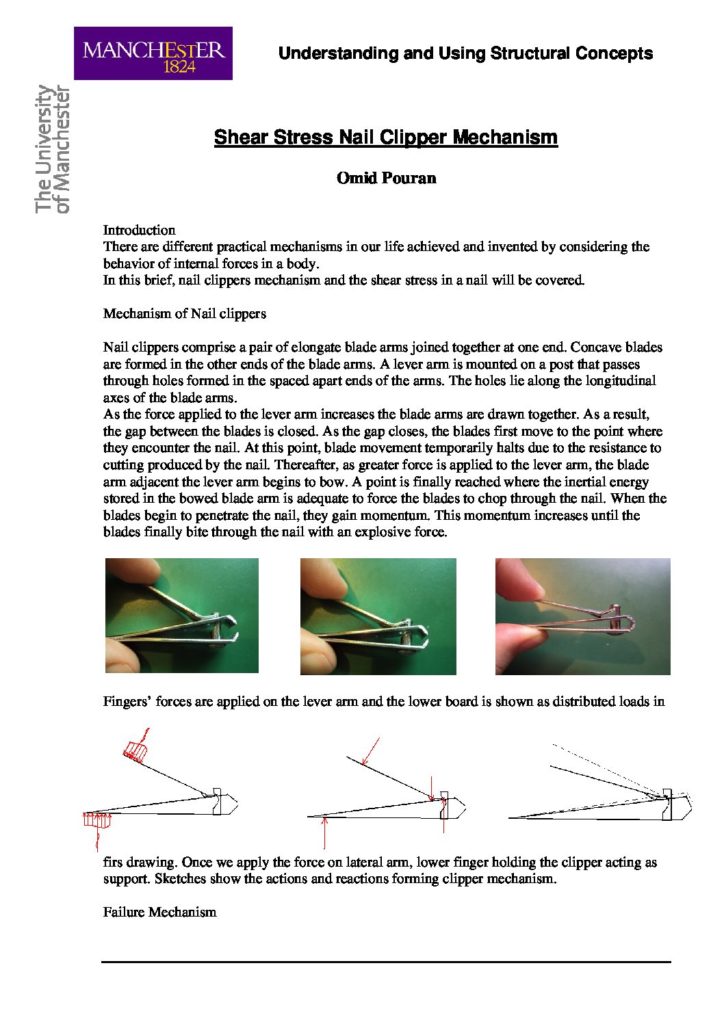
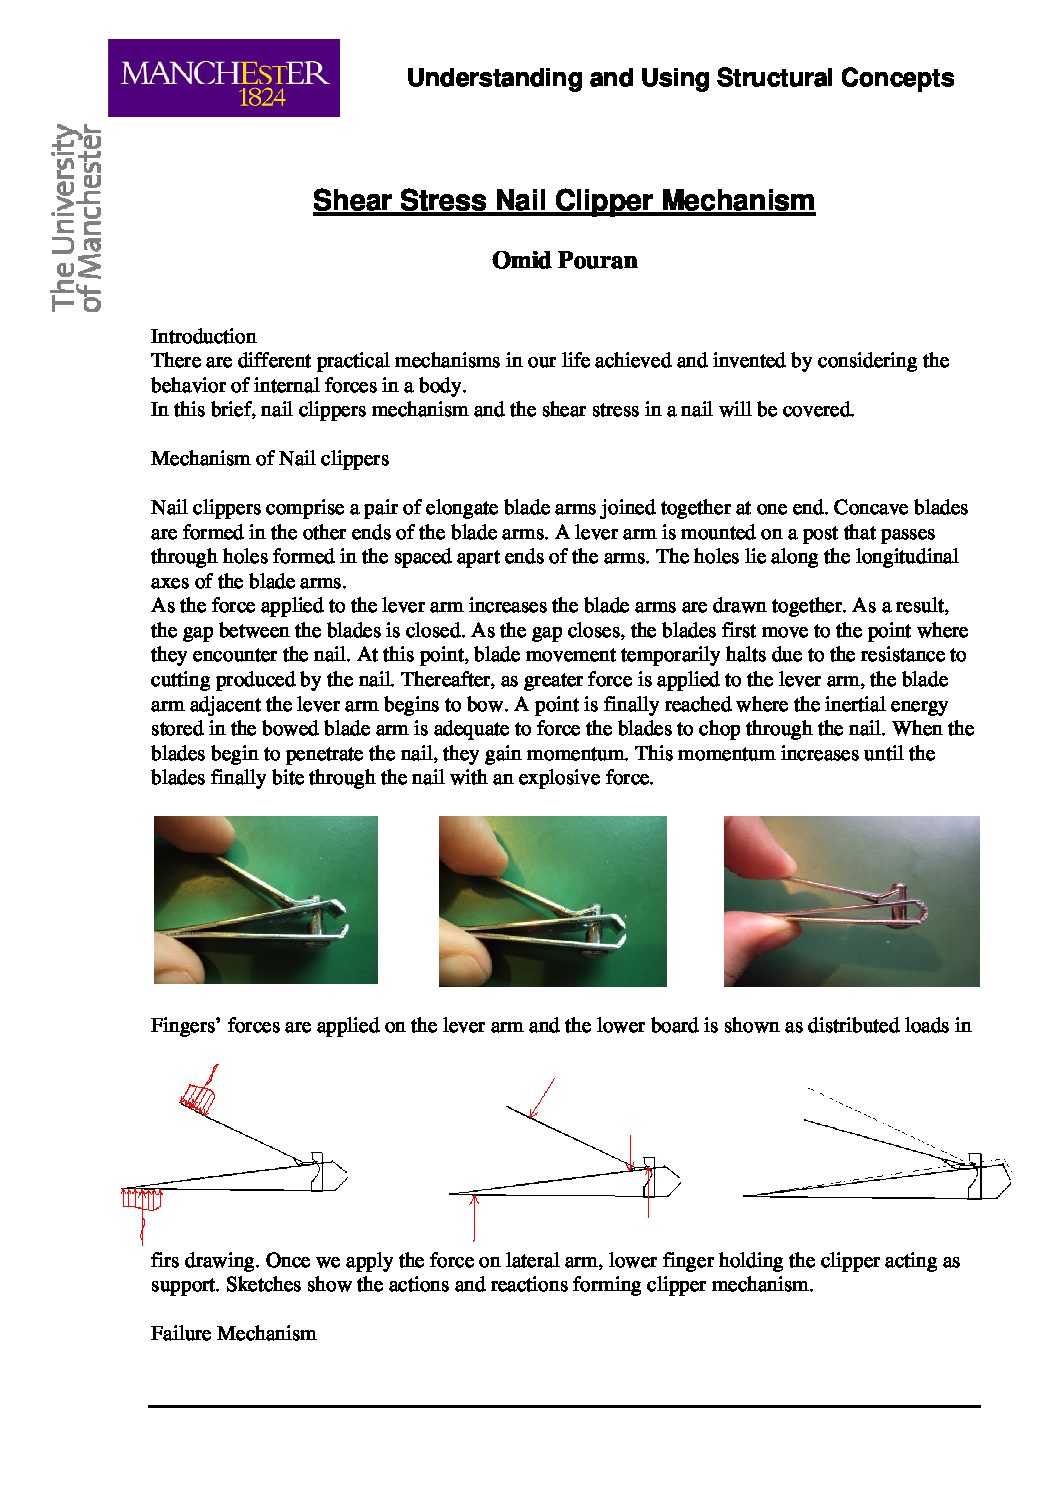
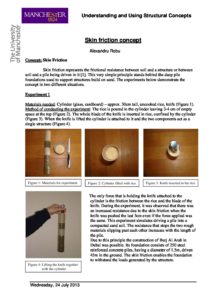
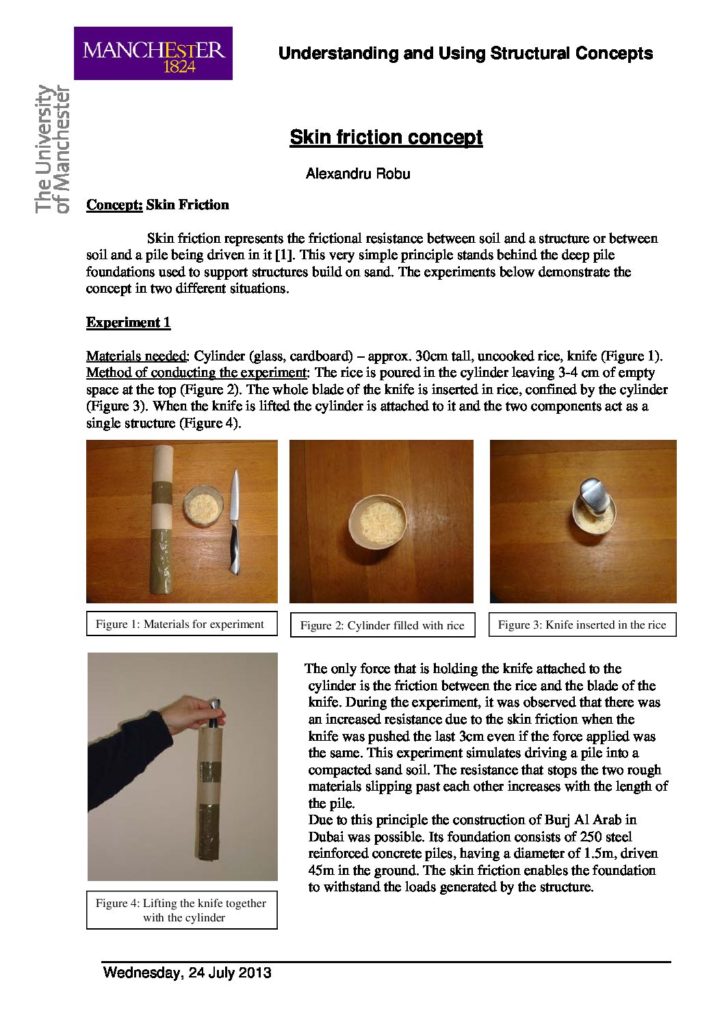
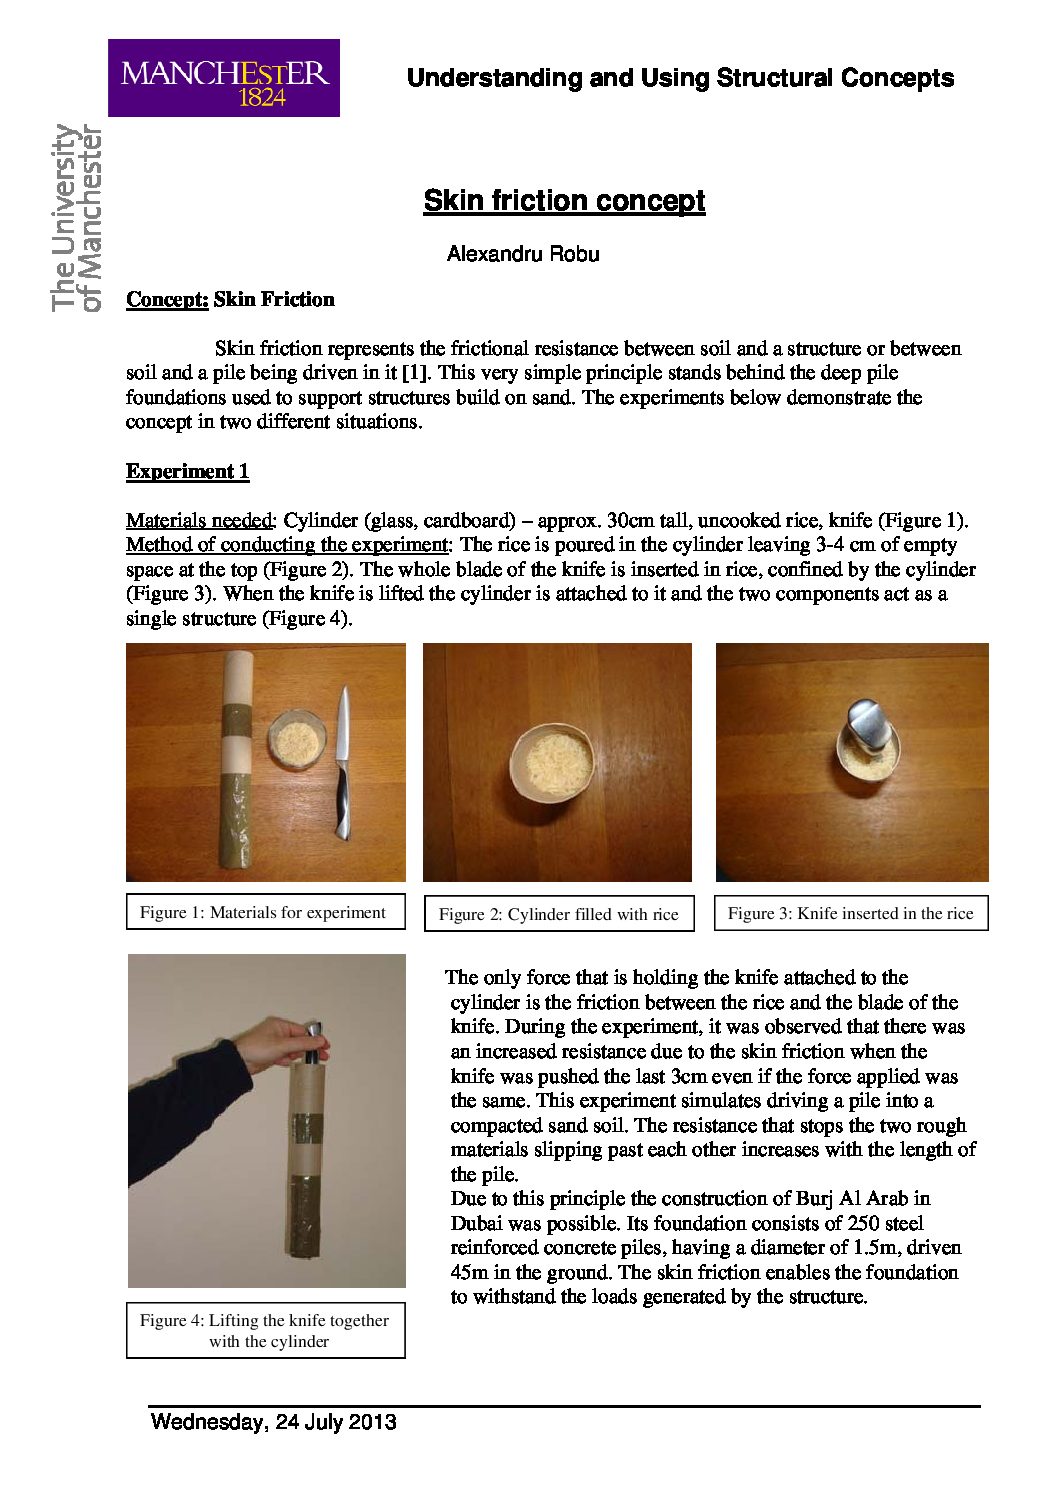
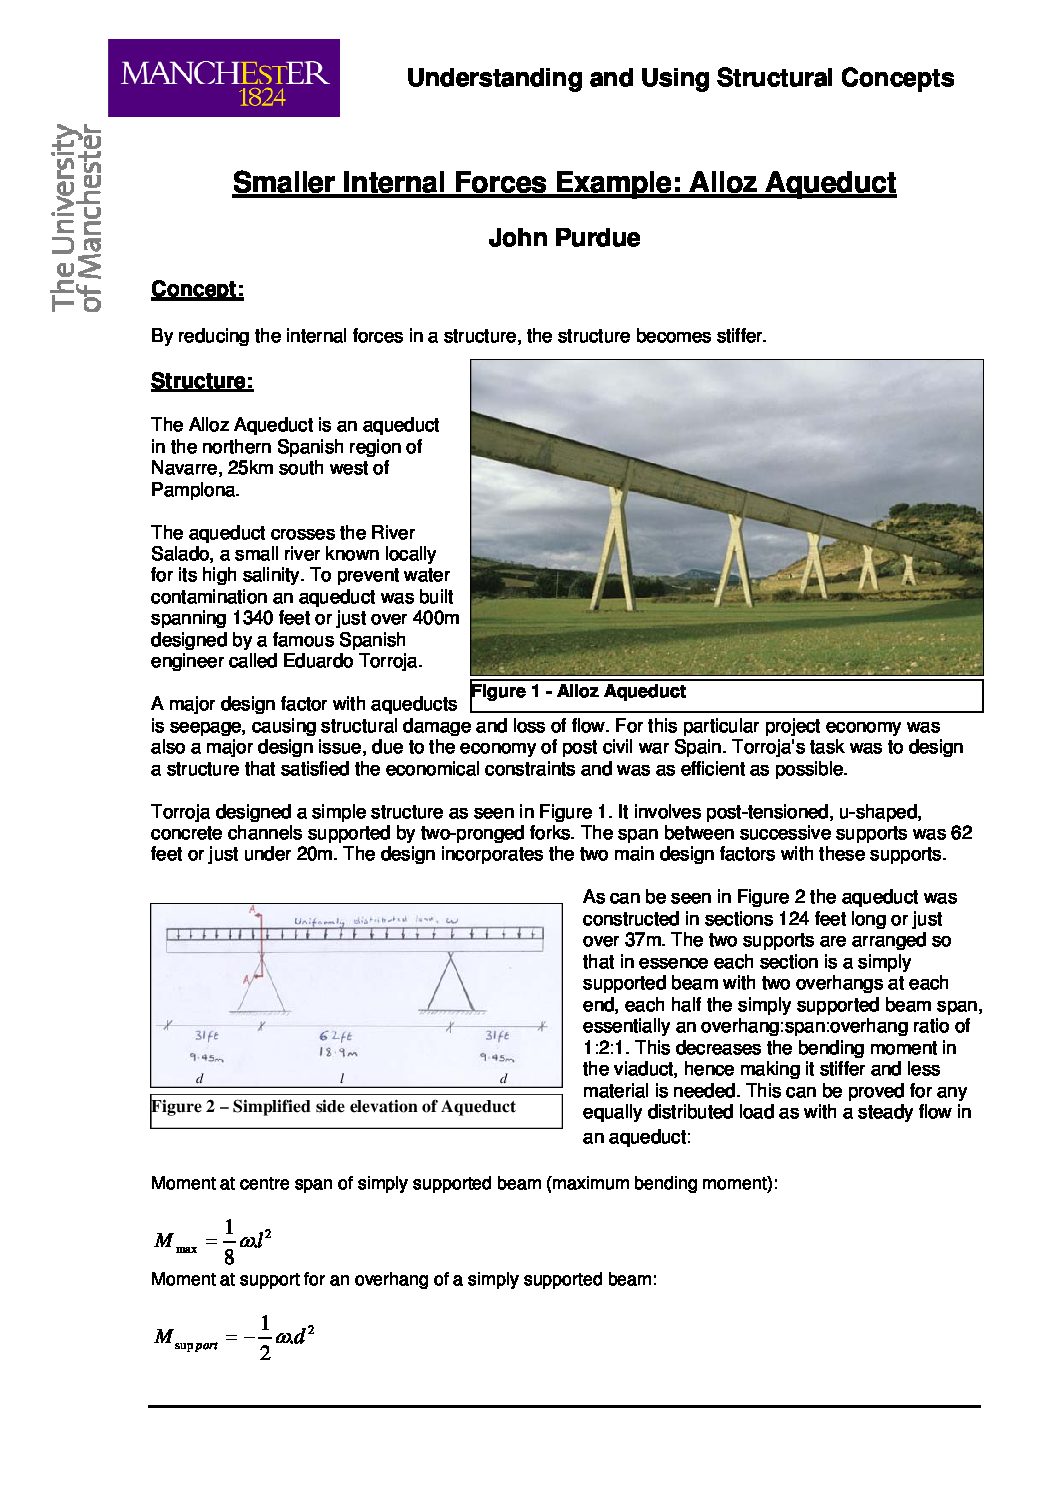
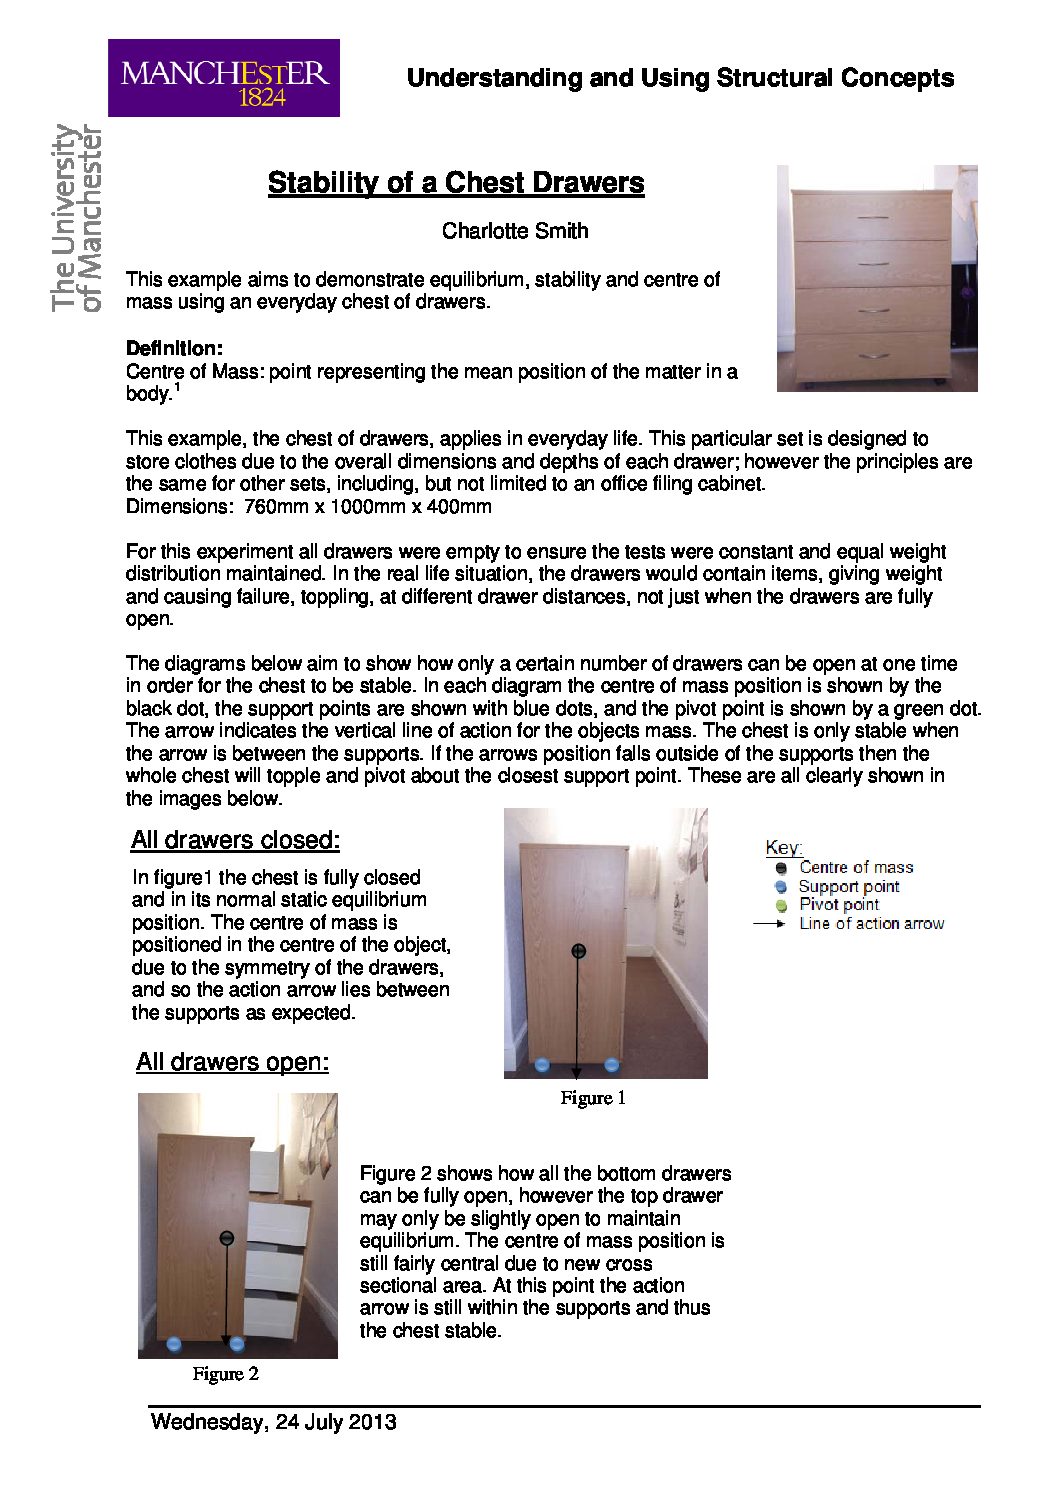
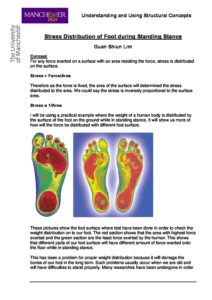
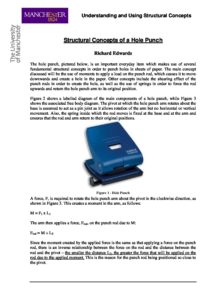
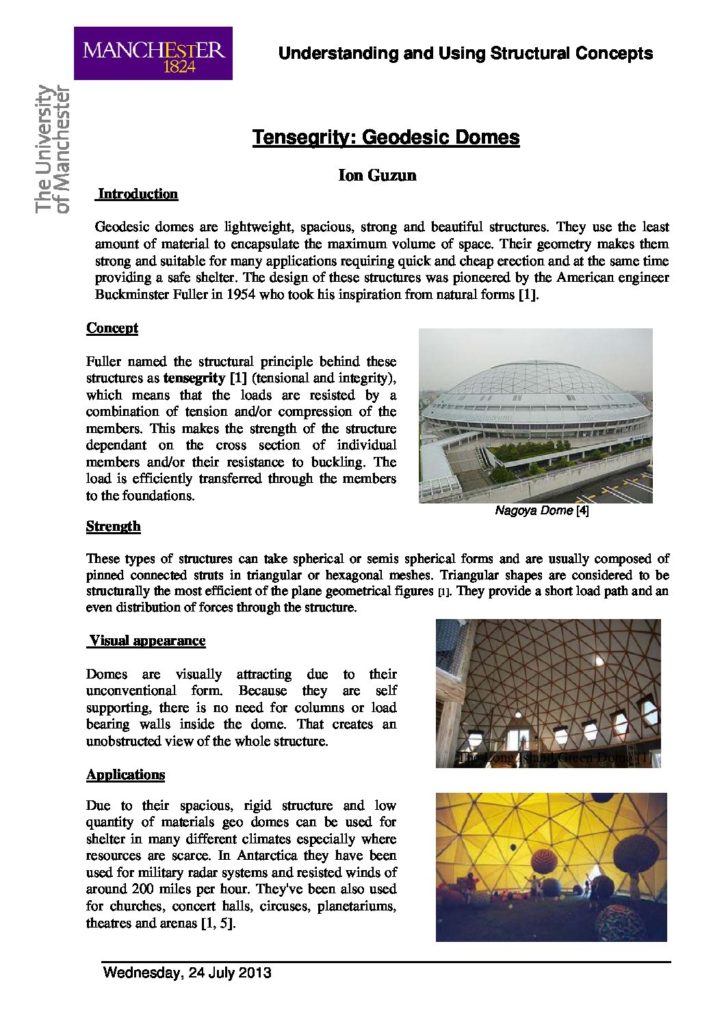
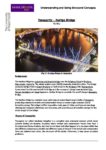
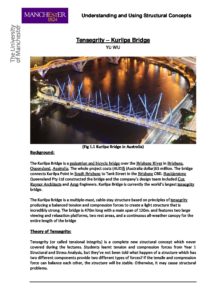
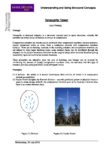
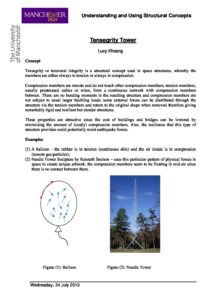
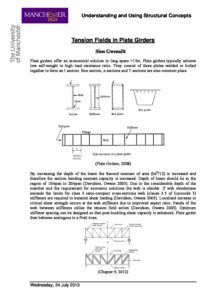
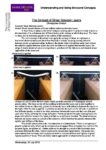
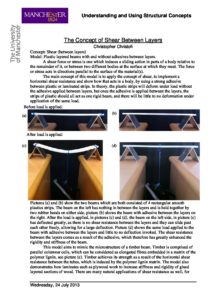
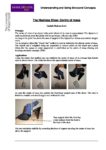
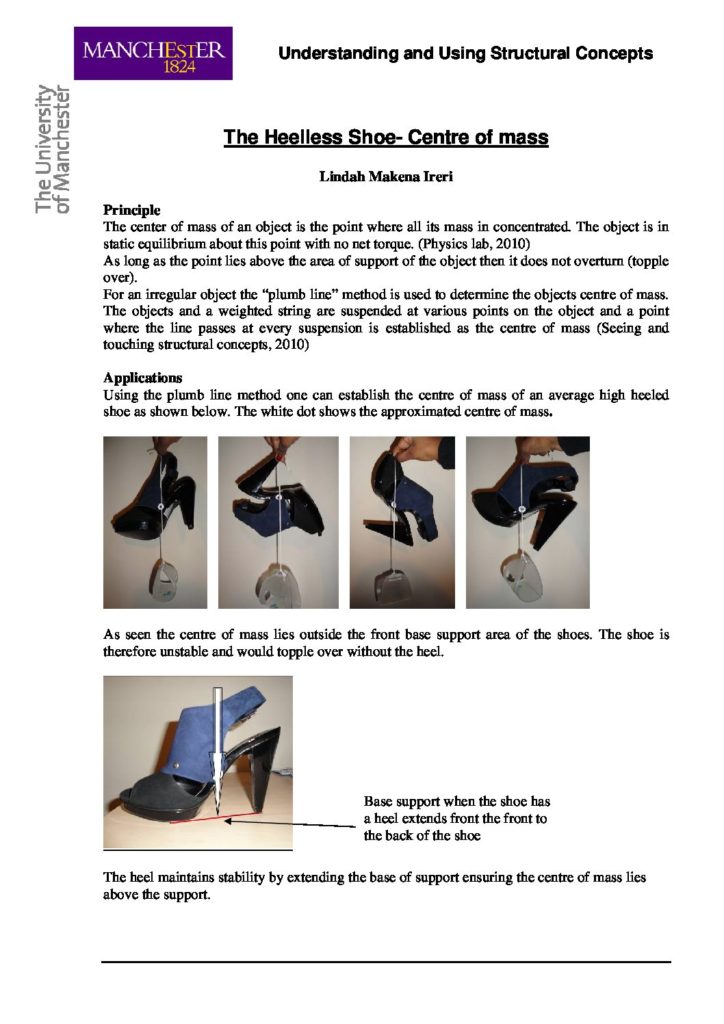
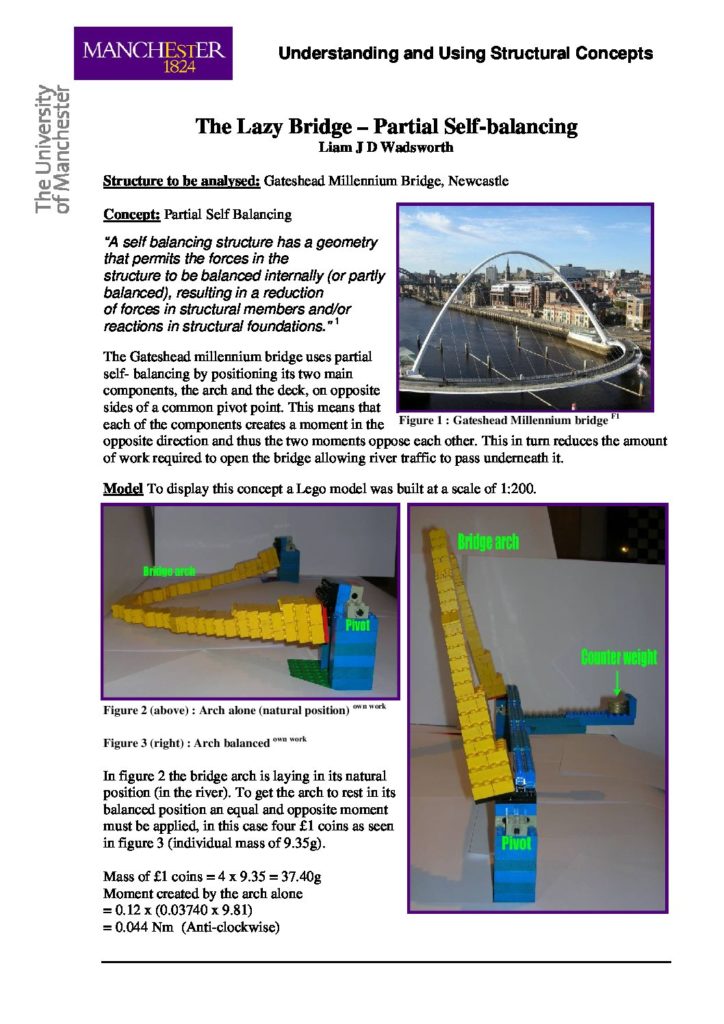
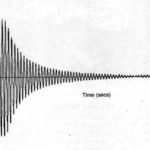
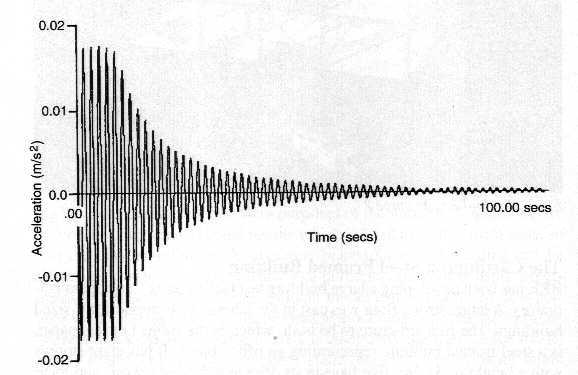
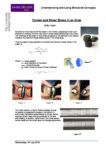
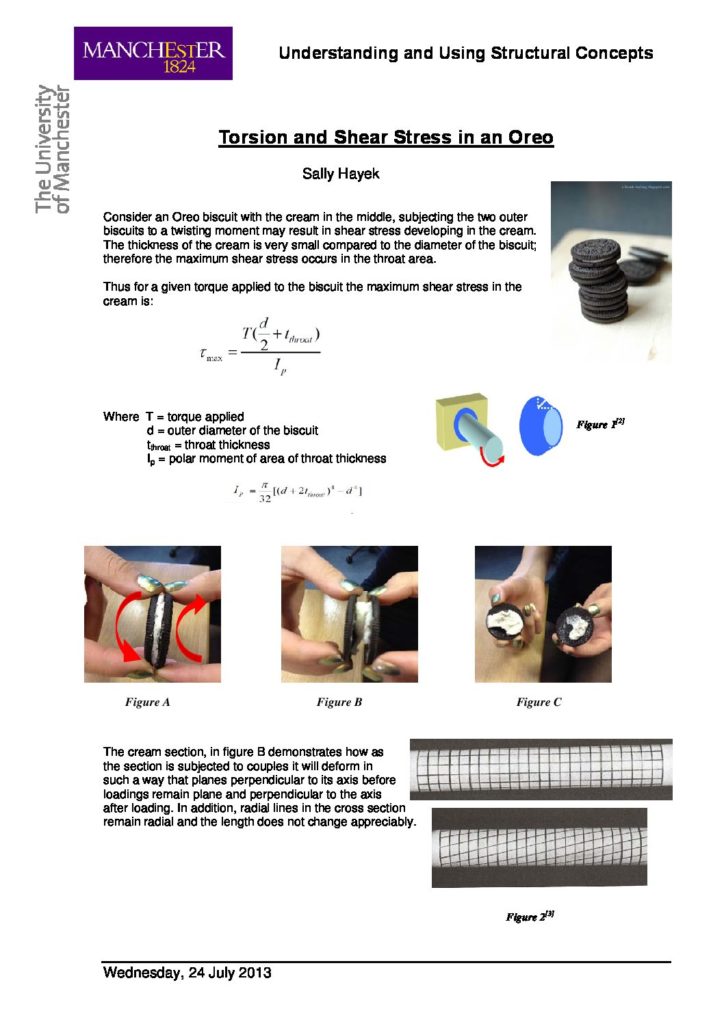
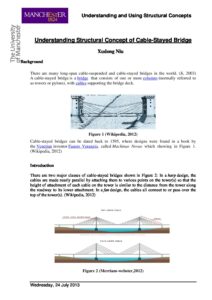
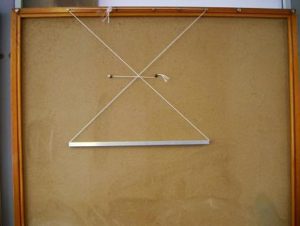
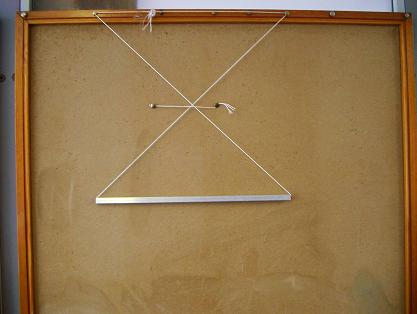
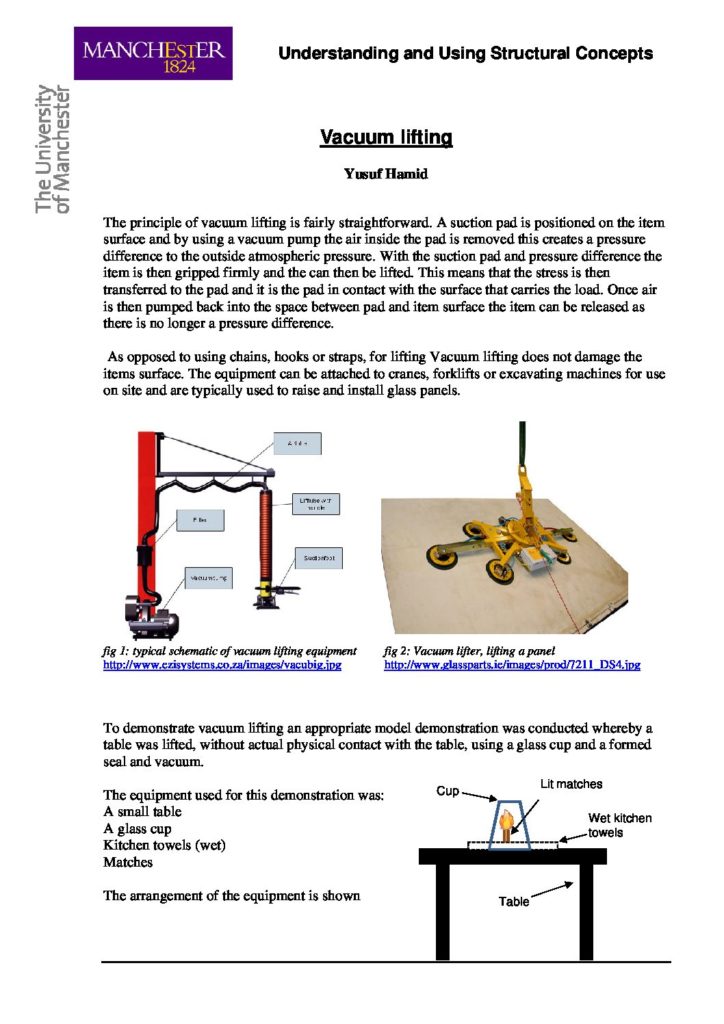
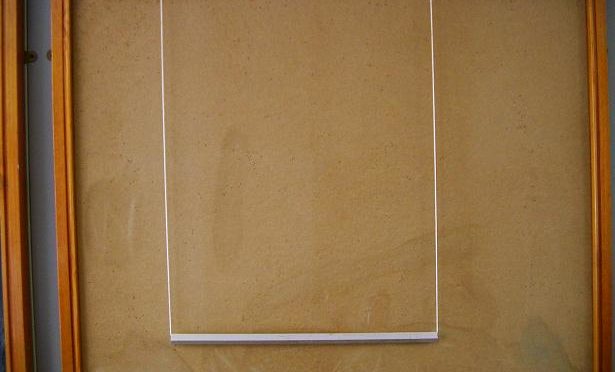
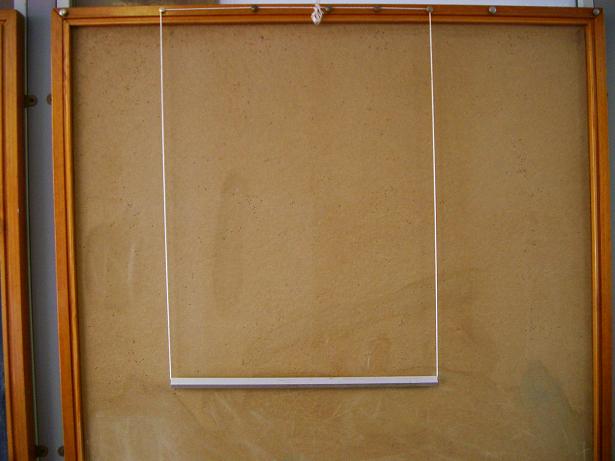
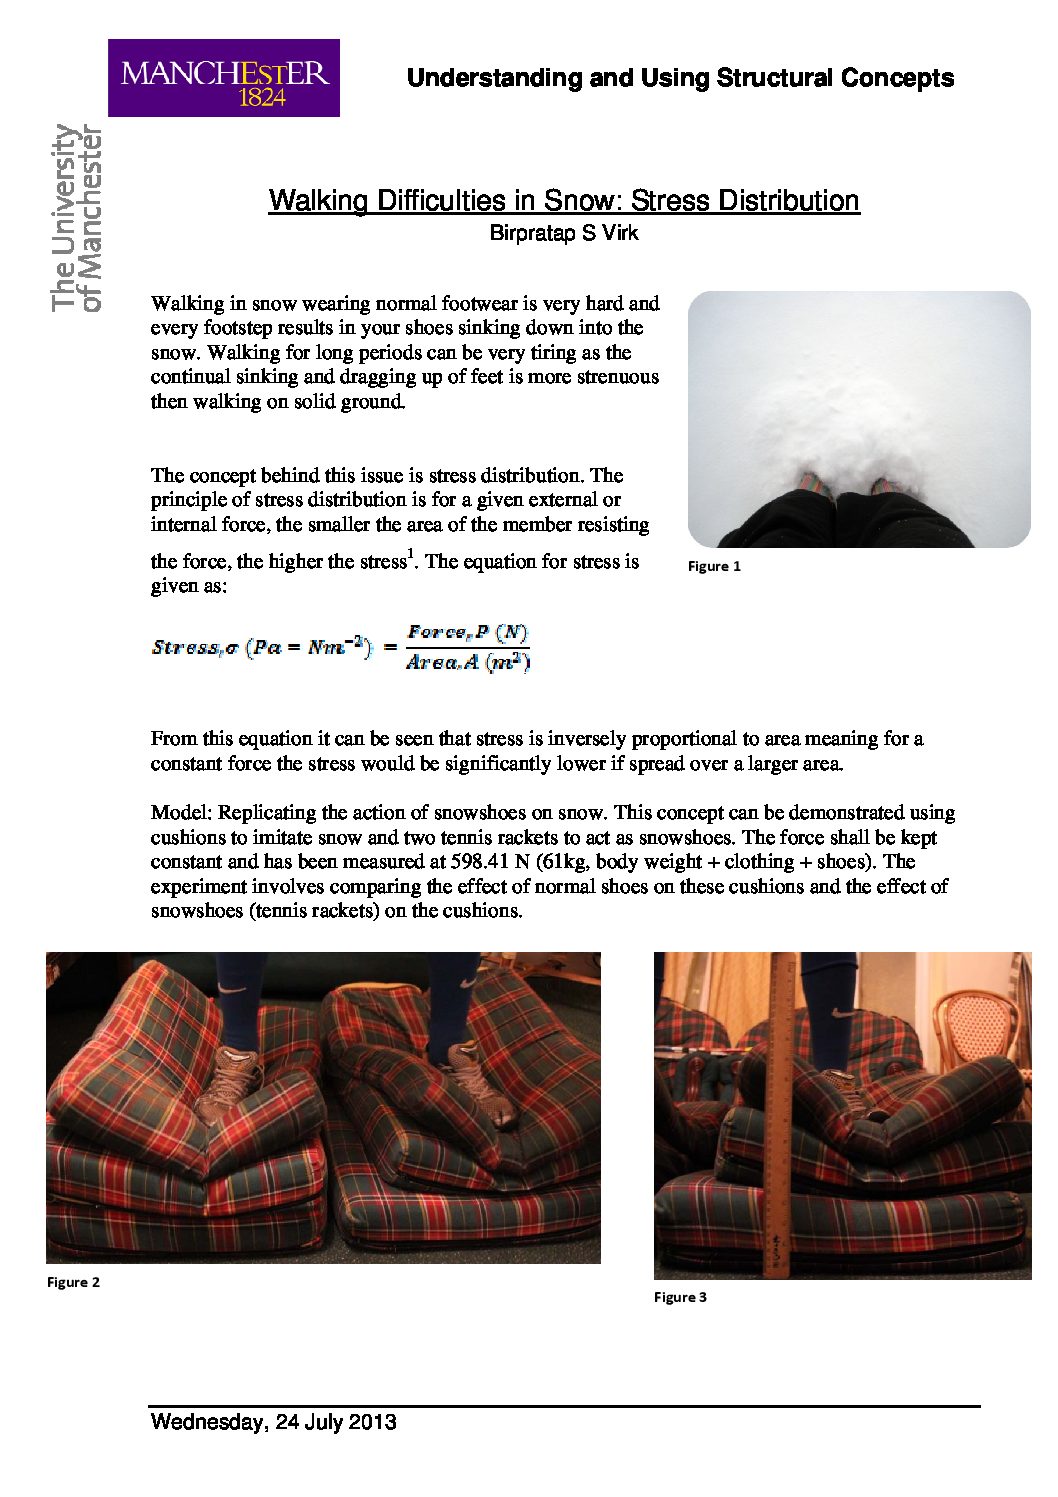
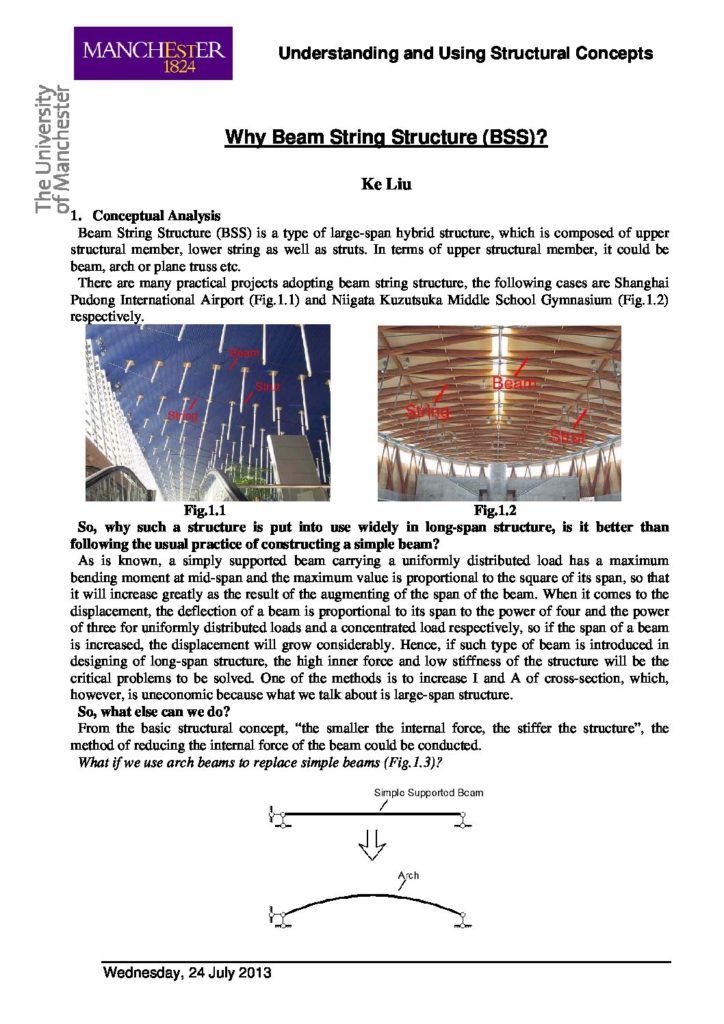